Jump to content

Opening Sheaffer plunger filler


CVR

Recommended Posts

I'm trying to be careful in opening a Sheaffer plunger filler (a Tuckaway).


Per Marshall & Oldfield, I should open it up at joint B, since this pen has a longer section. However, I've tried that before with a desk version, with unfortunate results.


Should I open it at B (heat it and turn to loosen), or do I open it at A (heat and use the Triumph nib tool)?


Advice is most welcome.


Tuckaway.thumb.jpg.78e52ca8b4478cbbc129cfca97c30ee2.jpg


Link to comment
Share on other sites

  • Replies 15
  • Created
  • Last Reply

Top Posters In This Topic

  • CVR

    7

  • Ron Z

    4

  • ralfstc

    3

  • Nethermark

    1

Top Posters In This Topic

Posted Images

Yes, that was precisely what prompted my question. Binder's instructions and those of Marshall & Oldfield do not appear to be fully consistent.


Binder implies that all Triumph nib pens open at A. Marshall and Oldfield, on the other hand, are clear that the section length determines where the pen opens. Both the pens in their illustration have Triumph nibs.


The pen can certainly be opened at A, but does it have to be? That's riskier, and I'd like to avoid doing that, if possible.


The pen clearly opened at B during assembly, when the metal ring to engage the cap threads was put on. However, the pen may have then been glued together.


The one and only time I tried to open at B, following Marshall & Oldfield, ended in a disaster.


Should I just bite the bullet and open at A?


Marshall_Oldfield.thumb.jpg.a522e02250f07a36e9f05dc7972c0496.jpg


Link to comment
Share on other sites

This is very interesting! I think the current approach is to open them all at the nib using Francis'/Pentooling's super-dooper tools (which work like magic, btw). It would be interesting to know of an alternative, but I thought the sections were pretty well glued on there . . . .

Link to comment
Share on other sites

There are two versions of the pen.  Before 1946 or so the section was fused to the barrel, and ink was held directly in the barrel, the pen was celluloid.  By 1947 the pen was Forticel, and it had the combined filler/section insert.


It is true that you should go in form the front end, removing the nib unit and replacing the packing material from the inside, regardless which one  you have.  If the section does not unscrew with a little heat, then assume it isn't supposed to come out.  If it does come out though, it's easier to see what you're doing when you drill out the inside of the packing unit.


Dale Beebe bought the rights to make Francis Goosen's nib removal tool.  I won't try to remove one without the tool.  He also sells a drill guide that I designed  (RZ B)and gave him that keeps the drill centered and protects the threads as you drill out the inside end of the packing unit. He also sells a tool (the RZ) that makes it very easy to install the 0-ring and retaining washer.  I don't get anything from the sales BTW - but I wanted folks to have access to them, and Dale undertook production of them.

spacer.png
Visit Main Street Pens
A full service pen shop providing professional, thoughtful vintage pen repair...

Please use email, not a PM for repair and pen purchase inquiries.

Link to comment
Share on other sites

Thanks for that insight, Ron. So, we should expect the section to be fused to the barrel if there is no ink chamber insert.


What Marshall & Oldfield say seems very misleading. Long sections don't always unscrew at the ring joint from the barrel. The only unscrew from the ink chamber insert, in pens where there is one.


I do have the tools from Dale Beebe, so I'll go ahead and work on removing the nib unit. Working as carefully as I can!

Link to comment
Share on other sites

On 5/7/2024 at 7:29 PM, CVR said:

So, we should expect the section to be fused to the barrel if there is no ink chamber insert.


Yes.  And I will admit that sometimes it can be difficult to figure out which version it is. But most of the time the inserts come out quite easily.

BTW, I use a small infrared non-contact thermometer when I take the nib out.  Some sneer at the idea, but you need to warm the section to about 160F and keep it there long enough that the heat softens the thread sealant inside.  Use of the thermometer helps me to insure that the temperature gets to where it needs to be without going much above that. 


Don't try to get the nib to come out now.  Warm the section and keep tabs on the temperature.  Persistent, gentle pressure will eventually loosen the nib.  Once it shifts you're on your way. It almost feels like the section is sheering off.    You may have to warm the section a couple more times after it shifts, but once lose it will come out.  I find that pressing the removal tool firmly onto the nib helps to keep it from shifting.


Once out of the section, do not pull the nib out of the removal too.  The nib could separate from the threads.  Loosen the screw that holds the key in place, and pressing on both sides of the nib push it out. 

spacer.png
Visit Main Street Pens
A full service pen shop providing professional, thoughtful vintage pen repair...

Please use email, not a PM for repair and pen purchase inquiries.

Link to comment
Share on other sites

Thanks again, Ron. Great suggestions.


I've tried to use an IR thermometer (I have one made by Etekcity), but the readings seem rather dependent on the section material, its color, texture, the distance from which we take the reading, etc.


It's of course not supposed to be that way, so I need to figure out what I might be doing incorrectly.


Link to comment
Share on other sites

I hold the thermometer right up to the area I'm heating.

spacer.png
Visit Main Street Pens
A full service pen shop providing professional, thoughtful vintage pen repair...

Please use email, not a PM for repair and pen purchase inquiries.

Link to comment
Share on other sites

Thanks, Ron. Holding it closer to the section might ensure that there aren't other things in the measurement cone besides the section.


I use the IR thermometer for other work (checking HVAC/attic temperatures, etc.), so I know it works fine.

Link to comment
Share on other sites

My IR thermometer has a truly sci-fi feature-- a laser pointer that shows where it's measuring. It would be really helpful if it wasn't for the fact that it doesn't point to the right place. I could use it to amuse the cat if I had one . . . .


But a thermometer is really useful. I was surprised to see how much temperatures varied even when I thought I'd done the same thing to the pen I was working on as I had before.


I find the ones with the interior ink capsule slightly harder to get a good seal on. I has one recently with an invisible leak near where the capsule joined the section. That took a moment or two to figure out!


I have a few repaired by Ron and Gerry and they are amazing. I don't think I've managed to do one myself as well as they do them. Respect.


Best,


Ralf


Link to comment
Share on other sites

Well, when you've restored a thousand or two... 😄


Yes my thermometer has a laser beam too, which could be out of alignment. The specs say that the distance/spot ratio is 12:1, meaning that the measurement cone spreads out at a 12:1 ratio. So, it measures a region 1" in diameter when held 12" from it. That's roughly a 5-degree angle for the cone apex, in planar cross section.


Holding it right up close to the section would clearly help, since we want to sense a much smaller region on the section.

Link to comment
Share on other sites

Mine is quite small, with an opening that's about 1/4" in diameter.  A little larger than a Zippo lighter.    I hold it almost up against the barrel below the section for readings.

spacer.png
Visit Main Street Pens
A full service pen shop providing professional, thoughtful vintage pen repair...

Please use email, not a PM for repair and pen purchase inquiries.

Link to comment
Share on other sites

I was struggling myself only last week with the same issue. I referred to the same book and was equally confused. Took me two days of soaking and gentle heat to realize that the pen you have with the longer section opens at the area just BELOW the metal ring (while I was heating the area above the ring). But the threads are at the area just below the ring (towards the barrel) and so the shellac needs to be softened there. This is how I opened two of these guys last week. 

My Vintage Montblanc Website--> link

Link to comment
Share on other sites

Good to know it worked for you! Unfortunately, this doesn't seem to be consistent.


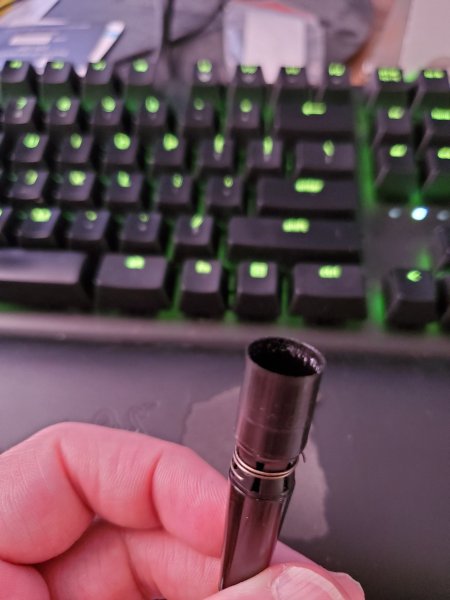
Here's a picture of a long-sectioned plunger I broke trying to open as Marshall & Oldfield recommend, heating below the ring.


It's illuminated from the inside. As we can see, there are no threads for the section to screw into. It's fused into the barrel, and sheared off just under the ring.


Long_Section.thumb.jpg.56bea1f2edfb4c4a29ff0bc0ed1c26da.jpg

Link to comment
Share on other sites

Create an account or sign in to comment

You need to be a member in order to leave a comment

Create an account

Sign up for a new account in our community. It's easy!

Register a new account

Sign in

Already have an account? Sign in here.

Sign In Now


  • Most Contributions

    1. amberleadavis
      amberleadavis
      43844
    2. PAKMAN
      PAKMAN
      33682
    3. Ghost Plane
      Ghost Plane
      28220
    4. inkstainedruth
      inkstainedruth
      26908
    5. jar
      jar
      26132
  • Upcoming Events

  • Blog Comments

    • Shanghai Knife Dude
      I have the Sailor Naginata and some fancy blade nibs coming after 2022 by a number of new workshop from China.  With all my respect, IMHO, they are all (bleep) in doing chinese characters.  Go use a bush, or at least a bush pen. 
    • A Smug Dill
      It is the reason why I'm so keen on the idea of a personal library — of pens, nibs, inks, paper products, etc. — and spent so much money, as well as time and effort, to “build” it for myself (because I can't simply remember everything, especially as I'm getting older fast) and my wife, so that we can “know”; and, instead of just disposing of what displeased us, or even just not good enough to be “given the time of day” against competition from >500 other pens and >500 other inks for our at
    • adamselene
      Agreed.  And I think it’s good to be aware of this early on and think about at the point of buying rather than rationalizing a purchase..
    • A Smug Dill
      Alas, one cannot know “good” without some idea of “bad” against which to contrast; and, as one of my former bosses (back when I was in my twenties) used to say, “on the scale of good to bad…”, it's a spectrum, not a dichotomy. Whereas subjectively acceptable (or tolerable) and unacceptable may well be a dichotomy to someone, and finding whether the threshold or cusp between them lies takes experiencing many degrees of less-than-ideal, especially if the decision is somehow influenced by factors o
    • adamselene
      I got my first real fountain pen on my 60th birthday and many hundreds of pens later I’ve often thought of what I should’ve known in the beginning. I have many pens, the majority of which have some objectionable feature. If they are too delicate, or can’t be posted, or they are too precious to face losing , still they are users, but only in very limited environments..  I have a big disliking for pens that have the cap jump into the air and fly off. I object to Pens that dry out, or leave blobs o
  • Chatbox

    You don't have permission to chat.
    Load More
  • Files


×
×
  • Create New...