Search the Community
Showing results for tags 'vintage'.
-
Hi FPN, A little while ago, I managed a great deal on a vintage Kaweco V12 and 619 set from around 1965. It was a bit of a risk, bought it on eBay with only one picture so didn't really know what condition it was in. Fortunately, it arrived and when I started to clean it and take it apart it turned out to be in VERY good condition and needing nothing other than a cleaning and some silicon grease. I've done a review of the pens here. However, between winning the auction and getting the pen, I was looking online on how to restore them, I was worried it had a cork piston seal, I couldn't find much. When I couldn't find one, I thought I would take some pictures of the steps as I did it to my new pen, so here's a quite guide on how to take apart a Kaweco V12 and what the parts look like. To start things off, here's a picture of the pens and the case as they arrived. The first thing I did was soak the pen in some deionized water for a few hours, pulling it out of the water to let the water inside the pen drain out and then refill the pen. This washed out virtually all of the ink, which turned the water blue likely meaning it was a washable blue ink that was in it. After the water coming out of the pen stayed clear, I used some nylon pliers to pull out the nib and feed from the pen, which come out as shown below. They just pull straight out, if they don't come out easily, I'd suggest soaking in some soapy water maybe then applying a little dry heat (not too much, the pen is celluloid). The nib may come out by itself without the feed, if that happens just pull the feed out with some rubber tipped pliers. Once removed, this is what the nib and feed look like. They can/should be soaked by themselves in clean water just to make sure everything comes off them, could even give them a gentle brush with a toothbrush to make sure. While I was soaking the nib unit, I started on the piston. On the pen, the seal and piston had come loose from the nob and twisting the nob at the back didn't do anything to the piston, which had me a little worried. When I was looking at the threads, i thought they looked a lot like the threads on a Parker Vacuumatic, which I have the tools to remove. So I grabbed that and it was a match. However, as soon as the unit started to unscrew, I realized that using section pliers are a better option. You can see from the photo below, that the piston unscrews from the barrel of the pen at the metal o-ring rather than at the nob. This means that the piston forms part of the barrel at the top of the pen. This makes using section pliers on the back end of the pen the best option for removing it. My pen didn't have any shellac, but I can see some pens might, so not a bad idea to apply a little dry heat, again, not too much. (this photo is actually from putting the pen back together, that's why the piston isn't sitting in the ink window). Once out, I could see why the piston had come loose from the nob. It's different from the TWSBI piston units as there's a screw that's attached to the nob which fits into a threaded hole inside the piston. There is a square hole in the nob piece which the piston fits into to stop it from rotating and the nob turns a screw which extends or retracts the piston. The below shows the pen fully disassembled. To reassemble the pen, I started with the piston. I put silicon grease on the seal to fill the notch and all along the sides of the seal. I also put grease into the hole in the nob unit, on the outside of the piston shaft, and on the threads that screw into the barrel. I then put the piston into the nob unit and fully retracted the piston. I then screwed the piston unit into the barrel of the pen. I only finger tightened the piston unit as I didn't want to crack the barrel of the pen and was confident it wasn't going to come loose. I wouldn't recommend using section pliers to screw it in as you might over tighten and crack the barrel. You could apply some shellac to the threads to keep it in place, but I didn't want to and the fit is good enough on my pen that I wasn't too worried. The pen is much easier to thoroughly clean if I can remove the piston. It was then just a matter of putting the nib back onto the feed and sliding it into the pen. It goes in smoothly and there is a final little bump you can feel it go over telling you it's in there securely. Because of how the nib fits onto the section, it's very difficult for it to be misaligned, but always worth a check as once on the pen it's difficult. After putting it all back together I tested the piston with some water and it worked great, so inked it up and gave it a test and been very happy ever since. For the 619 ballpoint, the pen came with a refill in it, fortunately, but it had long dried out. I was able to find out that the Schneider 75M refills fit the pen and ordered one black and one blue. To remove the refill, the front of the pen simply unscrews. As you might be able to tell in that photo, the Schneider refills are a little too long for the pen and need to be cut down slightly. I used the refill that came in the pen to get the correct size, unfortunately I don't know the length of what I cut off, but it's around a half inch I think. There was a bit of foam in the piece of the refill that I had to cut off, so I pushed it out and put it back into the back end of the refill to stop it from drying out. I then rounded off the corners a bit and put it into the pen. Worked great and writes very well. The click mechanism is a bit unique. To extend the pen, you push the button down halfway and it will stay there with the pen extended for use. To retract it, push the button the rest of the way and it will go back in. This means if you push the button all the way down in one go, it will extend then retract the pen in one push. This took me a couple of tries to figure out and I think would catch your typical ballpoint user off guard, they are likely to think it broken so if you let someone borrow the pen, best to explain. You can see in the below, the pen extended and the button half pushed. Hope that was useful to someone and if you get a chance to get one of these pens, I'd highly recommend it, they look to be very low maintenance and rather easy to restore if there aren't any broken pieces. Again, you can read my review of the two pens here.
-
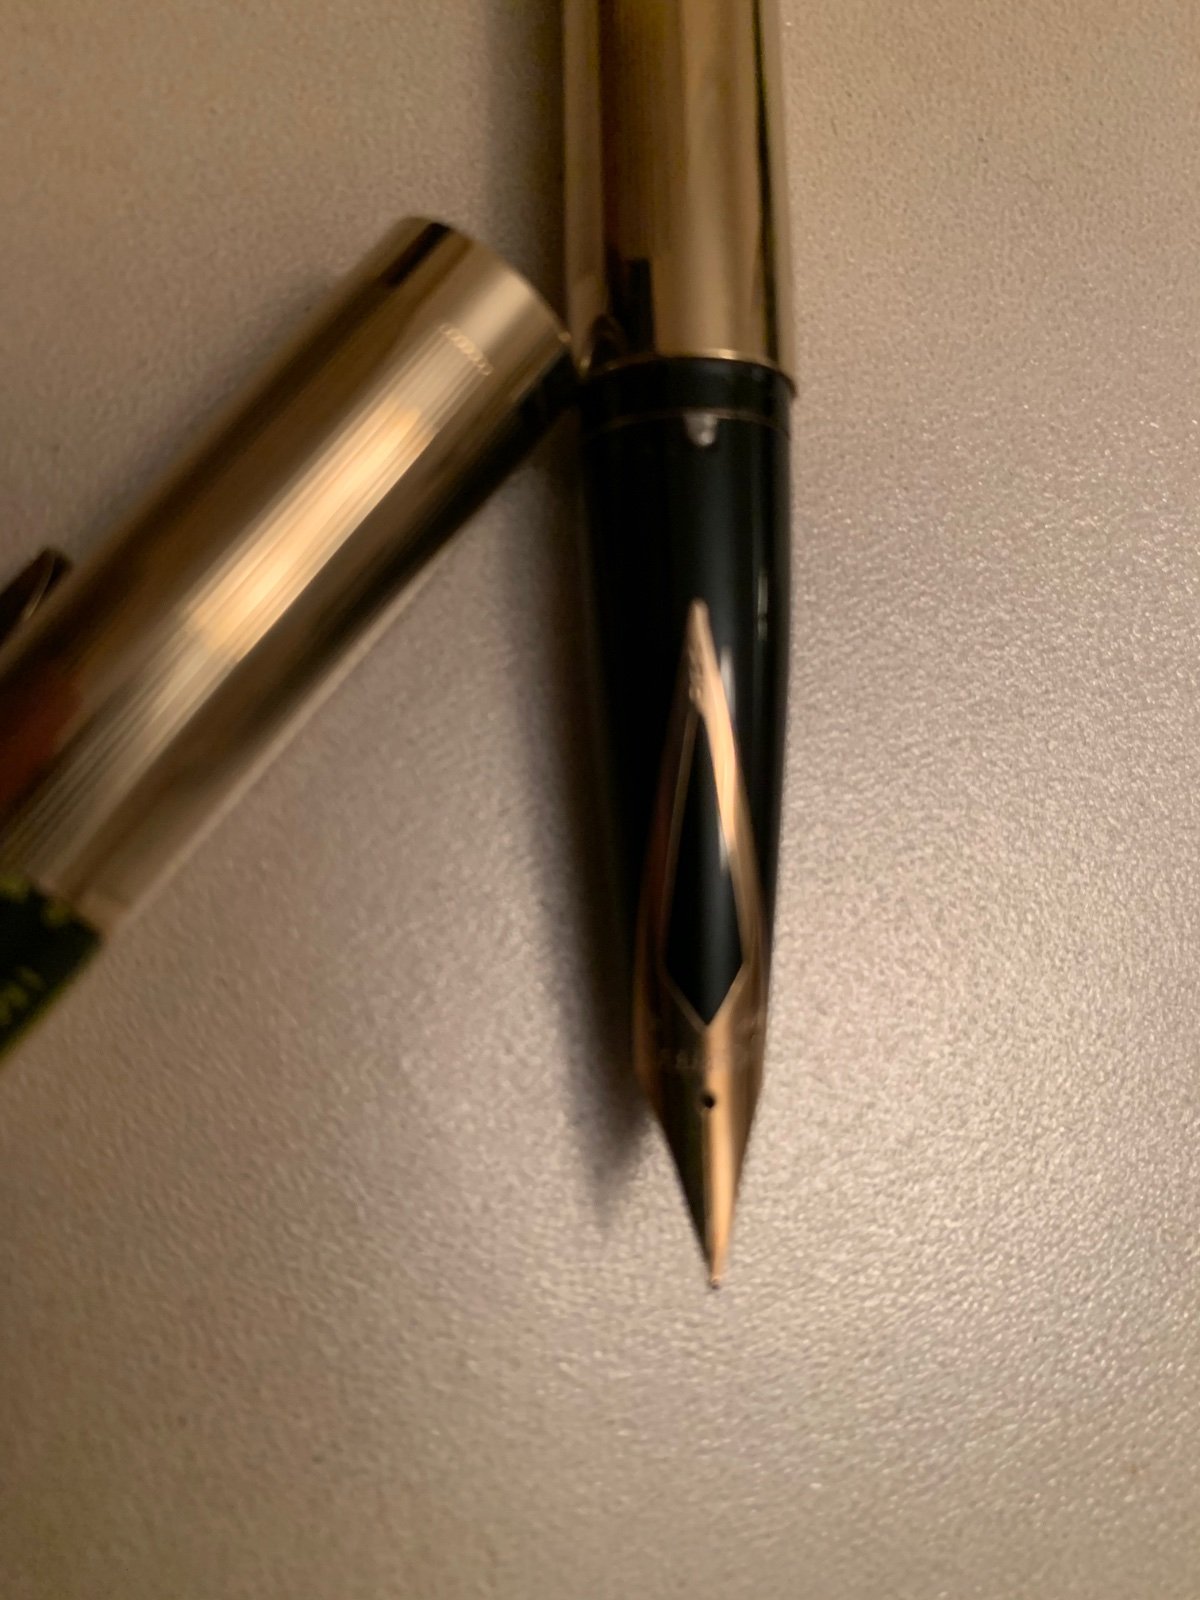
Hi everyone, A few weeks ago I bought a used Waterman DG (Directeur General) in the gold plated spec. When I received the pen, I didn't expect it was that used. The area round the nib is very corroded ( I guess because it's a brass body). So much it is unsuitable to write with I think. Then there's the nib... I truly feel sorry for it. It is an 18kt gold nib so that's that 😅. Writing with it will be impossible as I'm too inexperienced to repair this kind of damage. Nonetheless I think it is a wonderful and quit rare pen I saved from permanent death. I also found some documents in the original box of the pen, I don't know if they are correlated. It's an original French pen I bought on a holiday in France (I'm Belgian). I discovered the document later at home. Any ideas on what I could do with this pen? After feeling this pen, I feel very tempted to buy a silver one, but they are even rarer. For context, see photos :). Keep on writing, Lars

-

Does Anyone Else Also Use Manual Typewriters? What For?
kealani posted a topic in It Writes, But It Is Not A Fountain Pen ....
Does anyone else also use manual or vintage manual typewriters? What do you use it for? Correspondence? -
I have enjoyed the heck out of the Parker thread. And since I have a couple of nice Sheaffers scheduled to arrive as soon as Monday, I thought I would start this topic up. So, what Sheaffers have you added to the fold of late? Modern, vintage, rare, easy-to-find. All are welcome in this general discussion thread. Bring photos when you can!
-
Has anyone ever attempted to convert a Parker Vacumatic (Second Generation) into a cartridge-converter? I love the material of the Vacumatic but am not a huge fan of the filling system. Any tips or photos would be immensely helpful. Thanks in advance!
-
My sincerest apologies if somebody has done this already, but I would like to inquire about the definitions of the commonly used terms Vintage and Modern. 1: Is there a certain commonly-accepted year of delineation, like 2000? Or is there a more general and broad period of time, such as Sheaffer´s abandonment of their traditional US manufacturing sites in the early 2000s? 2: does it vary per the type of pen in question? For example, an original mid-century Parker 51 VS the modern attempt at a remake? 3: does it vary per whether the pen is discontinued or still in production? For example, the now-discontinued TWSBI 530, VS the modern replacement, the 580? Does this make my particular variant of the Platinum Preppy WA from the 2021 release a “vintage” pen? Obviously, there is probably no real universal answer to this question. I am simply looking to collect some opinions, pointers, and useful information as I start gearing up to enter the vintage fountain pen world. If you know of any particularly interesting “vintage VS modern” case studies, I would be delighted to read about them. Moderators, if you know about an older thread that this would merge well into, *please* do it. In a bygone era, I was once a forums moderator, and I know how ridiculous redundant threads can get. I am simply at present not able to find a thread that explicitly discusses this topic. (I could also just be blind)
-
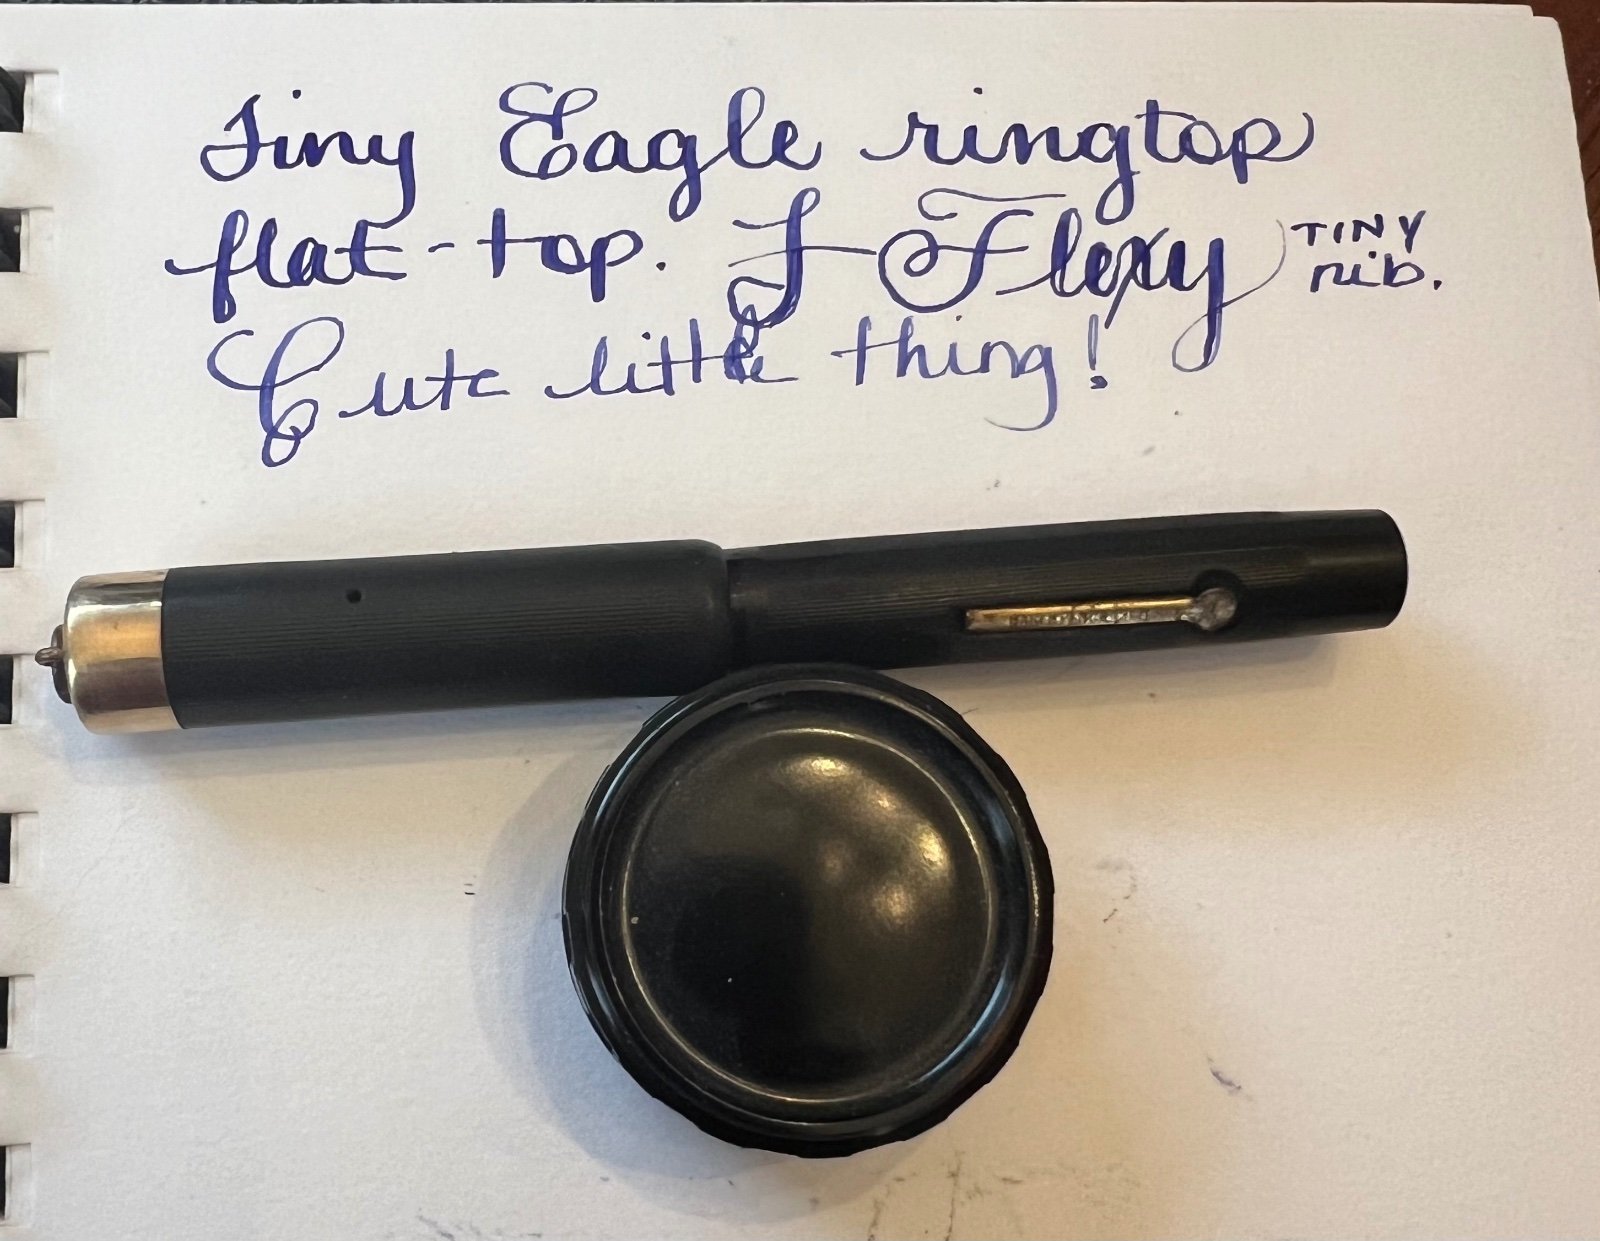
I have a cute, tiny, vintage Eagle Pencil Co. ringtop with a cute, tiny, flexible nib. I have no idea the age/model name of the pen; however, based on the flat-top shape, I’m assuming it’s from the 20’s/30’s. I’ve cleaned it out and would like to put a sac in it; however, the section seems to be integrated into the pen. I was able to take out the nib and the EXTREMELY LONG feed, but the section truly doesn’t seem to be able to come off. I can’t see any gaps between the threads (for the cap) and the body- even with a 10x magnification. Is it possible that the sac needs to attach to the feed?? There was no sac in it when I took it apart and cleaned it. It’s truly a cute little thing and I’d love to actually use it. Has anyone seen something like this?
-
Hello everyone, I recently bought a vintage Pelikan 100N and the pen writes really wet and smooth. It has a full flex nib. But I have a problem, the tip of the pen is unfortunately not springy enough and the tip is not thin enough. Even when I don't apply any pressure it writes like a medium. My question to you is, can the nib be thinned with a nibmeister? Can it be converted to F or EF nib? Thank you very much in advance.
-

From the album: OldTravelingShoe's Random Pics of Japanese Fountain Pens
© (c) 2023 OldTravelingShoe. All rights reserved.
- 0 B
- x
-
From the album: OldTravelingShoe's Random Pics of Japanese Fountain Pens
© (c) 2023 OldTravelingShoe. All rights reserved.
- 0 B
- x
-

From the album: OldTravelingShoe's Random Pics of Japanese Fountain Pens
© (c) 2023 OldTravelingShoe. All rights reserved.
- 0 B
- x
-
Pilot Lady - Lacquer Over Metal (1970s) 004.jpg
OldTravelingShoe posted a gallery image in FPN Image Albums
004.jpg.f080c3c62f8f8511491defeea9116087.jpg)
From the album: OldTravelingShoe's Random Pics of Japanese Fountain Pens
© (c) 2023 OldTravelingShoe. All rights reserved.
- 0 B
- x
-
Pilot Lady - Lacquer Over Metal (1970s) 002.jpg
OldTravelingShoe posted a gallery image in FPN Image Albums
002.jpg.1fb408e9fd90762356f84c519db94511.jpg)
From the album: OldTravelingShoe's Random Pics of Japanese Fountain Pens
© (c) 2023 OldTravelingShoe. All rights reserved.
- 0 B
- x
-
Pilot Lady - Lacquer Over Metal (1970s) 003.jpg
OldTravelingShoe posted a gallery image in FPN Image Albums
003.jpg.686d632c79c1176098786e67d8353dae.jpg)
From the album: OldTravelingShoe's Random Pics of Japanese Fountain Pens
© (c) 2023 OldTravelingShoe. All rights reserved.
- 0 B
- x
-
Platinum Bonito + Pilot Lady (1970s) 001 OVERVIEW.jpg
OldTravelingShoe posted a gallery image in FPN Image Albums
001OVERVIEW.jpg.fef308b26a915fffe511d91da2f0f526.jpg)
From the album: OldTravelingShoe's Random Pics of Japanese Fountain Pens
© (c) 2023 OldTravelingShoe. All rights reserved.
- 0 B
- x
-
Parker Royal Challenger - 001 - OVERVIEW.jpg
OldTravelingShoe posted a gallery image in FPN Image Albums
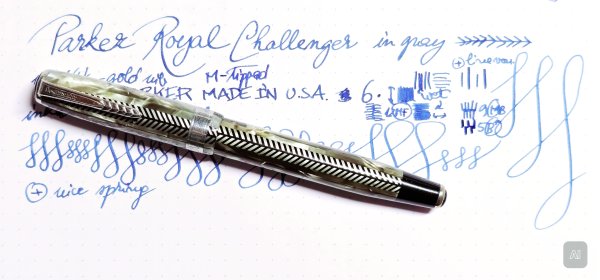
From the album: OldTravelingShoe's Random Pics of Fountain Pens (2)
© (c) 2023 OldTravelingShoe. All rights reserved.
- 0 B
- x
-
Parker Royal Challenger - 002 - Perspective 3-4.jpg
OldTravelingShoe posted a gallery image in FPN Image Albums
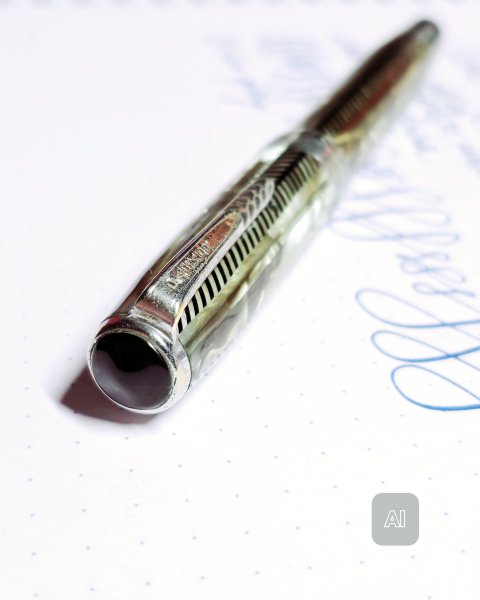
From the album: OldTravelingShoe's Random Pics of Fountain Pens (2)
© (c) 2023 OldTravelingShoe. All rights reserved.
- 0 B
- x
-
Parker Royal Challenger - 003 - Art Deco Detail.jpg
OldTravelingShoe posted a gallery image in FPN Image Albums

From the album: OldTravelingShoe's Random Pics of Fountain Pens (2)
© (c) 2023 OldTravelingShoe. All rights reserved.
- 0 B
- x
-
Parker Royal Challenger - 004 - Nib Sideview.jpg
OldTravelingShoe posted a gallery image in FPN Image Albums
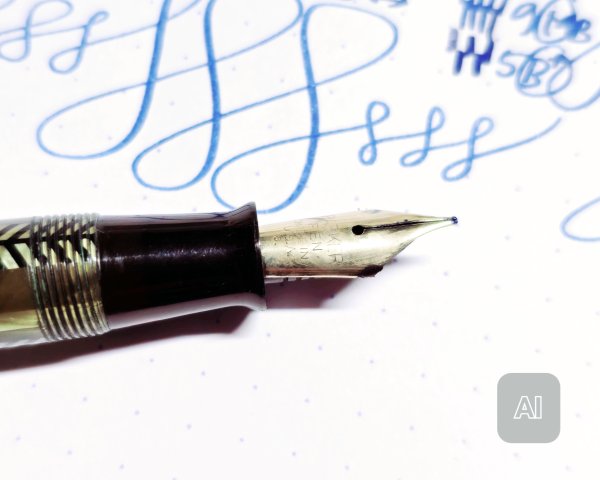
From the album: OldTravelingShoe's Random Pics of Fountain Pens (2)
© (c) 2023 OldTravelingShoe. All rights reserved.
- 0 B
- x
-
Hello Estie lovers, My first real "rabbit hole" into fountain pen collecting was the serendipitous purchase of an Esterbrook that had an 8668 palladium-silver nib attached. I have a background as a chemist and have long been in love with palladium; that coupled with the WWII history (another interest of mine) made this a fantastic discovery for me. It writes just beautifully! The first thing I did, being new to the game (and I still am!) was to look for advertising about these nibs and Esterbrooks in general during WWII. I loved finding ads stating that "only a few pens can be made" due to the war effort, and, "If your stationer cannot supply you immediately with Esterbrook Pens we know you will understand why." Just amazing stuff, and a wonderful look into one aspect of WWII American culture viewed through the lens of a fountain pen lover. I wondered if the 8000-series nibs ever showed up in advertising, and I had not been able to find any such ads until recently. I thought the other Esterbrook fans here might enjoy a look at this Argentinian ad I found that shows the 8000 series... I wonder if anyone else knows of 8000 series Esterbrook nibs showing up in ads or being mentioned in period literature? Cheers! Matt
-
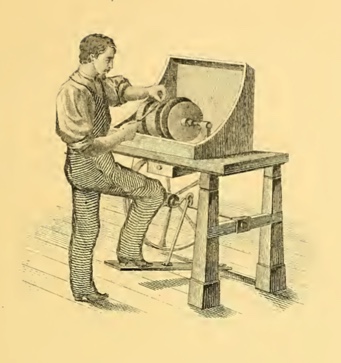
Making Gold Flex Nibs; From A Victorian Pen Catalogue
Lunoxmos posted a topic in Fountain & Dip Pens - First Stop
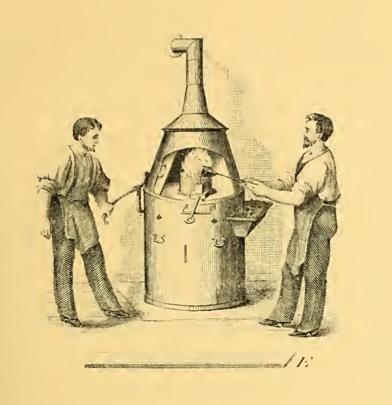
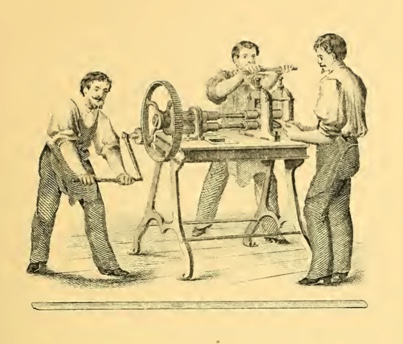
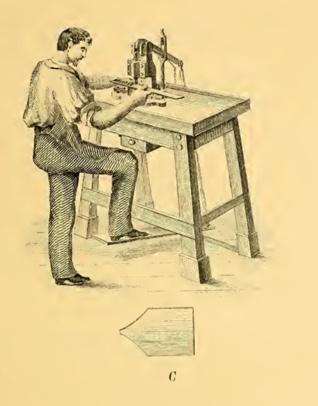
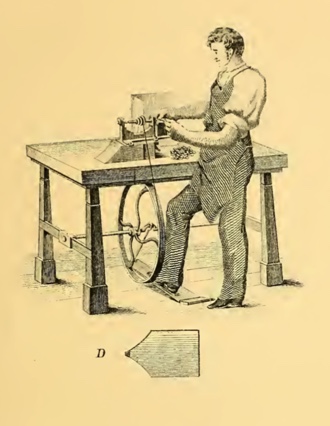
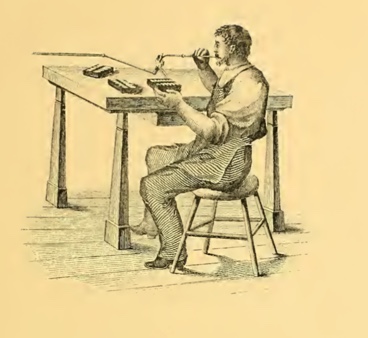
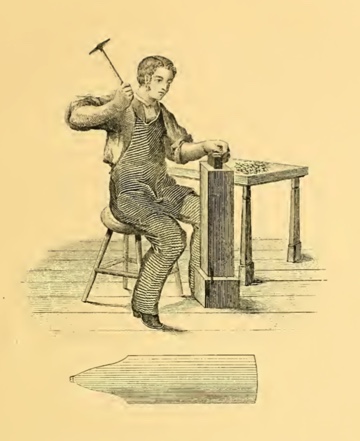
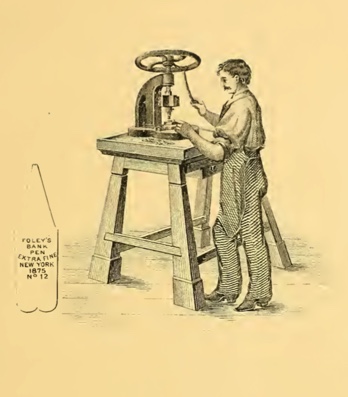
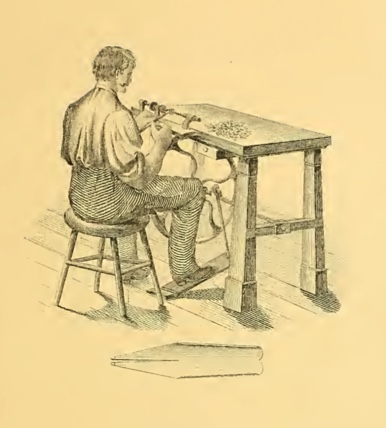
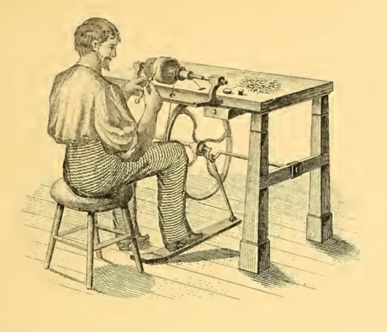
Credit given to David Armstrong from The Restorers Art Original article found here Copy of the catalogue found here Recently I came across a Victorian Era pen catalogue called the: "History of the invention and illustrated process of making Foley's diamond pointed gold pens" It starts off with a catalogue of the various products that the company offered, such as gold dip pens, and mechanical pencils, along with other bizarre combinations such as an instrument with a toothpick on one end and an ear spoon on the other. The main interest of the document, however, is that in the second half it details the history of the development of the Gold pen (or nib, as we would say these days), as well as the process in how these pens were made. After reading the catalogue myself, I along with David Armstrong and probably many other people as well, have concluded that the level of modern nib manufacturing is, though in my opinion, not exactly plagued by poor workmanship (a good nail nib is still a good nail nib), but has instead become complacent, perhaps unaware of the potential profits which could be obtained from the enthusiastic, albeit rather niche consumer group. (have a look at some of the prices that vintage flex fetches on eBay!) We have not really lost the technology or the method of producing flexible gold nibs. If you read the below copy-and-paste of the text, you can see that the only thing that was required to make the gold "flexible" was to hammer it; something that I believe with a little bit of will and determination we can replicate in a mechanical form, using machinery instead of a blacksmith, to make each one as precisely and accurately manufactured as the one before. "The nib of each Pen, as shown above, is hammered on a small anvil or stake, of curved surface, until the required spring or elasticity is secured, so that the nib of the Pen will bend almost double and again return to its proper position." Of course there are many things in the detailed process which can be automated due to our large advances in technology. For example, I believe that we have improved our tipping process, compared to when the Victorians were still figuring it out. Much of the tipping of the period was liable to falling out. In addition, we have automated much of the process of making nibs, the only part requiring human expertise being possibly the grinding, smoothing and inspecting, making the process faster and more consistent. I believe that if those high end companies, which probably have the money to invest in these sorts of things, decide to produce machinery which can hammer the nibs (tines), and strike upon the certain points with an exact pressure to produce the flexibility, then it is very possible that we will be able to produce modern flex nibs which will rival, or even better the flex nibs of the past. Here is a copy of the text which you may read at your own leisure. I have linked to the catalogue at the top of the post ( it's a big file so I recommend you look at it on a reasonably powerful device). (note that the use of the word "pens" is the Victorian equivalent of our "nibs", and the word "nibs" is the Victorian equivalent of our "tines") FORGE FOR MELTING THE GOLD. In this the Alloyed Gold is melted. It is fine Bar Gold (see page 43), and the quantity of alloy added is prepared with much care, and consists of pure Copper and Silver. A small quantity of each is added to the fine bar of gold. Pure Gold being too soft, the alloy is added to make it hard and durable and of a uniform elasticity. The alloyed gold is put into a sand crucible and placed in a charcoal fire, melted to a liquid and then poured into an iron ingot which produces a bar of the required width and thickness according to the size of Pen it is intended for, generally about half inch thick, 20 inches long, 1&1/2 inches in width (see E). After the bar is cooled it is removed from the ingot, the rough edge is filed smooth and hammered, and it is then ready for the ROLLING MILL, OR STOCK ROLLS. This machine rolls or stretches the bar of gold to perhaps ten times its original length, reducing it to a ribbon about 1/32 of an inch thick. Its width ought to be just enough to cut out two blank Pens. The machine is propelled by steam or hand power. It is complicated, very heavy, made and finished in the finest and most expensive manner, and regulated by two screws on each end. Each time the bar passes through the screws are turned down, until the required thickness is attained, and it is then ready for the BLANK PRESS AND DIE. After the bar of gold is rolled into a long thin ribbon, the blank Pen " C " is cut from it in two rows. One long strip or ribbon will cut from five hundred to a thousand blanks. The cutter is a lever press — with die set. The blank as it is cut drops through into a drawer underneath. This blank Pen is now ready for the BURRING MACHINE. This is used to mill out a recess across the point end of the blank "D" to receive the " Iridium " which is the celebrated Diamond Point of the Gold Pen. This done, the blank is now ready to have the Iridium set in, as is shown in the next Engraving. SELECTING AND PUTTING ON THE DIAMOND POINTS. This is done by placing a number of blanks in a row on a strip of wood made for that purpose. The diamond points being carefully selected, a small pencil brush is dipped into liquid borax and with it the points are picked up and set into the recess. The workman uses a microscope to enable him to place the points properly. When this is done, the " blank " is sent to the next man, who fixes the points permanently : SWEATING ON THE DIAMOND POINTS. A lot of blank Pens are placed in rows as above, on a flat piece of charcoal ; the blow pipe is then applied to the gas burner and a flame is directed steadily upon the point of the blank until the gold is thoroughly melted around the diamond or Iridium point. This is the " sweating" process (no solder being used) in making Foley's Pens. Hence it is that the points never come off. It requires much care and experience, for if the heat is applied a moment too long the whole Pen is melted and made useless. The point is now applied to the copper lathe (see 73) and brought to a square even face upon both sides and end. It is then ready for the blank rolls. The fine quality of Gold, over 16-karat fine, used in the manufacture of FOLEY'S Solid Gold Pens cannot be affected in the slightest degree by the strong acid with which most of the good inks are now made. Many of the Pens in the market at the present time are made of 10, 12 and 14-karat Gold and the points are put on with solder. The acid of the ink will turn the cheap Pens black and separate the points, which will soon fall off, and make the Pen worthless. Again, many Pens are made so light, being almost as thin as paper, that they soon wear out. A poorly made Gold Pen, no matter how cheap, is the most expensive in the end. THE BLANK ROLLS. With this machine the blank Pen is rolled down or stretched to the length shown above. This is done by placing the blank between the two rolls. The under roll has a recess in which the point is protected, and the pen is passed through the rolls several times until the required length is attained. The blank as shown above is now ready to have the Springiness or Elasticity hammered into it. HAMMERING TO PRODUCE THE SPRING OR ELASTICITY. The nib of each Pen, as shown above, is hammered on a small anvil or stake, of curved surface, until the required spring or elasticity is secured, so that the nib of the Pen will bend almost double and again return to its proper position. It is now in a rough and uneven shape and prepared for the second cut to give the Pen its proper form; by the SECOND CUTTING DIE AND PRESS. This operation takes off a narrow strip all around except at the point, and gives the Pen its proper even form in the flat state as above shown and it is then ready for the STAMPING PRESS. This is a screw press. The name stamp is set, and the pen, still flat, is placed on a hard steel plate with a guide to slide the pen into, so that every Pen is lettered uniformly and in exact position. Nearly one thousand Pens can be stamped in an hour. The Pen as above shown is now ready to have the sides raised up into shape, which is done in the RAISING UP MACHINE. This is a screw press of great power. With this, the Pen from its flat shape is bent into the round or partially cylindrical form. To insure perfect shape and per- manent set to the new curve, only a press of great power and dies of extreme exactness can be used successfully. This press is very heavy and complicated with many parts and very expensive fittings. The principal parts are the half round bed on which the flat Pen rests ; and the plunger, half round also, to fit exactly, which is struck down with great force by the action of the screw. This blow rounds the back and sides of the Pen. The plunger is brought up by an excentric and lever acting on two jaws, one on each side of the machine. This completes the perfect shape of the Pen as above shown in its well known form. This machine was invented by an ingenious Frenchman, John Countis, a machinist, while employed in Mr. Foley's factory. It is the most perfect and successful Raising Machine ever devised for Gold Pen making, and is capable of raising and shaping fifty Pens an hour. The next operation is to cut or divide the point in the Point, Cutting Lathe. CUTTING THE DIAMOND POINT. With this Point Cutting Lathe, after the Pen is carefully adjusted in a swing frame, the diamond or Iridium point is brought centrally upon the edge of a thin copper disk, about three inches in diameter, kept in rapid motion. The edge of the disk is charged with fine emeiy and oil. The Iridium is soon slit into two points, and thus is laid the foundation for the slit of the Pen. The Pen is next placed in a pen holder and passed over to the SLITTING LATHE. With this the slit is extended from the points to the full length of the nib. A very fine circular steel saw is used, and the skillful workman uses no guide. He simply places the Pen in a holder and with both hands and an experienced eye will slit, perfect and straight, one hundred Pens an hour. A fine hand-saw is used to perfect the end of the slit, which must end exactly perpendicular to both sides. This prevents the slit or Pen from cracking further up, and destroying the Pen. After slitting as above, the Pen is ready for BURNISHING THE NIBS. This is done with a hammer, burnisher and stake. Slitting the Pen removes more or less of the gold. The two edges must now be brought together again by hammering the outer edges of the nibs on the stake. The Pen is burnished on both sides to remove all unevenness ; and the nibs are set even by the fingers. After leaving the burnisher the Pen is ready to receive the most important part of its construction — from the GRINDING LATHE. This consists of one large and two or three smaller copper wheels and one tin slitter fitted on a steel spindle, running on true centers and finely finished. The tin slitter is charged with fine emery and oil. Now begins the most important work. After the Pen leaves the hand of the burnisher it goes at once into the hands of the GRINDER who should be not only an experienced workman and a good mechanic, but a man of intelligence, for he must understand thoroughly and practically what is necessary to finish a perfect Pen. The Grinder at once applies the Pen to the slitter so as to make the inside surfaces of the slit and points exactly flat, and set them easy together. Unless this is well understood by the workman and carefully done, a perfect writing Pen is impossible, for he will leave it with a crooked or an uneven slit. The great object in having the inside edges of the slit square and flat is to prevent the nibs from crossing or slipping by each other. The slit being made straight and perfect, the Pen is next fitted into the grinding holder, made of steel, with the diamond point alone projecting. It is then applied to the copper wheel (as shown in the cut which gives the exact operation), and the points are ground on the sides, back and end, while on the small copper wheels the face of the point is ground until the proper shape is secured. Here the skill and brains of the grinder are displayed, for if the correct shape is not given to the point it would be impossible to smooth and make it a good writing Pen. This is the most difficult part of Gold Pen making. A good workman cannot grind and smooth over two hundred good Pens in a week, though the men employed by the cheap manufactories claim to do as many in 7 or 8 hours. There are only a few excellent Pen grinders in the trade, and during the great demand for Gold Pens at the commencement of the war in 1861, and to 1865, the supply was not at ail equal to the demand. While grinding, the Pen is carefully examined with a strong lens, and finally fitted into a desk-holder and applied to paper and ink and thoroughly tested. Thus every defect is removed by the judgment and experience of the grinder. When that is done the Pen goes to THE POLISHING LATHE. This lathe consists of four wheels, two broad ones for polishing and rougeing the Pen on the back, and two very narrow ones for polishing the Pen on the inside. The wheels are covered with cloth of felt charged with rotten stone or tripoli ; and for the rougeing buckskin is used. The Pen is now " nibbed" on the inside of the nibs, with Scotch stone. This roughens the nibs so as to hold ink and prevent it from flowing too freely. This done the Pen goes again to the grinder — who re-adjusts and carefully examines it to see if any injury was done while in the hands of Polisher. The points are delicately touched up; the nibs carefully adjusted so that they will not cross or lap over; and the Pens are then placed in strong alcohol which removes the oil and other polishing materials and makes the Pen perfectly clean. After drying them in line box-wood sawdust, the Pens are put up in boxes and sent to the office, where the Manufacturer personally examines every Pen thoroughly, not only as to its writing qualities, but every part of the work and finish is carefully examined with the aid of a strong lens. If the slightest imperfection is discovered the Pen is returned to the Factory. The perfect Pens are finally counted and weighed and entered upon the stock book and are then ready for sale and delivery. [edited post to add pictures and to change some wording]
-
Advice on vintage Onoto nib sizes and interchangeability?
velox brunneis vulpes posted a topic in Great Britain & Ireland - Europe
Dear fellow FPNers, I have recently acquired 2 vintage Onoto plunger fillers, a model 3000 with a No.3/ST nib, and a model 6000 with a No.3 nib. Could someone please let me know if the nibs And what does the "ST" on the No 3/ST stand are interchangeable? for? I look forward to your feedback Thanks in advance! -

New to vintage pens, where to begin with getting two vintage resin piston fillers ready to use?
eggyplantz posted a topic in Repair Q&A
Hi all. I'm new here and looking for a little guidance on best practices to get two new (to me) vintage piston filler fountain pens up to snuff and ready to use. I've attached a couple of photos of the two lovely pens. I purchased them from a seller in the Netherlands and I understand that they are unused or barely used from an old stationery business, and their excellent condition would seem to confirm this. The resin is in great shape and both have tight fitting caps and piston knobs. The integral piston mechanisms both work fairly smoothly and the nibs are beautifully springy, not scratchy, and don't appear to be bent at all. I'm curious how I should proceed to get them ready to write? I'm not clear on the age but based on the styling I would assume mid-century, so I would guess the gaskets and sealants ideally need to be replaced or at least examined. I've never worked on a pen of this age so I'm wondering what your suggestions would be for disassembly in order not to break anything. Some facts about the pens below: Blue "City-Gold": This one's piston can be seen through the ink window portion of the barrel. In the photo attached, I positioned the piston almost to its lowest point. It looks to be a solid rubber plug attached to the piston rod. The end cap is the twisting lever and doesn't come off. Checkered "Royce": This one has a removable piston cap that reveals the twist knob. I can't quite see the piston but the lines between the checkered sections are mostly transparent, so I can see it moving in there and the knob twists freely. Any advice would be much welcomed, or if there are past posts that address this please do direct me there. I did a cursory search but nothing came up that seemed suited to my pens. I have experience with using and light tuning of modern fountain pens but this is my first foray into vintage pens. Thank you!
-
Dear Members, is the attached a 9202 Sheaffer Imperial 777 Rolled Gold Fountain Pen and Ball Pen set? I am new to fountain pens and have trouble identifying. Thanks
-
My first attempt at buying a Mentmore(the handsome brown marbled one in the pictures) led me to to the discover that nibs can sing(see other thread). I prefer other music. Then this even handsomer more burgundy tinged one was sent to me as a replacement. The sizing is a bit odd - it looks a little shorter unposted, but longer posted. They are both wonderfully weighted and sit nicely in hand. I dip-tested the new(well, it's vintage, but new to me!) one on Christmas and am thrilled to report in does not sing! Wonderful pen, though now I have to choose an ink that is neither blue nor brown but is safe for it. There's a little bit of feedback in an effortless writer. I'm so pleased.