Search the Community
Showing results for tags 'ballpoint adaptor'.
Found 1 result
-
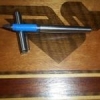
Diy Montblanc Ballpoint Pen Adaptor
austollie posted a topic in It Writes, But It Is Not A Fountain Pen ....
Some years ago, Montblanc changed the size of its standard ballpoint refills. For those who write with older Montblanc ballpoint pens (and I am a keen collector of pen sets in the 1970s Carrera and Caressa line and like the idea of matching ballpoints for my beloved fountain pens), modern refills will be too short. This does not apply to four colour ballpoints, where the standard D1 refill is still in use and readily available today. In this post, I will show you some options to make your own adaptor. Picture 1 show the dimensions of the adaptor in millimetres, the old and new refills side by side (the shorter one being the modern replacement) as well as four options for an adaptor. The options of arriving at a suitable adaptor are: a: Purchase a genuine Montblanc adaptor on ebay or similar platform. These are no longer sold by Montblanc, as far as I am aware; b: Pull the plastic end bit out of an old refill and insert a 3mm plastic or metal rod (if you don’t have any, your local hobby shop will be able to help). Then glue plastic bits around the rod, until the length of the body is 14 millimetres, as shown in the diagram. The plastic bits act as a spacer; c: Use a 3mm rod as per b above and insert in the end bit from an old refill, but do not glue plastic bits around the outside (i.e. no spacer). Then insert the other end of the 3mm rod into the modern refill and shorten until the combined length is the same as an old refill and you’re done (this will take you no more than 5 minutes). I am not a fan of this method, because you’re relying on getting the length of the rod exactly right. If the indentation in the next refill that you buy is different to the one that you used when you made the adaptor, the adaptor will no longer work; d: Make an adaptor from scratch. I will explain how to do that. It takes less time than it took me to write this post I have used 3mm diameter polystyrene rod (old sprue) and 1 millimetre thick polystyrene, because that’s what I had to hand. You can adapt this to suit the materials that you have available. Most people will have all the materials in the home that are needed for this. It’s a case of getting creative. The tools you need are: A box cutter to cut the polystyrene (or other material) into strips;A punch for punching out a polystyrene end cap (you can improvise if you don’t have one);A set of tweezers (not essential);A suitable adhesive or solvent. I used MEK (methyl ethyl ketone) for solvent welding everything together, but I learned in this forum that’s no longer available in California. You can use any other glue. If you do use MEK, please only use this in a well ventilated area;A drill (not essential). The steps are: Cut a 13 millimetre wide strip of polystyrene (we’re aiming for a total width of the body of 14mm and I’m allowing 1mm for the end cap. If you’re using thinner polystyrene, then cut the strip longer); Cut the 13 millimetre strip of polystyrene into thin (1.5 millimetre or so wide) strips. Glue the 13 by 1.5 millimetre strips around a 3mm to 3.5mm diameter polystyrene rod (I used old sprue). If you’re using epoxy glue, you can use metal rod instead.; Punch out a 6 to 7mm diameter end cap out of the polystyrene and glue into place; Wait for the glue to set and then insert the 3mm rod end into a drill chuck and hold a piece of sandpaper to the end cap until it has the right shape. You can do this by hand, if you do not have a drill.That’s it. You’re done. See below for my 1970s Montblanc ballpoints.


