Search the Community
Showing results for tags 'diy'.
-
Well well, we who collect and use Chinese fountain pens tend to hoard loads after loads, and then we start experimenting and hacking ; and ultimately ending up with a bunch of success and equal bunch of failures and with that we usually end up with a cache of parts , partial pens etc etc .. so I figure let's start a thread that chronicle our ( mis ) adventure with these parts and how we end up with something uniquely one's own, and might end up inspiring more ... I will start with my Nov haul ; the Sunnymax Selmy Piston Filler , aka WSE Wing Sung 3009, a plain un adorned trim down version of the 3008 with all Demo styling and Lamy style nib ; my hack had to do with hacking a Hero 58 nib onto it. Well normally the Hero 200/50 and the equal tooled Wing Sung 400/500 nib will not fit a Lamy ( Safari ) but well not all of these same kind of nib are actually the same. The Hero 58 nib , the only varaint that got this 2 tone finishing happen to just a wee bit different in size and one can coax the nib to fit onto the pen / feed ( or the other way round ) The Hero nib will in its form fit loose if you are using the 200 or 50 series nib but the 58 nib, probably due to its finishing is just that bit thicker so it would fir somewhat if one just pry the side wing a bit tighter ) on the claws ) or one could score the side of the feed that engage the nib's wing with a hot X-acto knief and thus forming a raised ridge along the scored line that give a bit more girth and some friction to the side, then its just the simple job of putting the nib onto the feed
-
Hey guys, not sure if best in this forum or maybe maintenance/repair... but if it needs moved I'm sure it'll be moved. I'm sure many people probably have done this but, earlier this year I started getting into fountain pens beyond that of my Pilot V-Pen disposable. I like to keep my stuff clean so a couple of months ago I made my own flush using a 'recipe' found on here and YouTube. In addition to using the flush (which is rare and only when changing colours completely in a pen) I wanted a better way to flush so came up with this. I took one of a few syringes that I have. All plastic syringe with the curved end, I think maybe 3 for $5 off eBay, commonly used for wood glue. I cut the end off and left about 1cm / 3/8". I then took a Lamy cartridge and I think a Kaweco cartridge, and cut the very end off (not where the opening is). Cutting is very easy, syringe/cartridges are a soft plastic so I basically took an exact-o utility knife and rolled the piece back and forth beneath it and is sliced right through... don't use scissors, it'll pinch/buckle the tubes. Now, I can interchange between the two and they slide on and fit snugly onto the syringe. I can pop them into the section and slowly/carefully push water in/out. Usually I fill up a small bucket with warm water with a few drops of soap for the initial flushing pushing water in/out, then dump the water and switch to warm water without soap and flush water out only. Works quite well... the Kaweco fits most of my pens, the Lamy fits my Lamy and Parker pens. Just thought I'd share... cheap/easy DIY pen flusher tool. And, if anyone is wondering... the flush I use is a 1:10 ratio of Pure Ammonia (not scented) and Distilled Water, with a few drops of Dawn dish soap. http://i1286.photobucket.com/albums/a611/THRobinson/Fountain%20Pens/20151127_225632_zpsk0phgqxo.jpg http://i1286.photobucket.com/albums/a611/THRobinson/Fountain%20Pens/20151127_225744_zpsuiaswrap.jpg
-
Hey all, I'm hoping the more computer-oriented here can help me with a computer-assisted DIY need: I want to figure out how I can design my own planner layouts and arrange them in the right order (pagination?) so that when I print them out, I can assemble them into a single-signature booklet with the pages in the right order. Basically, I want to make my own Midori TN-style planner insert, from scratch. I've got the booklet-making part down. I'm already making most of my inserts myself, the ones that have just lines or dots or sketching paper. I can make one in like 15', so I've kinda become spoiled by the convenience of not having to anticipate when I'm going to be running out of space on my current one to go out and buy a refill (or worse, re-order online & hope it arrives in time). The only insert I can't make yet but also can't replace with something I can is the planner, unless I draw it all out bullet-journaling style, and for a variety of reasons that's just not practical. So I need some sort of an application that would let me 1) design the layout (quickly draw straight lines, boxes, etc and repeat them as needed, input things like dates and days of the weeks, that kind of thing) and 2) arrange them in the right order so that when I print, it's not all out of order with eg march following September or whatever. Ideally, it would also have a built-in allowance for cutting - there's actually a technical term for this, I just can't find it right now, but basically it's a little extra space at the edges of some of the pages that are going to get bound into a booklet that accounts for the way that, to make a signatures edges all equal, you trim them after binding - the allowance is there to ensure you don't wind up cutting off content on any of the pages that come out shorter (seems really nit-picky described like this, I know, and this doesn't matter when you're just printing off dots or a grid for writing paper, but for a planner layout it could matter). I'm definitely not opposed to paying for software, but I would rather not spend more than $100, absolute maximum (staying under $50 suits my budget better, but I can stretch it up to 100ish if you really think it's perfect for my needs). I'd also rather stay away from any software/application that's a little too indie/artisanal because it'd be a bummer to go through the hassle of learning the ins and outs of it only to find it's no longer available or not being updated in some critical way because it was just a side project for some programmer to stay busy during the lockdowns or something lol. I appreciate all ideas though. I often find in these situations that the best solution ends up coming out of some more lateral sorts of paths 🙂
-
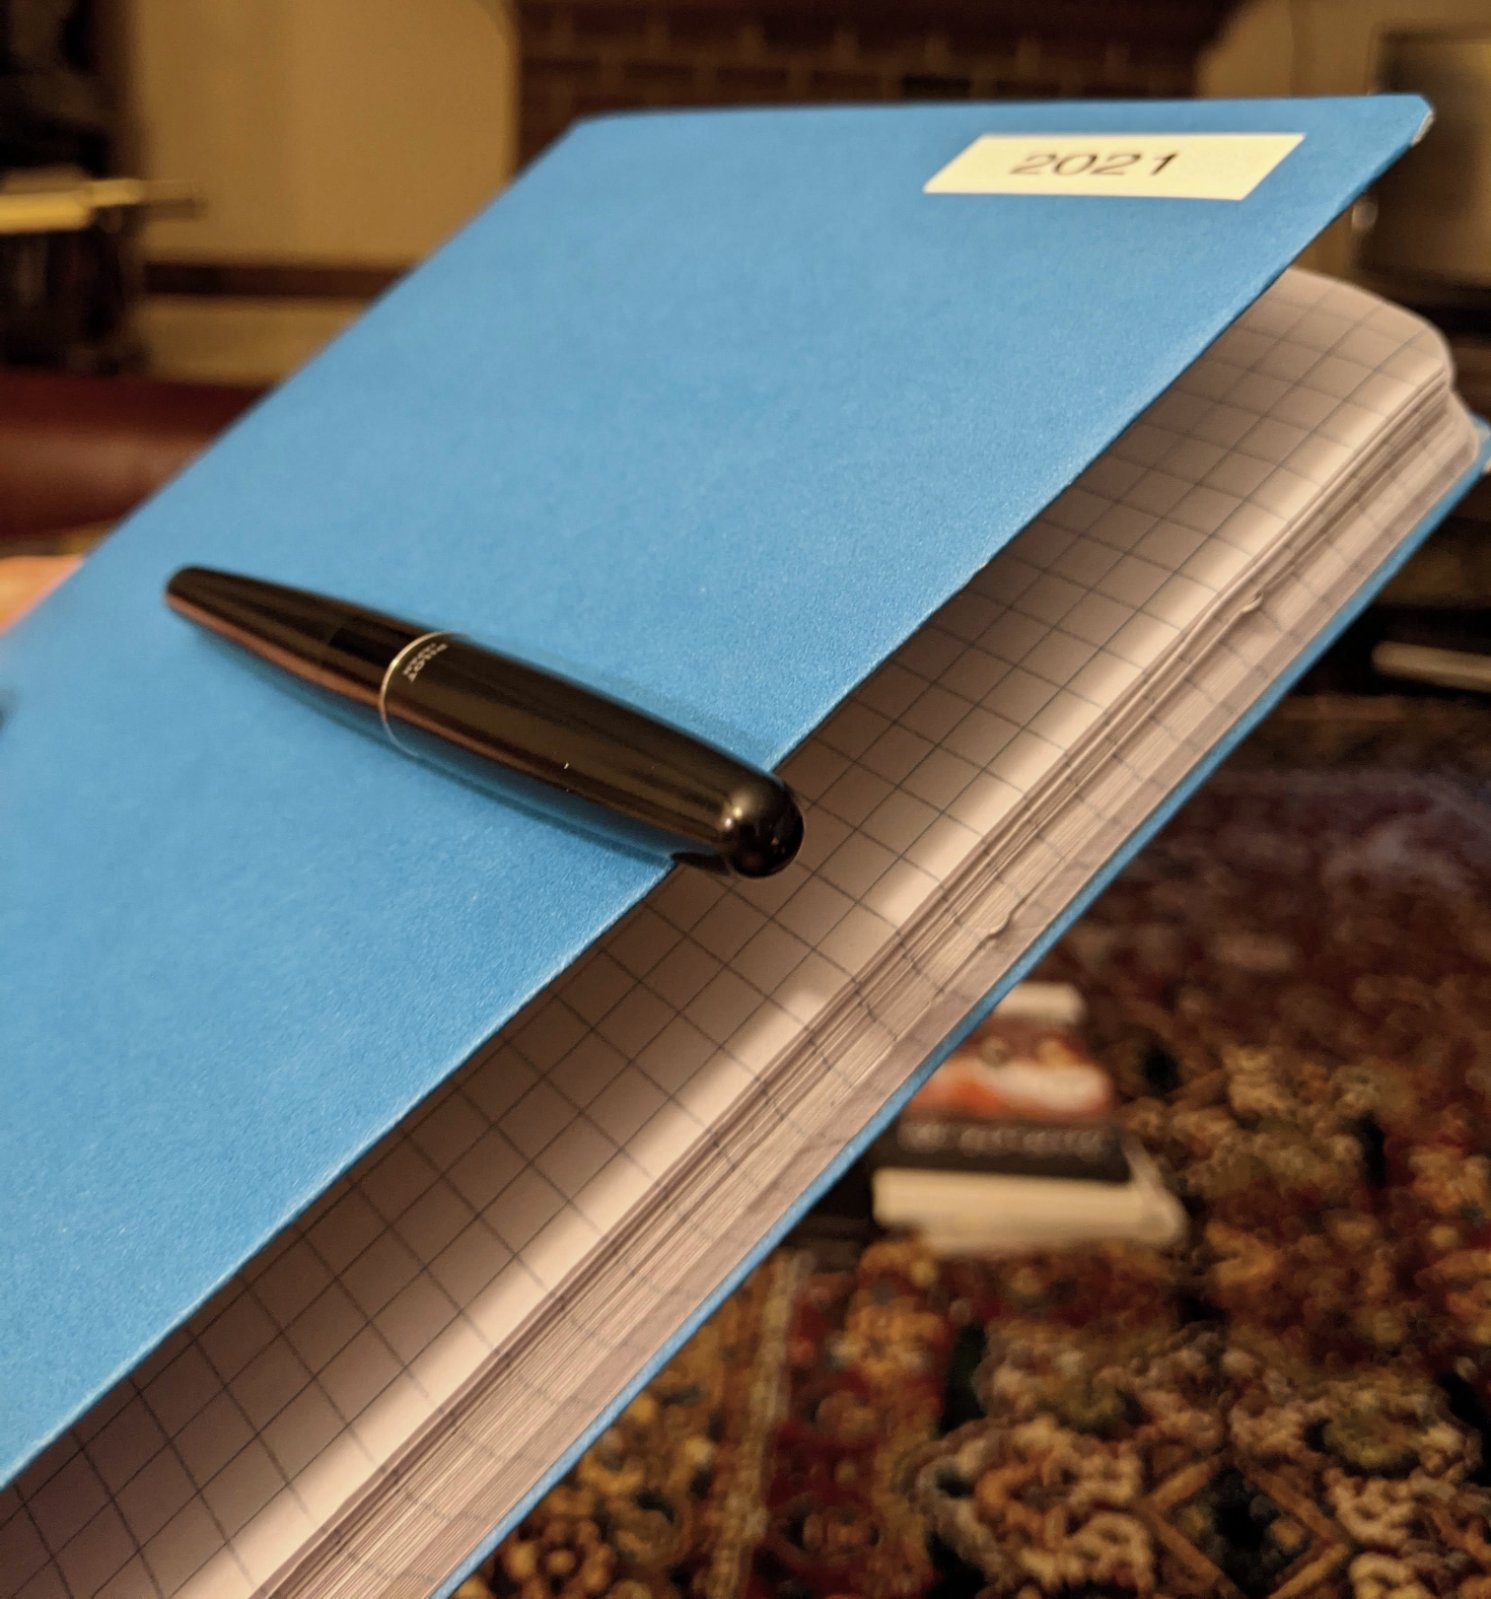
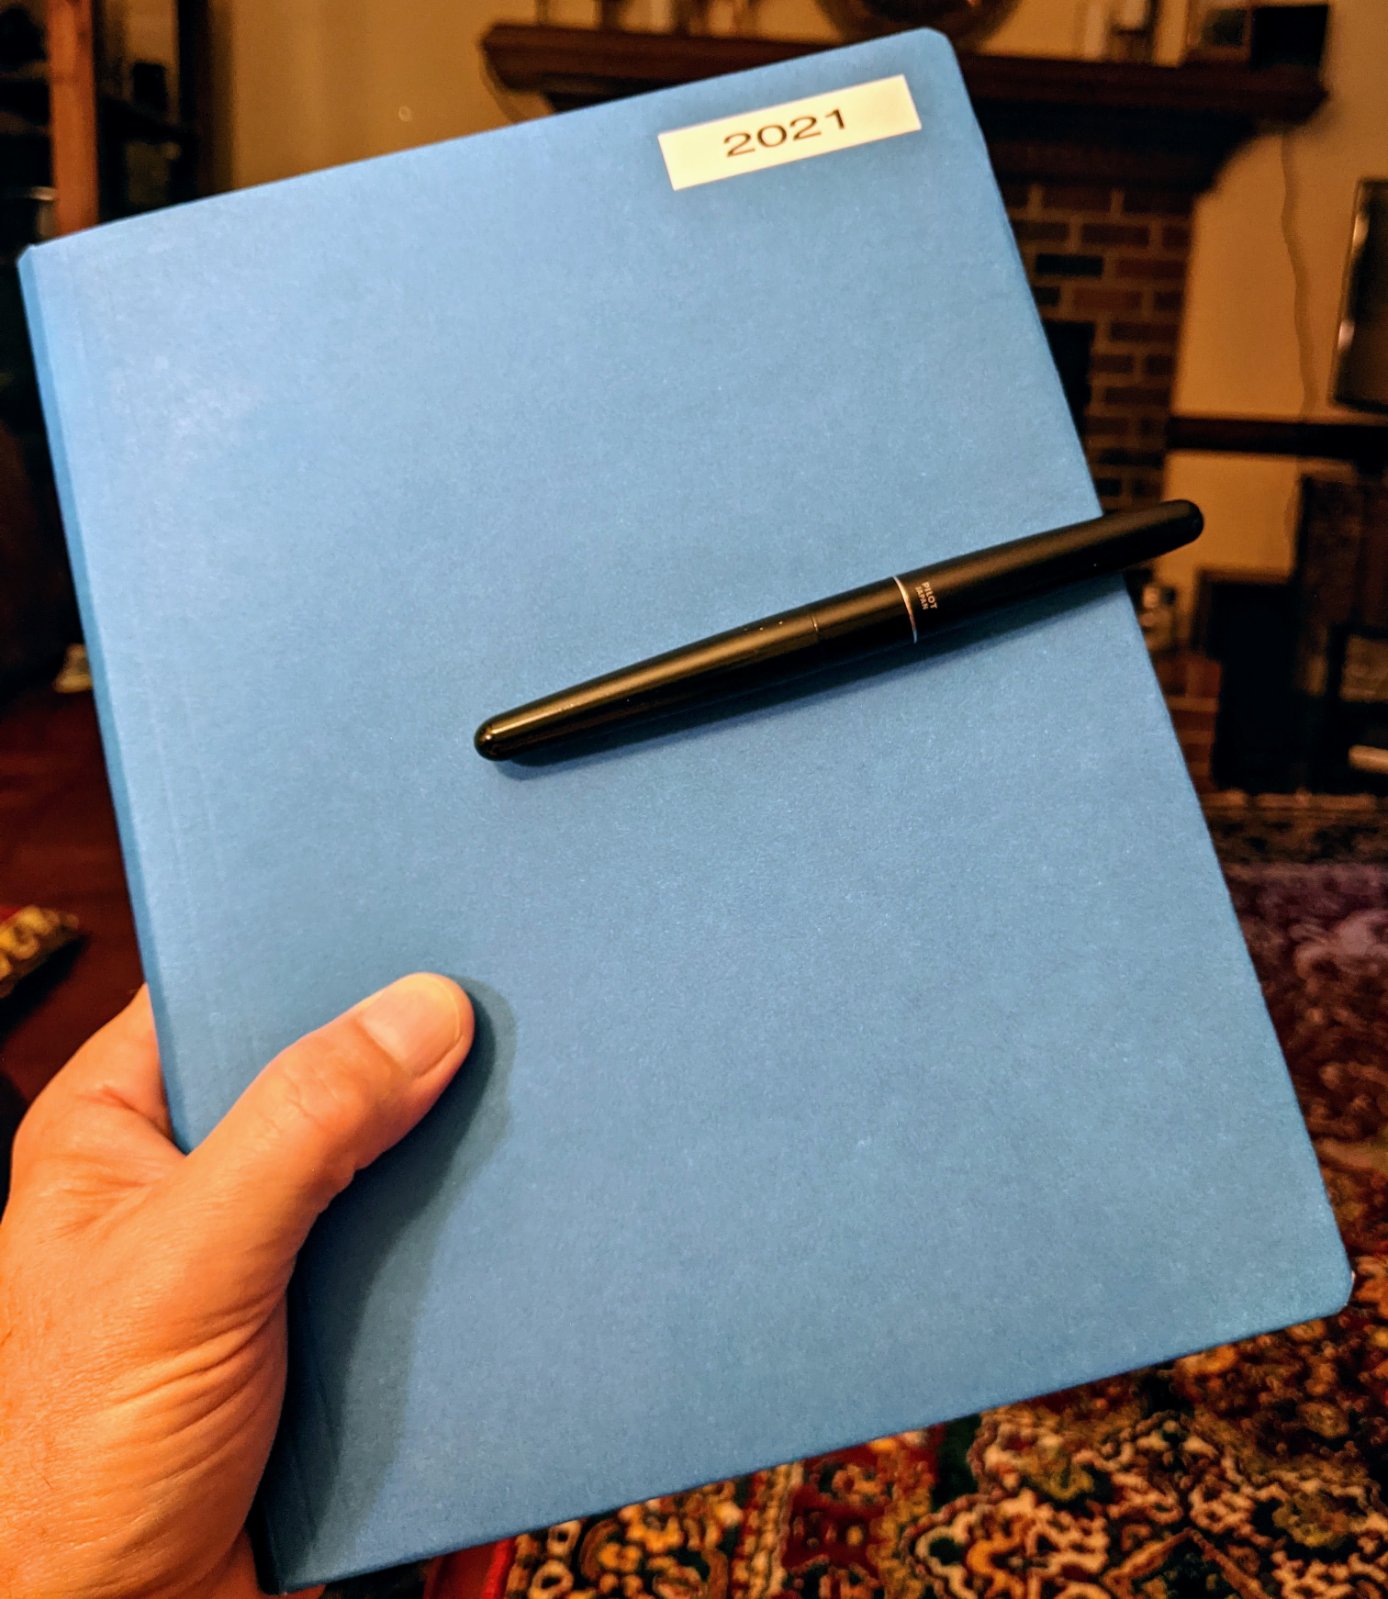
I use grid paper composition books as my annual planners. I made a notebook cover from a file folder. Just lay the notebook in the file folder and fold the file folder like we did with book covers back in the 60's. Trim and tape the inner corners, and trim the sharp edges to be rounded. I've found comp book paper to be the cheapest, most readily available fountain-pen-friendly paper. I learned that here, BTW, and thank you! I've always disliked the marble covers of comp books but love the paper. Now I don't look like I'm carrying the cheap, grade-school notebook I'm actually carrying.

-
Diy Montblanc Ballpoint Pen Adaptor
austollie posted a topic in It Writes, But It Is Not A Fountain Pen ....
Some years ago, Montblanc changed the size of its standard ballpoint refills. For those who write with older Montblanc ballpoint pens (and I am a keen collector of pen sets in the 1970s Carrera and Caressa line and like the idea of matching ballpoints for my beloved fountain pens), modern refills will be too short. This does not apply to four colour ballpoints, where the standard D1 refill is still in use and readily available today. In this post, I will show you some options to make your own adaptor. Picture 1 show the dimensions of the adaptor in millimetres, the old and new refills side by side (the shorter one being the modern replacement) as well as four options for an adaptor. The options of arriving at a suitable adaptor are: a: Purchase a genuine Montblanc adaptor on ebay or similar platform. These are no longer sold by Montblanc, as far as I am aware; b: Pull the plastic end bit out of an old refill and insert a 3mm plastic or metal rod (if you don’t have any, your local hobby shop will be able to help). Then glue plastic bits around the rod, until the length of the body is 14 millimetres, as shown in the diagram. The plastic bits act as a spacer; c: Use a 3mm rod as per b above and insert in the end bit from an old refill, but do not glue plastic bits around the outside (i.e. no spacer). Then insert the other end of the 3mm rod into the modern refill and shorten until the combined length is the same as an old refill and you’re done (this will take you no more than 5 minutes). I am not a fan of this method, because you’re relying on getting the length of the rod exactly right. If the indentation in the next refill that you buy is different to the one that you used when you made the adaptor, the adaptor will no longer work; d: Make an adaptor from scratch. I will explain how to do that. It takes less time than it took me to write this post I have used 3mm diameter polystyrene rod (old sprue) and 1 millimetre thick polystyrene, because that’s what I had to hand. You can adapt this to suit the materials that you have available. Most people will have all the materials in the home that are needed for this. It’s a case of getting creative. The tools you need are: A box cutter to cut the polystyrene (or other material) into strips;A punch for punching out a polystyrene end cap (you can improvise if you don’t have one);A set of tweezers (not essential);A suitable adhesive or solvent. I used MEK (methyl ethyl ketone) for solvent welding everything together, but I learned in this forum that’s no longer available in California. You can use any other glue. If you do use MEK, please only use this in a well ventilated area;A drill (not essential). The steps are: Cut a 13 millimetre wide strip of polystyrene (we’re aiming for a total width of the body of 14mm and I’m allowing 1mm for the end cap. If you’re using thinner polystyrene, then cut the strip longer); Cut the 13 millimetre strip of polystyrene into thin (1.5 millimetre or so wide) strips. Glue the 13 by 1.5 millimetre strips around a 3mm to 3.5mm diameter polystyrene rod (I used old sprue). If you’re using epoxy glue, you can use metal rod instead.; Punch out a 6 to 7mm diameter end cap out of the polystyrene and glue into place; Wait for the glue to set and then insert the 3mm rod end into a drill chuck and hold a piece of sandpaper to the end cap until it has the right shape. You can do this by hand, if you do not have a drill.That’s it. You’re done. See below for my 1970s Montblanc ballpoints.
-
Do-It-Yourself Lacquer Work - Best Options For Faux Urushi?
spaceink posted a topic in Pen Turning and Making
I recently fixed a crack in the cap of a Parker Big Red, but the repair work has left a rather unsightly blemish on it. I've been an admirer of Japanese lacquer work and am thinking of using that pen to do a DIY faux Urushi pen similar to the methods used here with Edison's project: http://edisonpen.com...pearl-project-2 In no way do I want to use actual Urushi, owing to its toxicity and price. My questions: 1) What kind of lacquer should I use? Or would it be easier to use enamel paint, like the ones by Testor's? 2) If I use lacquer, what's an inexpensive way to color it? Would using wood stains work? 3) How much time to let each layer cure? 4) What's a good hardener or thickener to create the random-seeming patterns like in the Edison project? Or should I just let the lacquer thicken over time? 5) What grades of grit are best to get for this? Thanks in advance for your guidance. -
Yesterday I started my new year with a new achievement: I restored a Sheaffer Snorkel! I’m sure that’s not exactly a “stop the presses” moment for most of you, but it was a bit of a watershed for me. I’ve been collecting and using fountain pens for some years now, and I’ve done a bit of light tinkering along the way. I’ve learned to swap standard #5 and #6 nibs around freely, made some basic nib adjustments, got a sonic cleaner. I even replaced rubber bulbs on my bulb-fillers, which is about as easy as it gets, because it doesn’t even require disassembling the pen at all. But the Snorkel… It’s got a reputation as possibly the most advanced—and most complex—fountain pen ever produced. Jumping into this was a leap of faith for me. With three non-functioning Snorkels in hand, I snagged a fresh bottle of shellac and a parts kit from eBay. Then took a while to work up my nerve. The most scary thing to me is disassembly, if a pen was put together with glue and not designed to come apart easily. I figure if I’m going to break one, or scar one up, that’s when it’ll happen. Fortunately, a lot of Snorkels seem to come apart quite easily. Unfortunately, the one I picked to start working on was stubborn and seemed like it got a triple shot of glue back at Ford Madison. I had to apply heat and a fair bit of torque (with latex-coated gloves for extra grip) before it gradually turned loose. My parts kit came with three O-rings, three point seals, and three sacs. After getting the pen apart, the orginal factory O-ring and point seal were in great condition. They weren’t hard or cracked or gummy, and I decided to just keep them. (Getting that O-ring back in place after examining it was pretty comedic, though!) The sac, though… It had turned to crumbly, stubborn goo. Or gooey crumbs. Either way, it didn’t want to come out. I eventually discovered that a 22-caliber bronze bore brush was very helpful with this. I probably shouldn’t even call what I did “restoration” because all I ended up doing was replacing the sac in this pen. It was already a superbly preserved “eBay minty” specimen. Even so, I can’t help feeling a little pride that I managed to disassemble the notorious Snorkel, replace that sac and reassemble everything correctly without damaging anything or losing any parts, and I got it working as it should. One down, two to go!
-
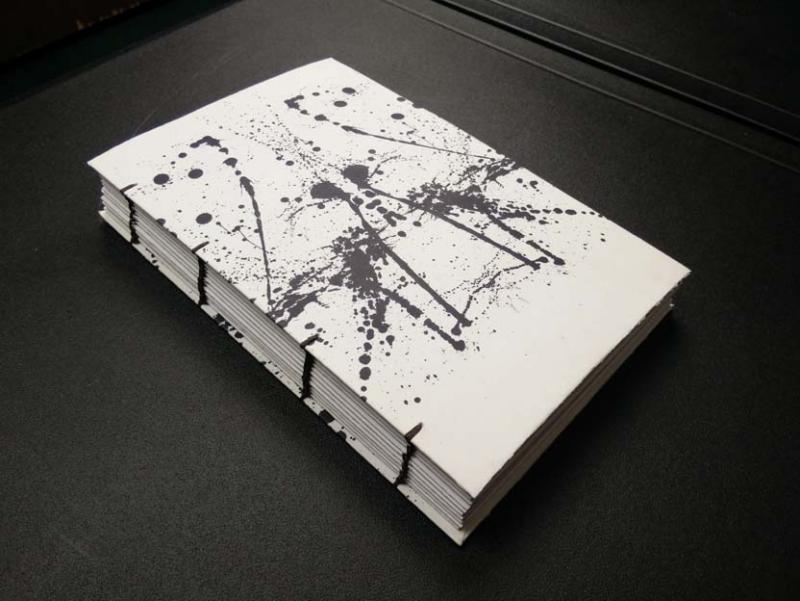
Hello everyone! Today I’d like to share with you a very big book I made last month. The style chosen was German Springback. It had to be A4 size and 4 cm of thickness of the paper. My first thought was: “oh my, this is going to be heavy!”. The paper chosen was Fedrigoni. This was the stack of paper I used, after cutting it to A3 size to fold it. The sheets were folded and sewn. Glue on the spine and some trimming done, it was rounded. Then I applied some backing cloth to reinforce the spine. I finished the spine by applying a couple of bookmarks, some headbands I sew off the book and two layers of paper for further reinforcement. Then I proceeded to make a thin cover which would be the basis for the springback structure. I applied some layers of 1.5 mm board on the spine to thicken it. On the spine, I glued four fake ribs made of leather. Then I glued two boards (a 2 mm plus a 2.5 mm) and put in on the cover, with the four sides bevelled. The structure finished, it was time to prepare the leather. It was a huge piece of leather! I used paste to attach the leather to the book. The folder is for size reference. Once it was dried, it was time to decorate! And the book was finished! The weight was about 2,5 kg, quite heavy! Thank you very much for reading up to here hehe. I enjoy sharing with you guys and I hadn't done it in way too long, so it was time to solve that. Best, Anna
-

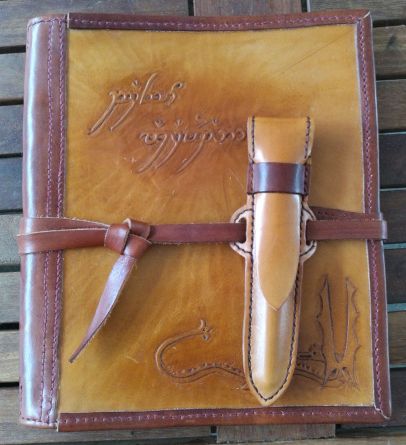
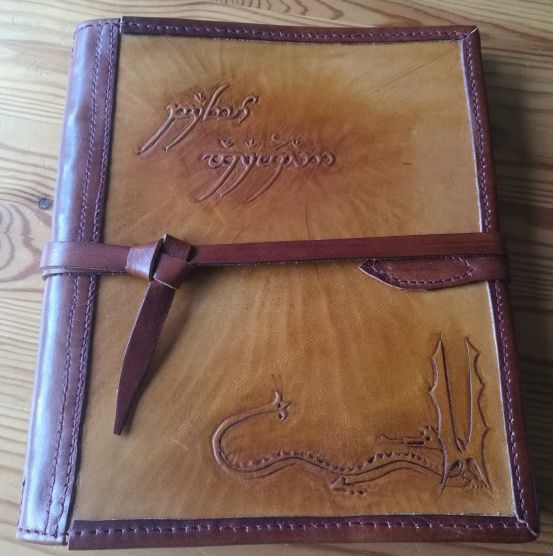
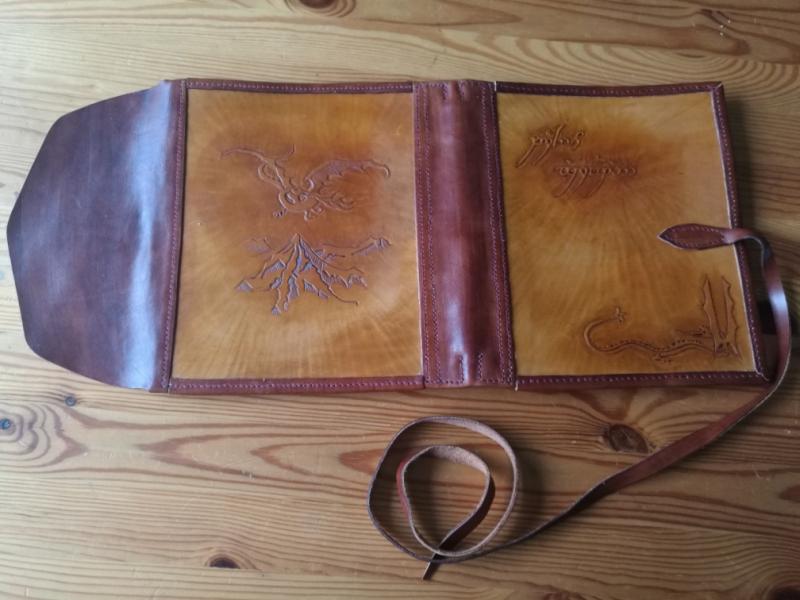
Diy Leather Cover I Made For My Atoma Notebook, With Assordted Pen Case !
agarwaen posted a topic in Paper and Pen Paraphernalia
My first try at a notebook cover (I'm more used to bigger pieces, or knife sheaths). I have done a number of errors, and the leather I used to make the border was not thin enough, but still, I'm quite happy with it ! You can see more pictures in this gallery. I've added a steel bar in the discs to rigidify the notebook's spine, and replaced the paper by Clairefontaine's Clairing.
-

Staples Arc Punch Vs Levenger Circa Leverage Punch
WARRZONE posted a topic in Paper and Pen Paraphernalia
Does anyone own or has anyone owned these hole punchers. I just bought the Staples Arc punch. I have heard that the Levenger Circa punch punches a bigger hole, so it is easier to turn the pages when installed. Is it true that it punches a bigger hole than the Staples brand Arc puncher, or is the hole the same size? Price is not an issue. I will get whichever one functions better. Will the Levenger last a long time, or is it just an expensive piece of junk? With the Levenger Circa Leverage punch, I estimate I can fit about 10 pages to punch at once (I will use 32 lb bond / 120 gsm). With the Staples Arc punch, I can only fit about 7 pages to punch at once, and most of the pages have come out slanted. I may have gotten a defective one. The slanted-ness may have been affecting the ease of page-turning and making it tougher, maybe even more so than the small holes. Should I be exchanging or returning? -
It took longer than expected to get the last pieces together and write up my full report, but now I am ready to show off the Zo65 keyboards! And yes, it is a long report. So, for easy reference, here's the thread about the earlier Zo64 → https://www.fountainpennetwork.com/forum/topic/328749-i-built-a-keyboard-image-heavy/ And now the new hotness… http://zobeid.zapto.org/image/keeb/Zo65-02.jpg I haven't changed the basic concept here, but there have been a lot of refinements to make it sleeker, more attractive, and better sounding-and-feeling to type on. I also added the green "Compose" key, which allows me to easily enter all sorts of special characters in Linux. The case is anodized aluminum, and I'm using Sorbothane® to dampen vibrations and PBT plastic keycaps for an exceptionally solid feeling. I built two of these, one with the clicky switches (Kailh BOX Pale Blue) that I used before, and one with quiet tactile switches (Kailh BOX Burnt Orange) that I may like even better. It's the one to take with me to the library, for sure! http://zobeid.zapto.org/image/keeb/Zo65-10.jpg Oh yeah, and there's the old Zo64 which has been given a facelift so it can hang with its younger siblings. I wish it was possible to buy something like these off-the-shelf. If I could have, I would have. The only reason I built my own keyboard was because nobody was producing what I wanted. I've written up the full report and posted it on my own server, so rather than repeat all of that, I'll provide a link. There are lots of photos and nitty-gritty details, so fee free to check it out here → http://zobeid.zapto.org/misc/zo65.html
-

I Built A Keyboard! (Image Heavy)
tonybelding posted a topic in It Writes, But It Is Not A Fountain Pen ....
Now for something completely different… I didn't plan in the beginning to build my own computer keyboard. I used a Unicomp for a couple of years, and it was OK. I mean, it was a creaky and clunky behemoth, but it got the job done. Then I discovered the whole "mechanical keyboard" hobby that's sprung up in the last few years, and… Yeah. It was like fountain pens and cameras all over again, but on an accelerated track. Soon I had placed a pre-order for a WhiteFox, placed a pre-order for a new IBM Model F replica (both of which I'm still waiting on!), bought a new Matias Mini Tactile Pro, bought a vintage IBM XT keyboard off eBay, and bought a Carpe JD45 mini-keyboard. And after all that I realized that nobody was making what I really wanted, and I was going to have to build it myself. Here is the result: http://zobeid.zapto.org/image/keeb/Zo64-07.jpg The first thing some of you might wonder is, "Where's the rest of it?" This is what we call a 60% keyboard layout, although this one actually has 64 keys. It's done away with the number pad, the F-keys and the navigation keys, but all of those functions are still accessible using the two blue Fn keys. I am particularly proud of how these navigation keys work: http://zobeid.zapto.org/image/keeb/Zo64-08.jpg For anyone not fully familiar with those symbols, ESDF are my arrow keys, Q and A are PgUp and PgDn, W and R are Home and End. Now all I have to do is mash down with my left thumb on that blue key, then I have my entire nav cluster under my fingertips without shifting my hand position away from the home-row typing position. I can do all my navigating with my left hand, and it doesn't matter if my right hand is in the typing position or not. After a brief period of adjustment, this can actually be more convenient than dedicated arrow keys! I chose media keys that I thought were easy to remember: P for pause/play, M for Mute, and the adjacent keys for Prev, Next, VolUp, VolDn. The left space bar is, of course, Backspace, and with Fn it becomes Delete (or Forward Delete as we Mac loonies say). The star or "any" key in the upper-right is currently working as another Backspace, but I'll probably change that eventually. It could be programmed for anything. This board has full RGB underglow, and each switch has a white LED backlight. I don't usually use them, but the one under Caps Lock at least works as an indicator light. (That's why there's a big gap in the legend between "Caps" and "Lock", which in retrospect wasn't necessary. I'll change that next time.) http://zobeid.zapto.org/image/keeb/Zo64-11.jpg That aluminum case is extra thick and heavy, and it feels as solid as a brick. (I guess you might say it's Thick As A Brick!) The completed keyboard weighs over two and a half pounds, and it has an optional steel weight that can attach to the base and bring it to just shy of three pounds. I really don't think the steel weight is necessary. http://zobeid.zapto.org/image/keeb/Zo64-03.jpg Getting all the parts together for this project was quite an exercise. The PCB and mounting plate, the short space bars, and the case all came from different vendors in China. The switches, stabilizers and keycaps all came from US sources. It's all off-the-shelf components, except for the custom printed keycaps. Those switches are new Kailh BOX Whites with dust and water resistance and a great double-click sound. They feel fantastic to type on. I do think they're a bit light for my hands, so I'll go for stiffer springs next time, and I'm probably going to build a version using tactile (quiet) switches. I know I'm going to build at least one more of these, since I need one for each of my Mac Pros. If anybody wants to know more details about planning the layout, creating the custom keycap set, programming it, the assembly process, anything… Just ask! -
I found this artist's case for paints, brushes and other materials in a Japanese surplus store, and decided to convert it into another case for pens. Some of you will recall that I turned a similar case (a larger one) into a case for pens five years ago: http://farm9.staticflickr.com/8224/8443280687_ab69f77bb1_z.jpg http://farm9.staticflickr.com/8355/8443285285_663d0c565e_z.jpg http://farm9.staticflickr.com/8512/8506094988_aebae6ea7e_z.jpg This was the case I used this time--older and narrower: Got some help from a handyman who varnished the case and installed the dividers (leftovers from a previous project, so they weren't tall enough to go all the way to the top, but they do the job). And here we go:
-

Anything I Need To Know Before Making My Own Stub Nib?
calvin_0 posted a topic in Fountain & Dip Pens - First Stop
I been looking for a cheap way to try stub nib... but so far it seems to cost me around 10 bucks minimum... however someone suggest that I should buy jinhou nib and make it myself... well i dont have any Jinhou nib, but I do have a Wing Sung nib that come with my 698.. and it seems like making stub nib is as easy as cutting it with a side cutter and sanding it down... so is there anything else I need to know before I start butchering my wing sung nib? www.youtube.com/watch?v=rG6_4GK8QCE&t -
Hey all, we all love fountain pens and we all want to write with them. So at one point we need to find ourselves some nice paper. In my case I also wanted a nice notebook which contains the paper. Eventually I discovered the Midori Notebooks and loved them. Simple design but a very thought through, cool looking little system. The problem that I had was the price. I just did not want to (and shouldn't at the time) spend 50$ for a notebook. So I had the idea to google a little bit and see, if there were people who made their own versions of that Traveler's Notebook. And I was lucky. I found , which explains in detail how to cut the leather and this website, which teaches you how to make your own refills and provides printable templates (if that's something you want to do). I could tell you myself how I did it, but I think these two sources are doing a pretty good job explaining everything. I just would repeating it here. I liked the passport-size, but I did not wanted to be dependent on Midori refills. So I changed the format in the way that now I can refill with small Moleskine or FieldNotes notebooks. After that, I bought some nice leather on ebay together with a cheap leatherpunch and was ready to go. Here are the first four I made. http://i1367.photobucket.com/albums/r799/manoart/PhotoGrid_1381243254004_zps0c384e16.png I must say, I'm pretty pleased with the end result and I hope you try it yourself if you have the time and the passion. It's also great as a gift if you can't or do not want to spent the 50$ or more and it comes with this special self-made charm. Enough rambling. Have a good day, Manuel
-
Is anyone aware of recipes for inks! I really like the idea of making up your own ink but can't really find anything (like a recipe) online.
-
Hello all! I wanted to make my own nib for some time, and I don't have the proper tools. So I invented a new type of nib! And also the feed! I tried several designs, but I found that this one works well. I cut a sewing needle in three parts without the tip. Put them together in a triangular shape. Put all three of them into a screw dowel right for the size of my section. And put all of them into the section. To keep the "tines" properly pressed to each other, I used a part of another dowel. Then sanded the "nib" to a proper shape. This one writes a little italic. And, you can grind all three sides of the nib to different sizes! You can have a pen with F, M, and B nibs for example. It's my gift to all diy fans.
-
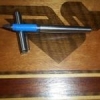
Just finish my pen desk stand for my new Parker arrow flighters. Hope you all like it Double click for lager image; http://bildr.no/image/ZGZyV3Zx.jpeg
-
Hi everyone, I am rather new to the world of calligraphy and all the bells and whistles that go with it. I have done tons of research almost a frightful amount. For this past Christmas I got a hinkler complete kit from the book store as a gift. Now these pens are alright and I know they are just cheap beginner pens, however they do have potential. I got to thinking about if it were possible to make/use parts from let's say pens from Staples, Walmart, etc to attach to the grip/nip piece. I have tried scouring the internet to no avail except a headache for too much information. I know silicone lube can make a seal. What I am looking for is any information on factory type/brand store named pens that have the internal threaded barrel which would possibly make up with my pen nibs. I do have four of them. I would prefer a clear barrel though in the end I am willing to try anything. Sincerely, Blaze BloodLily
-

First Attempt At Making A Journal, Using A Cereal Box And Coptic Binding
gamingoodz posted a topic in Paper and Pen Paraphernalia
After seeing some of the cool journals that people made in the classifieds section that they were selling I really wanted one.. But I don't have much cash and I'm not really the type of person to pay for something without trying to do it myself first. I knew that mine wouldn't be nearly as nice as the ones on here but I would be happy if it was at least "ok" for my first try. I went out and got some supplies and started binge watching YouTube tutorials lol. I decided to use a cereal box for my cover as I didn't have any chipboard and didn't want to spend any more money than I already had. So the cover was made from a cereal box and the pages are HP Premium Laser jet 32lb paper that I made a template for on the computer and printed out onto each page to put lines and the data on it. If I was to do this again (which I will someday) I would pay more attention to the grain of the paper as my cover warped some. I would also try to be neater and I'm sure with practice they would turn out better the more I made. I've never made anything like this before, I'm pretty much the opposite of someone that would make a journal. But I've started looking at life differently since battling my demons years back and I've expanded my hobbies and interests quite a bit. (Which is also how I got into fountain pens) This is also the first time I've ever kept or used a journal so it's been interesting and I like having somewhere to keep a record of my day.
-
Inspired by Do-It-Yourself pen boxes (like this one by StephanV), having a STRONG aversion to the smell of tobacco rendering a re-purposed cigar box unviable, and with a desire/need to keep costs down, I decided to make my own pen box. With the input and help of a good friend with a woodshop, this is what I came up with: I'll post some process photos and a description of how I made it in the event that it may help a future fountain pen enthusiast who wants to give it a go himself.
-
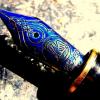
I managed to convince myself to try out nib grinding, following the procedure (more or less) from this Ludwig Tan article. I used a cheap Jinhao 250 and some micromesh pads I got from Anderson pens. I should have done before and after shots, but I didn't. I started with the 1500 grit for large scale shaping and then moved to 3200 and 6000, smoothing on 12000 and mylar. Pics of the nib, various angles, afterward: And here's a sample of the line variation (Diamine Sapphire cart on Rhodia): Any comments from those more experienced? It seems to write acceptably so far, but has a sort of dry-draggy feel, though not scratchy. I should learn more about smoothing/polishing perhaps? Also anyone else who grinds their own, feel free to jump in and show off!
-
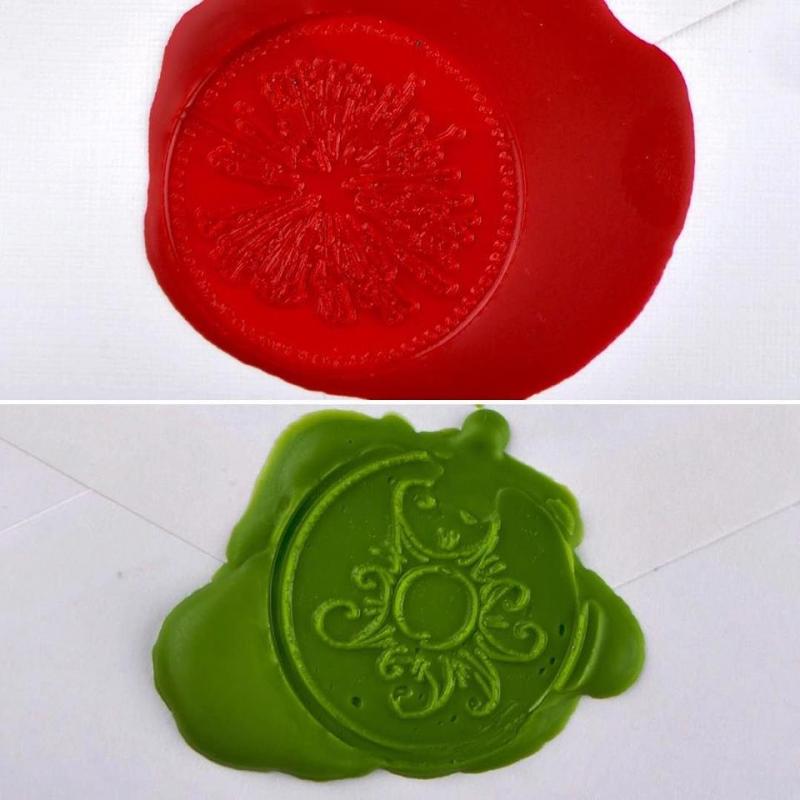
So during the day I make my own lotions, soaps, lip balms and other personal care products. What I make is pretty similar to what you can find at a Gardener's or Craft Market. So my love of crafting has spilled over into my letter writing. I got frustrated with the limitations of most sealing wax and the expense of the really good sealing wax so I decided to make my own. Here is my recipe so you can try it out yourself! I have it in both grams and ounces so use whichever you prefer. 80 grams Beeswax 16 grams Emulsifying Wax (You can find this at most cosmetic supply stores.) 4 grams Soy Wax (This helps stiffen the mixture just a tiny bit to make sure you get that tamper evident seal that is mailable!) A pea size to a bean size of Oil Soluble Lip Color (The color must be oil soluble! I get most of my colors mixed into oil already because it is easier to use and less messy than powders.) 2 0.15 cc Silver Mica (You can use other pearlescent powders but I found glitter to be too large for my sealing wax. If I used glitter, I couldn't get a smooth texture. 0.15 cc scoops are these tiny scoops used for measuring various powders. These work great!) 2.82 oz Beeswax 0.56 oz Emulsifying Wax 0.14 oz Soy Wax A pea size to a bean size of Oil Soluble Lip Color 2 0.15 cc Silver Mica Measure everything but your colors into a microwave safe container. Heat until the mixture is liquid. Caution! It will be hot! While the waxes are still liquid add your colors and silver mica. Or don’t add any color if you like the natural look. Pour the hot mixture into molds or containers. I used an ice cube mold from IKEA but you can use anything you have on hand. I found that pouring the mixture into silicone molds made it easier to remove from the mold when cool. I like the longer sticks because I can keep my fingers away from the flame. I guess next thing for me is a sealing wax spoon. Here are my waxes in action. These are all of the colors I made. Thanks for letting me share!
-
My wife and I paid our monthly visit to our favorite Japanese resale shop on Rizal Avenue in downtown Manila ("the armpit of the city", as one poet-friend picturesquely calls it), and I found a couple of very nice wooden boxes (selling for about $3-$5) which I've repurposed for my pens and inks: The second box came with built-in dividers so it seemed a natural home for inks: Not bad for less than $10, plus the pen tray, one of which I still thankfully had lying around.
-
I have 12,000 grit micro-mesh, and 1.0 and 0.3 micron mylar paper. I find that the micro-mesh gives me a smoother nib...I thought it was meant to be the opposite? What are your experiences?