Jump to content

Sheaffer Snorkel Repair


sndeshpande

Recommended Posts

Hi All,


I recently repaired a Snorkel (a Special) and thought it would be good idea to share my experience with everybody. The following is a brief account of the procedure which went rather well considering the fact that it was my first snorkel repair. Lacking a digital camera, I made a quick sketch of the Snorkel assembly and various parts of interest. Scanned version of this sketch has been attached to this post (and also stored on the web - here) for reference.


[A]. Tools and Supplies used by me –


1. #14 Thin wall Rubber sac for Snorkel (Source: Wood Bin)

2. O-ring and Point Holder Gasket (Source: Martin Ferguson)

3. Silicone Grease (100% Pure, Food Grade) (Source: Silicone Grease for Divers)

4. Talc (100% Pure, Unscented ) (Source: Talc Powder for Billiards)

5. 1/8" x 6" Cabinet Tip Slotted Screwdriver (Source: Local Hardware Store)

6. Shellac (Source: Local Hardware Store)

7. Sac Spreader tweezers (Source: Local Hobby Store) (Note: Purchased but not required)

8. Dental Pick Set

9. Sewing Needle

10. Wooden toothpick

11. Wooden Skewer

12. Scissors

13. Ear Buds


. Following are the important repair steps arranged in a decreasing order of difficulty –


(i) Sac Replacement: The sac in the pen was still somewhat flexible and hence I had to puncture it by pulling it out of the hole at the end of the sac protector with a dental pick and cutting a hole in it. The sac protector on this pen was crimped. I un-crimped it using the sharp point of a dental pick. I did this with utmost care so as not to cause a tear in the thin sac protector sheet and also to avoid gouging the rubber stopper.


I then pushed the rubber stopper out of the sac protector using the tip of an ear bud. While doing so I accidentally pushed out the inner rubber feed out of the snorkel tube. I noticed that the feed had twisted a little when it was pushed out so that the slit on the feed no longer aligned with the slit on the snorkel tube. I then decided to push out the feed completely, clean it, realign it and push it back. This was accomplished by slowly and carefully pushing it using a 20AWG wire. Luckily (beginner's luck!!) for me it slid out without breaking. This gave me a good opportunity to study this part carefully.


Once the stopper was out, it was quite easy to clean the remains of the old sac and to shellac the new sac in place. I spread the shellac in a thin coat using a tooth pick and could easily slip on the new sac onto the rubber stopper without using the Sac spreader tweezers. I let the new sac dry for more than an hour. Before using the shellac, I had pre-tested the shellac for drying time. The sac received an ample dose of talc and the rubber stopper /sac assembly was pushed back into the sac protector. I carefully re-crimped the sac protector and ensured that it slid properly into the section. The snorkel assembly was allowed to dry overnight.


(ii) O-Ring Replacement: This proceeded very fast. The rear cap was unscrewed. I noticed that the rubber washer inside the rear cap was intact. Then using the sharp end of the sewing needle, I prodded and carefully took out the old O-Ring. I inserted and anchored one end of the new O-Ring into the slot and then using a wooden skewer I maneuvered the remaining part of O-ring into the slot.


(iii) Point Holder Gasket Replacement: This was easiest of all. Initially I found the new gasket very tight. However, after a few operations it loosened a little. I avoided using silicone grease as I did not feel comfortable with the thought of some of it finding its way into the feed, gumming it up. I hope the gasket will loosen up progressively with time and use.


(iv) Final Assembly and Testing: I applied a thin layer of silicone grease on the spring and on the rear end of the touchdown tube just below the rear cap. Re-assembled the pen. Checked for the tell-tale sounds of puffs on the up and down strokes of the touchdown tube. Tested the pen with water. Squirts of water confirmed the air seals in the pen and proper operation. Disassembled the pen and tested for leaks from the rubber stopper onto the snorkel tube and inside the section. Satisfied with the results, I proceeded to re-assemble the pen and to fill it with Waterman's Florida Blue Ink. The pen started laying down a smooth, firm and wet line immediately on contact with paper.


[C]. Conclusion:


The snorkel is an absolute delight to work on. With patience and careful planning, the repair is possible even for a absolute beginner like me. :thumbup:

post-11338-1216165618_thumb.jpg

Link to comment
Share on other sites

  • Replies 36
  • Created
  • Last Reply

Top Posters In This Topic

  • Kelly G

    3

  • adyf

    3

  • Ernst Bitterman

    3

  • miket_nyc

    3

Top Posters In This Topic

Posted Images

Thanks for shearing your detailed repair approach sndeshpande !

I really appreciate the drawing you provided, very nice!


Link to comment
Share on other sites

I'd urge a very tiny application of grease to the snorkel below the point-holder gasket. The chances of disaster are tiny, the rewards in smoothness of function are immense.


That is a magnificent "sketch", by the way. Good job of minimizing the horrors of the work, too, especially the O-ring replacement.

Ravensmarch Pens & Books
It's mainly pens, just now....

Oh, good heavens. He's got a blog now, too.


fpn_1465330536__hwabutton.jpg

Link to comment
Share on other sites

  • 1 month later...
I recently repaired a Snorkel (a Special) and thought it would be good idea to share my experience with everybody. The following is a brief account of the procedure which went rather well considering the fact that it was my first snorkel repair. Lacking a digital camera, I made a quick sketch of the Snorkel assembly and various parts of interest. Scanned version of this sketch has been attached to this post (and also stored on the web - here) for reference.


. . .


The snorkel is an absolute delight to work on. With patience and careful planning, the repair is possible even for a absolute beginner like me. :thumbup:


sndeshpande,


Today, I repaired my very first snorkel, and I used this post as a reference! Found it by searching FPN. Thanks for posting such a detailed description of what you did -- it was very helpful! :clap1:


Link to comment
Share on other sites

I just fixed one up that had the small piece of rubber between the blind cap and tube missing. I ended up taking the piece that I cut off the top of the sac and making a hole in it, and wedging it around the screw.


It seemed to work well enough, but does anyone have any better ideas? My main concern with this "method" is that it probably wouldn't survive being removed and reinserted.


Previous times when I took apart snorkels, the gasket (of sorts) was more-or-less intact.

This should be fine, as it is the accepted practice for that particular seal in these pens.


OP, your sketch? is awesome, very coherent and detailed, much the same as information that is supplied by Fountainbelle (Francis) sorry, can't think of higher praise than that. I would guess, that as with Francis, your background is engineering. Snorkels, think are one of the most fun pens to get working again, it's not so much repair as service. Now to move onto something more difficult !!!! :embarrassed_smile: and supply the drawings :thumbup:

et

Ignorance more frequently begets confidence than does knowledge (Charles Darwin)

http://www.wesonline.org.uk/

Link to comment
Share on other sites

This should be fine, as it is the accepted practice for that particular seal in these pens.


Thanks - I was afraid I was missing out on some great idea for a fix!

Link to comment
Share on other sites

  • 8 months later...

Well, I've read a few of the Snorkel repair Threads here and looked at Richard's anatomy page, but I still can't get the hard rubber stopper with the Snorkel tube to dis-lodge from the sac protector. It just won't budge from the sac protector. I have un-crimped the sac protector tabs, soaked it all in water, applied heat. and exerted force on the rubber stopper with a stiff wire from the hole in the sac protector end.

What am I missing here?

Link to comment
Share on other sites

  • 7 months later...

(ii) O-Ring Replacement: This proceeded very fast. The rear cap was unscrewed. I noticed that the rubber washer inside the rear cap was intact. Then using the sharp end of the sewing needle, I prodded and carefully took out the old O-Ring. I inserted and anchored one end of the new O-Ring into the slot and then using a wooden skewer I maneuvered the remaining part of O-ring into the slot.


Hi. May I have a question about how to remove the old O-ring? I have tried to find a way to unscrew the rear cap, but in vain. Would you give me a little detail information? I thought that it needs a screw driver and have tried to find a screw driver long and narrow enough to put in, but no luck. If it is needed, do you happen to know exactly what model I need? Or, if there is any way to unscrew it, please let me know. Thank you in advance.

Link to comment
Share on other sites

I thought that it needs a screw driver and have tried to find a screw driver long and narrow enough to put in, but no luck.


It's a simple slotted screw. What frequently happens is that some corrosion of the screw itself makes it hard to seat the driver in the slot; it generally just takes some patience while moving the driver around gently to feel when it has purchase.

Ravensmarch Pens & Books
It's mainly pens, just now....

Oh, good heavens. He's got a blog now, too.


fpn_1465330536__hwabutton.jpg

Link to comment
Share on other sites

I don't think the proper screwdrivers are that hard to find. I found one by taking a TD to the hardware store and trying out their screwdrivers. It's one of the green-handled, made in USA ones at Dorn Hardware on Broom St. in Madison. Some time later, i needed a similar screwdriver for an auto repair and found it easily enough at another local hardware store.

Link to comment
Share on other sites

Thanks all - This has been a great help to me as I'm about to attempt my first servicing to a PFM and am trying to get as much info as possible before I jump in! Please can some-one confirm that the method to remove the blind end piece (with the tassie on IV & V's) is similar to that stated within this post - a small flat head screw driver long enough to reach up the barrel? Any potential pitfalls I should be careful to avoid? Many Thanks, Noj

Link to comment
Share on other sites

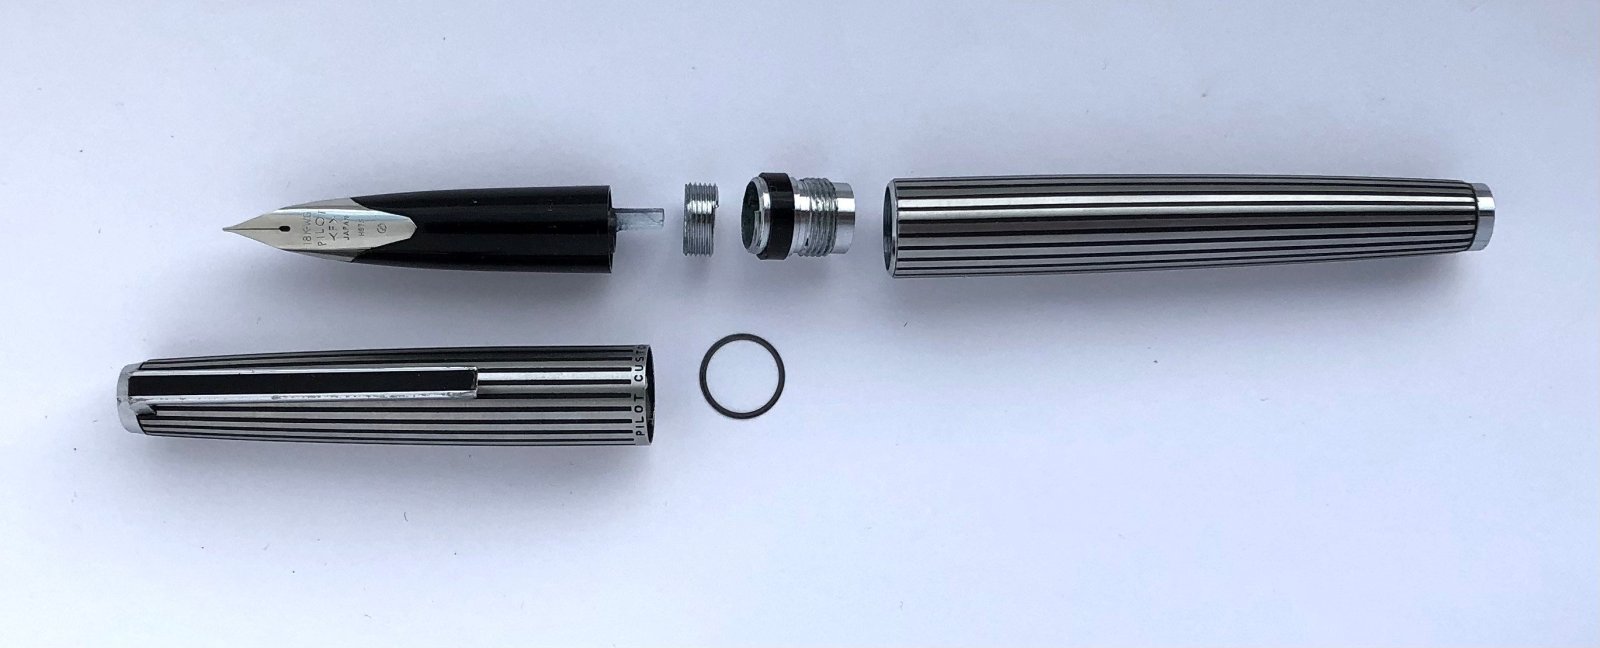
http://img.photobucket.com/albums/v249/takematsu/SheafferPFMguts.jpg


The main problem is the need of a special tool to take the threaded connector out of the section so you can get at the point gasket (and why I screwed it back in for this picture, I can't imagine). I got mine from Martin Ferguson, who also sells the gaskets.

Ravensmarch Pens & Books
It's mainly pens, just now....

Oh, good heavens. He's got a blog now, too.


fpn_1465330536__hwabutton.jpg

Link to comment
Share on other sites

I understand almost all of this repair process but have a couple of questions.


On a finished pen, when you compress the plunger to collapse the sack, are you expelling the air around the sac protector and if so where does it go.


Once the sac is full is ink, why doesn't it leak back out the snorkel, and how does the ink flow to the nib.


Is there any sealant required around the rubber stopper to the sac protector and or the snorkel.

Link to comment
Share on other sites

I understand almost all of this repair process but have a couple of questions.


On a finished pen, when you compress the plunger to collapse the sack, are you expelling the air around the sac protector and if so where does it go.


You are compressing the sac and the air inside the sac expels through the snorkel tube - that is one way you can tell you have a proper repair; immerse the entire nib and section in water, if air expels from any other place than the snorkel, you have a problem.


Once the sac is full is ink, why doesn't it leak back out the snorkel, and how does the ink flow to the nib.


The Snorkel tube has a hard rubber secondary feed inside - this regulates the flow of ink and air. The Snorkel tube end has slits that feed ink to the primary feed and nib.


Is there any sealant required around the rubber stopper to the sac protector and or the snorkel.


The "rubber stopper" or section, requires no sealant in the interface with the sac protector - the sac is sealed to the section as per usual, with shellac. If the Snorkel tube has been removed from the section, when you get it set in the proper position, a small drop of shellac around the base of the tube will seal it to the section - small being the operative term.


Spend some time on Richard Binder's site; www.richardspens.com, reference info, anatomy of a fountain pen III: Sheaffer's Snorkel to get the complete picture.


Good luck!

Edited by Kelly G

May we live, not by our fears but by our hopes; not by our words but by our deeds; not by our disappointments but by our dreams.

Link to comment
Share on other sites

http://img.photobucket.com/albums/v249/takematsu/SheafferPFMguts.jpg


The main problem is the need of a special tool to take the threaded connector out of the section so you can get at the point gasket (and why I screwed it back in for this picture, I can't imagine). I got mine from Martin Ferguson, who also sells the gaskets.


I think I understand most of this diagram although I have a couple of questions:


How does the sac protector, filler tube and spring fit together, and how far do you push the snorkel tube into the sac bushing?

Link to comment
Share on other sites

Create an account or sign in to comment

You need to be a member in order to leave a comment

Create an account

Sign up for a new account in our community. It's easy!

Register a new account

Sign in

Already have an account? Sign in here.

Sign In Now


  • Most Contributions

    1. amberleadavis
      amberleadavis
      43844
    2. PAKMAN
      PAKMAN
      33558
    3. Ghost Plane
      Ghost Plane
      28220
    4. inkstainedruth
      inkstainedruth
      26730
    5. jar
      jar
      26101
  • Upcoming Events

  • Blog Comments

    • Shanghai Knife Dude
      I have the Sailor Naginata and some fancy blade nibs coming after 2022 by a number of new workshop from China.  With all my respect, IMHO, they are all (bleep) in doing chinese characters.  Go use a bush, or at least a bush pen. 
    • A Smug Dill
      It is the reason why I'm so keen on the idea of a personal library — of pens, nibs, inks, paper products, etc. — and spent so much money, as well as time and effort, to “build” it for myself (because I can't simply remember everything, especially as I'm getting older fast) and my wife, so that we can “know”; and, instead of just disposing of what displeased us, or even just not good enough to be “given the time of day” against competition from >500 other pens and >500 other inks for our at
    • adamselene
      Agreed.  And I think it’s good to be aware of this early on and think about at the point of buying rather than rationalizing a purchase..
    • A Smug Dill
      Alas, one cannot know “good” without some idea of “bad” against which to contrast; and, as one of my former bosses (back when I was in my twenties) used to say, “on the scale of good to bad…”, it's a spectrum, not a dichotomy. Whereas subjectively acceptable (or tolerable) and unacceptable may well be a dichotomy to someone, and finding whether the threshold or cusp between them lies takes experiencing many degrees of less-than-ideal, especially if the decision is somehow influenced by factors o
    • adamselene
      I got my first real fountain pen on my 60th birthday and many hundreds of pens later I’ve often thought of what I should’ve known in the beginning. I have many pens, the majority of which have some objectionable feature. If they are too delicate, or can’t be posted, or they are too precious to face losing , still they are users, but only in very limited environments..  I have a big disliking for pens that have the cap jump into the air and fly off. I object to Pens that dry out, or leave blobs o
  • Chatbox

    You don't have permission to chat.
    Load More
  • Files


×
×
  • Create New...