Jump to content

My Current (And First) Project - Os Swan Visofil Demo


angio

Recommended Posts

Hi All,


After picking up a lathe last October (a 1930s Myford ML4) to turn spare parts for pen restoration I've been toying with the idea of making my own pens. Then a broken down old Swan Visofil appeared that was good for nothing other than breaking for parts; warped barrel, chipped cap but the section and filler were sound. So I thought why not, it can't be too hard to turn a cap, barrel and inner cap to replace the knackered originals and whilst I'm at it I'll increase the proportions to more what I would find comfortable using. Also by changing the proportions I hope I will thwart anyone who might try to pass it off as an original vintage demonstrator (I'm intending to engrave it too, so there can be no doubt of it's origins).


I'm most of the way through the project and have a rough but working pen and would like some help with the next stages:


I want to add cap bands and barrel bands akin to the original: Fountinbel posted an excellent solution for cap bands but could the ER25 collet system be used for a barrel band? Will the collets be deep enough to insert 50 - 60mm of pen barrel to swage the bands? Also what is the best material to use for the bands? Ideally I want gold coloured metal to match the original clip, brass perhaps?


What's the best way of finishing the inside of the cap and barrel? Should I be able to get a better finish with a tool bit and then do a final polish with a liquid plastic polish? What do other people do with transparent parts?


I'm also going to replace the latex sac with a silicon one so the spring in the filler can be seen.


Thoughts, comments and advice is always welcomed and gratefully received!


Current dimensions:

149mm capped

15mm cap diameter

13mm barrel diameter

5.5ml Ink capacity


DSC03909.JPG


DSC03911.JPG


DSC03912.JPG


Link to comment
Share on other sites

  • Replies 16
  • Created
  • Last Reply

Top Posters In This Topic

  • fountainbel

    3

  • Jerry Adair

    3

  • angio

    3

  • bluejay

    1

No it isn't a piston filler; it's a British interpretation of the vacumatic. Give me a few minutes and I'll get you some pictures of the filler disassembled.

Link to comment
Share on other sites

"What's the best way of finishing the inside of the cap and barrel? Should I be able to get a better finish with a tool bit and then do a final polish with a liquid plastic polish? What do other people do with transparent parts?"

Sand the inside before you thread anything. Also, don't sand with the lathe on. Do it by hand so you won't get radial marks.

Link to comment
Share on other sites

  • 7 months later...

Well done Angio, bravo !

As for swaging the bands, I've experienced that the wall thickness of the ring should be at least 0,25mm.

The cap/barrel seat groove should be 0.20 mm deep (and 0,2 mm wider as the ring width)

This avoids the ring wall penetrates in the axial ER25 collet grooves.

Brass will work perfectly for swaging, .

Using the standard collet one can swage rings maximum 40mm far on the part.

When the ring is further on the barrel you have to drill the collet holder bore deeper ( not easy since harden to 50 HRC)

As for obtaining a perfect surface finish of the barrel bore :

Drilling should occur slow feed, applying cutting oil, the last step before making the final diameter should be 0,2 /0,3mm smaller as the final diameter

Finish using a perfect sharp drill, spray generously cutting oil in the bore before starting drilling , slow feed,and don't retract the drill over the complete drilling operation.

And last but not least : Only retract the drill after the machine chuck has stopped to rotate

You will be surprised seeing the perfect surface finish you can obtain by doing so.

Wishing you success !

Francis


Hi All,


After picking up a lathe last October (a 1930s Myford ML4) to turn spare parts for pen restoration I've been toying with the idea of making my own pens. Then a broken down old Swan Visofil appeared that was good for nothing other than breaking for parts; warped barrel, chipped cap but the section and filler were sound. So I thought why not, it can't be too hard to turn a cap, barrel and inner cap to replace the knackered originals and whilst I'm at it I'll increase the proportions to more what I would find comfortable using. Also by changing the proportions I hope I will thwart anyone who might try to pass it off as an original vintage demonstrator (I'm intending to engrave it too, so there can be no doubt of it's origins).


I'm most of the way through the project and have a rough but working pen and would like some help with the next stages:


I want to add cap bands and barrel bands akin to the original: Fountinbel posted an excellent solution for cap bands but could the ER25 collet system be used for a barrel band? Will the collets be deep enough to insert 50 - 60mm of pen barrel to swage the bands? Also what is the best material to use for the bands? Ideally I want gold coloured metal to match the original clip, brass perhaps?


What's the best way of finishing the inside of the cap and barrel? Should I be able to get a better finish with a tool bit and then do a final polish with a liquid plastic polish? What do other people do with transparent parts?


I'm also going to replace the latex sac with a silicon one so the spring in the filler can be seen.


Thoughts, comments and advice is always welcomed and gratefully received!


Current dimensions:

149mm capped

15mm cap diameter

13mm barrel diameter

5.5ml Ink capacity


DSC03909.JPG


DSC03911.JPG


DSC03912.JPG


Link to comment
Share on other sites

Francis

Great advice re the finish in the bore I invested in a drill sharpener $125 or so and that is how I do it as well. I once used lapping compound.

Question you wrote: "When the ring is further on the barrel you have to drill the collet holder bore deeper ( not easy since harden to 50 HRC" I assume you mean 50 Rockwell if yes then I have no knowledge of drilling that hard of material only grind it. Let me know how you drill it and what the material of the bit is as well as feed and speed.

Thanks.

BTW angio that is excellent for your first try, my compliments. Did you thread the barrel and cap on your lathe or use a tap and die?

Jerry

Hi Jerry,

Yes, 50HRC means 50 Rockwell C.

The hardness behind the collet cone could be someway lower though, maybe 45HRC.

I've simply used a top quality HSS drills and plenty of cutting oil and succeeded in deepening the bore.

Had to re-sharpen the bore 2 times though...

Francis

Link to comment
Share on other sites

Francis

Got you by a few years at 74 Sept 1st

I too am an engineer by trade and a salesman by profession. I am interested in your filling system. Where might I buy one to try? I am/was in the motor business until this Monday. I retired feels good now I can play lathe and mill all day. I just finished an overlay titanium C2 and flame anodized it. Looks pretty good. My lawyer wife grabbed it so anther starts next Monday. Thanks for the info although not likely that I will be playing with 50 to 55 RC. I have great lathes an Atlas 612 with a tricked out dc drive a Taig and a pristine Sherline with anther custom dc drive I made

.

Stay well

Jerrt


Hi Jerry,

Nice to read you are a fellow pen making engineer !

I've designed and prototyped the different Bulk filler models, but I don't make them in series nor sell them.

Conid in Antwerp Belgium produces the various models in small series.

You can buy the Bulk filler in the Conid web shop.

Cheers, Francis

Link to comment
Share on other sites

I see threads already so I think finishing the interior is already going to be a lost cause since you need to sand it down to be smooth so no ink will get trapped in the small grooves in the pen then you can give the exterior a frosted look if you wish...

Link to comment
Share on other sites

You can see the threads principally because of the contrast of the section. He will not sand it unless he uses micro cloth and it is not a lost cause. He is well on his way to a beautiful creation


Jerry

Link to comment
Share on other sites

  • 2 weeks later...

Hi All,


Thank you Francis for the advice; now I just need to go off and practice!


I cut almost all of the threads on the lathe - one of the benefits of using a metal lathe. The one I didn't, I made the tap on the lathe first.


With regards to drilling the barrel, I found that the drill bit overheats quite quickly even at low speeds and causes the poor finish inside. I could be trying to remove too much material but I used incrementally larger drill bits so the thickness removed each time was only about 1mm for the last couple of passes. I probably need to use more cutting fluid.


My drill bits are black; could silver ones handle the heat better?


Basically I need more practice.


What I have done in the meantime is redesign the filler and fit a #6 Knox steel nib:

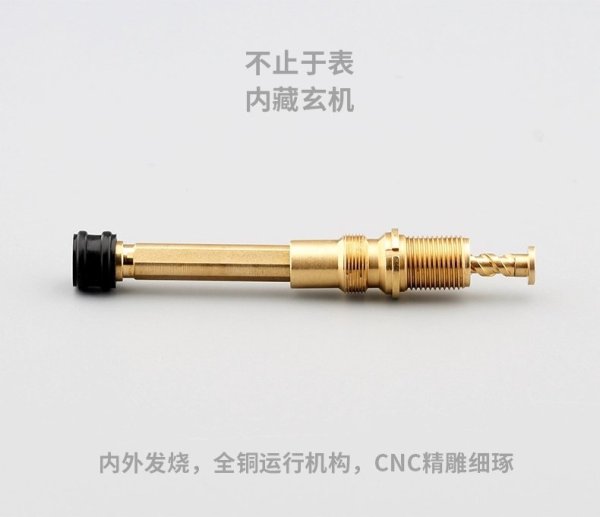
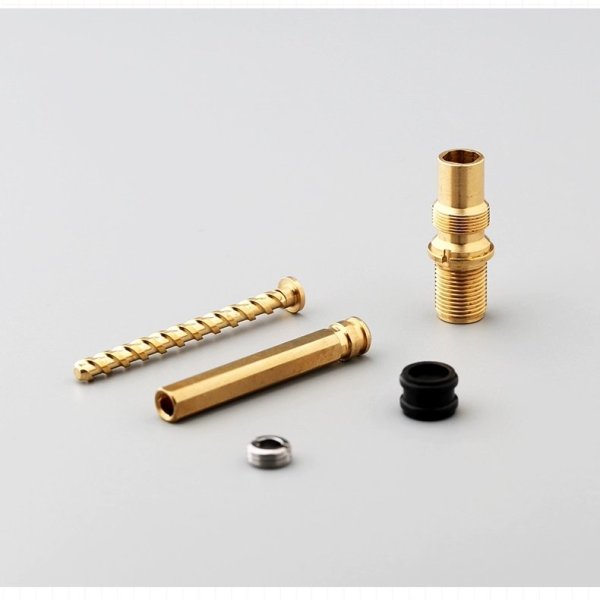
I wanted to produce a pen that I could make multiple copies of and the fact I was using the feed, nib, section and filler from (rare?) uncommon vintage pen meant I had to look elsewhere. The closest modern approximation of the vacumatic filling system in the Swan Visofil I felt was the system used in the Tibaldi Iride and once again thank you to Francis for posting his fix for the crystallised Iride where I was able to adapt his designs for my pen. Another nice thing about the Iride style filller is that the whole filler unit screws into the barrel as a single unit


The interesting thing I found out about this filler is that the internal diameter of the barrel is large enough that the down stroke of the plunger when filling is only about 7mm of travel which is about half of the distance of Parker 51 vacumatic. Even with this short stroke and a long breather tube the pen still fills in about four strokes. It's perfectly logical when you think about it but I found it interesting enough to mention.


Then came the nib (actually the nib was the first modification which is why the breather tube has the bends in it) which needed a breather tube fitted. I had to pull the nib and feed from the collar and drill into the back to fit the breather tube and then down from the top for the vent hole - very nerve-wracking but it worked. I also turned a new section which due to the difference in lengths required a new inner cap.


I wasn't happy with the ratios of the cap to barrel lengths so I shortened the length of the cap in the process too.


I also need to put a cap band on it. I don't think it looks right with out one.


This pen was only ever meant to be a practice/prototype so it is as rough as a dog with a hangover covered in sandpaper. That being said, it works brilliantly and I've been using it for the past few months. Ultimately I intend to make one out of a marbled and transparent resin like the Iride.


Any comments or suggestions are welcome!


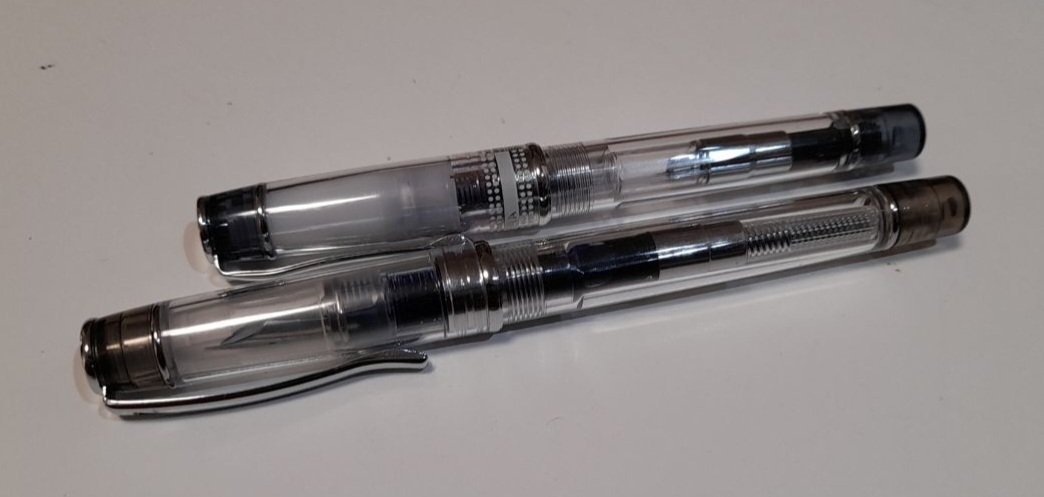
For size comparison here it is beside a Kullock fantasy P51 demo

20140923_093013.jpg


20140923_093547.jpg


20140923_092855.jpg


20140923_093504.jpg

Link to comment
Share on other sites

Two possibilities with your drilled finish.

First is that if you used extruded acrylic instead of the harder to find cast acrylic. The extruded is softer and gets softer when drilling than the cast.

Second is if the drill bits you have are not sharp or have rough flutes the holes may be affected. Quality high speed steel (HSS) usually have a better finish but keep in mind HSS bits also come in black or blue with just as good as good a finish as the shiny ones. So if yours are a quality bit then the colour may just be cosmetic.

:eureka: Oh I guess third thing might help if you aren't already doing it. :rolleyes: Drill slow (feed and speed) with lots of lubricant.


Pete

Link to comment
Share on other sites

With regard to extruded acrylic:

  • It can crack within a month or so of machining due to internal stresses. However it can be annealed by simmering in boiling water for 20 minutes per inch of thickness. It can distort during this time, so start with a larger thickness than you need and machine after annealing.
  • The finish you are getting after drilling is, whatever you may think, superb for a straight machined finish. Acrylic always needs polishing, and it's all the more obvious when transparent. Polishing could be with micromesh, rubber blocks with abrasive bound in them, small buffing wheels etc. Or, try being a bit more adventurous with flame polishing. It's a technique I have never risked trying, but if you flash melt the surface by washing a flame over it, it is supposed to self polish.
  • Acrylic, as you have found, does not conduct heat away from the cutting point. To reduce heat, you could grind away the flutes of the drill behind the tip, as this will reduce rubbing. increasing the rake angle is supposed to help, but it's much more likely to snatch if you do this. Flood cooling is needed for moderate feed rates, preferably with drills with coolant holes to the tip. Final option that I found worked quite well was submerged drilling in the drill press. Basically drill the hole down the middle of the blank and ensure that coolant fills the hole at all times. Then on the lathe use a mandrel that locates on the hole down the middle for the first external cut until everything can be made concentric. In the drill press using this method I use a low feed and 80 rpm on the drill. If the drill press could go slower, I'd go slower.

Hope this helps a bit


Richard.

Link to comment
Share on other sites

  • 1 year later...

Create an account or sign in to comment

You need to be a member in order to leave a comment

Create an account

Sign up for a new account in our community. It's easy!

Register a new account

Sign in

Already have an account? Sign in here.

Sign In Now


  • Most Contributions

    1. amberleadavis
      amberleadavis
      43844
    2. PAKMAN
      PAKMAN
      33559
    3. Ghost Plane
      Ghost Plane
      28220
    4. inkstainedruth
      inkstainedruth
      26744
    5. jar
      jar
      26101
  • Upcoming Events

  • Blog Comments

    • Shanghai Knife Dude
      I have the Sailor Naginata and some fancy blade nibs coming after 2022 by a number of new workshop from China.  With all my respect, IMHO, they are all (bleep) in doing chinese characters.  Go use a bush, or at least a bush pen. 
    • A Smug Dill
      It is the reason why I'm so keen on the idea of a personal library — of pens, nibs, inks, paper products, etc. — and spent so much money, as well as time and effort, to “build” it for myself (because I can't simply remember everything, especially as I'm getting older fast) and my wife, so that we can “know”; and, instead of just disposing of what displeased us, or even just not good enough to be “given the time of day” against competition from >500 other pens and >500 other inks for our at
    • adamselene
      Agreed.  And I think it’s good to be aware of this early on and think about at the point of buying rather than rationalizing a purchase..
    • A Smug Dill
      Alas, one cannot know “good” without some idea of “bad” against which to contrast; and, as one of my former bosses (back when I was in my twenties) used to say, “on the scale of good to bad…”, it's a spectrum, not a dichotomy. Whereas subjectively acceptable (or tolerable) and unacceptable may well be a dichotomy to someone, and finding whether the threshold or cusp between them lies takes experiencing many degrees of less-than-ideal, especially if the decision is somehow influenced by factors o
    • adamselene
      I got my first real fountain pen on my 60th birthday and many hundreds of pens later I’ve often thought of what I should’ve known in the beginning. I have many pens, the majority of which have some objectionable feature. If they are too delicate, or can’t be posted, or they are too precious to face losing , still they are users, but only in very limited environments..  I have a big disliking for pens that have the cap jump into the air and fly off. I object to Pens that dry out, or leave blobs o
  • Chatbox

    You don't have permission to chat.
    Load More
  • Files


×
×
  • Create New...