Jump to content

... homemade journal ...


TMLee

Recommended Posts

Excellent TM Lee!! Maybe cutting the very corner so the creases dicrease... ahem, are reduced. 45°, not counter-rounded. Maybe cuting tiny, almost microscopic slits, like in the example I showed you some months ago, so the bulk is diminished. Anyway, result is QUITE impressive. I can almost feel the softness of the round corner. Oh, if only I could get some skin. No pun intended! :)


Cheers!

Aristarco Palacios

Visit My Website to see pics of my humble works on binding

Link to comment
Share on other sites

  • Replies 1.8k
  • Created
  • Last Reply

Top Posters In This Topic

  • TMLee

    1127

  • mhguda

    32

  • pen2paper

    23

  • Earthdawn

    20

Top Posters In This Topic

Posted Images

Let me start out by saying that those are some of the nicest journals that I have ever seen! The fact that the signatures are showing is quite cool, making these NEARLY demonstrator journals!


One suggestion I do have is to not get too caught up in them. If at any time it becomes a chore, I would advise you to look back at the reason you are making them in the first place. If it is for extra money, go ahead even when it gets bad, but if it is for fun, and the money is a perk, I would suggest staying in only as long as it is fun.


thanks for your suggestion.

Rgds


... 671 crafted ... one at a time ... ☺️

instagram

Link to comment
Share on other sites

Excellent TM Lee!! Maybe cutting the very corner so the creases dicrease... ahem, are reduced. 45°, not counter-rounded. Maybe cuting tiny, almost microscopic slits, like in the example I showed you some months ago, so the bulk is diminished. Anyway, result is QUITE impressive. I can almost feel the softness of the round corner. Oh, if only I could get some skin. No pun intended! :)


Cheers!


Tks Aristarco,

I am not sure I understand what u mean when u said cut thecorners?


Yr previous link is interesting. I haven't tried it yet.

I think I have problems cutting the curvature bcos the lambskin is so soft.


... 671 crafted ... one at a time ... ☺️

instagram

Link to comment
Share on other sites

I mean, instead of having the skin to form 90° corners before wrapping it over the round, why not cutting it at 45°, then wrap it over the round. It's a foolish idea, maybe it won't change anything, but in my mind, I see less bulk when wrapped and glued.Maybe I need some rest :D

Aristarco Palacios

Visit My Website to see pics of my humble works on binding

Link to comment
Share on other sites

Dear Aristarco, I am afraid I have trouble understanding what you are describing ...


anyway , ....


A few nites ago , I tried this ... I didn't do the corners the usual way, ie cutting the corners into many sharp triangular spikes.


I decided to try making creases like what I did for leather corners.

I wanted a smooth rounded corner without any cuts.

I figured that fabric is much thinner than leather and ought to be more do-able.


This time, I only cut out 2 triangles at the tangents - each where the round corner meets the straightedges.

Then, I made creases as I folded into the corners.

The corners were then clamped to flatten out whatever folds.


The end result is promising.

(I didn't take photos each step of the process)


Here are the end results


Here the corners are fully rounded and smooth - no noticeable cutlines or segmented cuts.

I like this . Its like its perfectly moulded into the corners.

http://i169.photobucket.com/albums/u236/TMLee/round%20corners%20uncut/DSCF5698.jpg


The endview of the corner showing the same.

http://i169.photobucket.com/albums/u236/TMLee/round%20corners%20uncut/DSCF5699.jpg


some more pics of other corners

http://i169.photobucket.com/albums/u236/TMLee/round%20corners%20uncut/DSCF5700.jpg http://i169.photobucket.com/albums/u236/TMLee/round%20corners%20uncut/DSCF5702.jpg

Edited by TMLee

... 671 crafted ... one at a time ... ☺️

instagram

Link to comment
Share on other sites

Dear Aristarco, I am afraid I have trouble understanding what you are describing ...


anyway , ....


Oh man, I am so bad describing things using words. :headsmack: I'm an engineer, I need to draw while speaking so, here it is what I say... in images.


post-17708-1246497863_thumb.jpg

Aristarco Palacios

Visit My Website to see pics of my humble works on binding

Link to comment
Share on other sites

This is Journal #43D (A5 size) "Briar"


Its finally completed eversince doing the corner bands earlier posted here.


I managed to buy a spool of the same heavy waxed cord (natural colour) in a deep brown colour. This way, I can then make stitches two-tone like what I did earlier in the Briar A6 size. That one was using yellow and brown cotton thread that was waxed.

Here its a better cord that is flattish and waxed and gives a better end result.


The Front with and without bands deployed

http://i169.photobucket.com/albums/u236/TMLee/Journal%2043D%20A5%20Briar/DSCF5713.jpg http://i169.photobucket.com/albums/u236/TMLee/Journal%2043D%20A5%20Briar/DSCF5717.jpg


The Back

http://i169.photobucket.com/albums/u236/TMLee/Journal%2043D%20A5%20Briar/DSCF5718.jpg


Full spread

http://i169.photobucket.com/albums/u236/TMLee/Journal%2043D%20A5%20Briar/DSCF5709.jpg http://i169.photobucket.com/albums/u236/TMLee/Journal%2043D%20A5%20Briar/DSCF5710.jpg


The spine with the ribbon pagemarker added

http://i169.photobucket.com/albums/u236/TMLee/Journal%2043D%20A5%20Briar/DSCF5711.jpg http://i169.photobucket.com/albums/u236/TMLee/Journal%2043D%20A5%20Briar/DSCF5715.jpg http://i169.photobucket.com/albums/u236/TMLee/Journal%2043D%20A5%20Briar/DSCF5716.jpg


The two-tone stitches

http://i169.photobucket.com/albums/u236/TMLee/Journal%2043D%20A5%20Briar/DSCF5703.jpg


The head (with the ribbon embedded)

http://i169.photobucket.com/albums/u236/TMLee/Journal%2043D%20A5%20Briar/DSCF5704.jpg


The middle

http://i169.photobucket.com/albums/u236/TMLee/Journal%2043D%20A5%20Briar/DSCF5705.jpg


The tail

http://i169.photobucket.com/albums/u236/TMLee/Journal%2043D%20A5%20Briar/DSCF5706.jpg


Some close-ups showing the 2 different coloured stitches intertwined. The two colours match the colours on the fabric.

http://i169.photobucket.com/albums/u236/TMLee/Journal%2043D%20A5%20Briar/DSCF5707.jpg http://i169.photobucket.com/albums/u236/TMLee/Journal%2043D%20A5%20Briar/DSCF5708.jpg


The flyleaves and 'anti drop-out" flap

http://i169.photobucket.com/albums/u236/TMLee/Journal%2043D%20A5%20Briar/DSCF5721.jpg


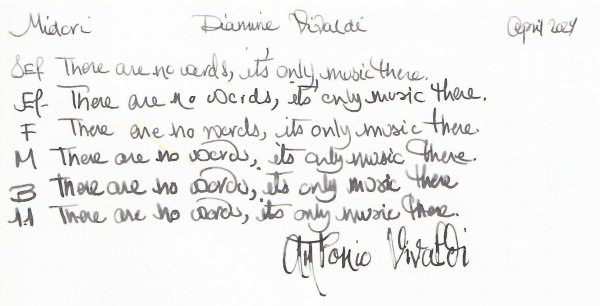
the Colophon and inktestpage

http://i169.photobucket.com/albums/u236/TMLee/Journal%2043D%20A5%20Briar/DSCF5722.jpg

http://i169.photobucket.com/albums/u236/TMLee/Journal%2043D%20A5%20Briar/DSCF5725.jpg


7 signatures , 112 pages

Edited by TMLee

... 671 crafted ... one at a time ... ☺️

instagram

Link to comment
Share on other sites

I'll take it!!!!


You keep posting photos of these journals with that sexy Omas and my resistance weakens...


cheers


Wael


This is Journal #43D (A5 size) "Briar"


Its finally completed eversince doing the corner bands earlier posted here.


7 signatures , 112 pages


“Non Impediti Ratione Cogitationis”

Link to comment
Share on other sites

Oh my goodness, I just realized that I have not taken any pictures of the fabulous Batik journal you made! I've been remiss!


Note to self: Take photos and upload already, crissake.

_________________

etherX in To Miasto

Fleekair <--French accent.

Link to comment
Share on other sites

Dear Aristarco, I am afraid I have trouble understanding what you are describing ...


anyway , ....


Oh man, I am so bad describing things using words. :headsmack: I'm an engineer, I need to draw while speaking so, here it is what I say... in images.


post-17708-1246497863_thumb.jpg


Yes I understand what u mean now.

I have practising this in all my journals.

However, cutting away these corners do not reduce the bulk of the folded corners.

It only reduces the length of the material that is folded over.


What I did discover is that gluing the fabric corners thoroughly wet and then creasing while foldingover and then clamping DOES flatten the corners very well.

A few more tries shld see marked improvements.


The quest to make the perfect journal goes on ... :D

... 671 crafted ... one at a time ... ☺️

instagram

Link to comment
Share on other sites

I'll take it!!!!


You keep posting photos of these journals with that sexy Omas and my resistance weakens...


cheers


Wael


This is Journal #43D (A5 size) "Briar"


Its finally completed eversince doing the corner bands earlier posted here.


7 signatures , 112 pages


dear Wael,

Thank you for your enthusiasm even tho I haven't offerred it up for sale yet.

It's yours :-). Will PM you.


And yes .... "Resistance is futile ..."

it's a hard one to find these days.


... 671 crafted ... one at a time ... ☺️

instagram

Link to comment
Share on other sites

Oh my goodness, I just realized that I have not taken any pictures of the fabulous Batik journal you made! I've been remiss!


Note to self: Take photos and upload already, crissake.


great!

look forward to seeing yr pics, though I am half guessing that perhaps pics ought to be posted in the other sub-forum.


What FP did you intend to photograph with again ? I forgot.


... 671 crafted ... one at a time ... ☺️

instagram

Link to comment
Share on other sites

This is my recent attempt on folding over rounded corners with fabric.


Continuing from what was mentioned above regarding corners, i tried a different technique.


Here the corner is cut off 45degrees.

Then one slit is cut at each tangential.

Then its thoroughly wet with glue.

http://i169.photobucket.com/albums/u236/TMLee/Rounded%20corners%20fabric/DSCF5727.jpg


This is different from my usual method of cutting out several wedge-shaped pieces at the corners before folding in.


Next, just use your fingers and pinch the fabric together to make creases.

Then fold over onto the greyboard.

http://i169.photobucket.com/albums/u236/TMLee/Rounded%20corners%20fabric/DSCF5733.jpg


Next, continue to flatten the freshly foldedover fabric onto the greyboard.

No need for more glue here bcos the fabric is already thoroughly wet and since fabric is porous, the glue will just permeate thru the fabric.

http://i169.photobucket.com/albums/u236/TMLee/Rounded%20corners%20fabric/DSCF5734.jpg


The two long edges are then folded over, whilst the corners are still wet .

This is important bcos being wet still allows you to knead away unwanted bumps and folds.

Two things to look at in this pic.

1) the resulting corner EDGE is nice and smooth and continuous,

2) but the corner from the folded fabric is still quite bulky.

http://i169.photobucket.com/albums/u236/TMLee/Rounded%20corners%20fabric/DSCF5737.jpg


To reduce this bulk, I clamped the corners carefully.

http://i169.photobucket.com/albums/u236/TMLee/Rounded%20corners%20fabric/DSCF5740.jpg


After clamping, the bulk is reduced a little bit.

But it can't be any thinner than the many layers of fabric that is folded over each other.


This is then the subsequent attempt to redress this bulk.

so, logically,

I cut out some wedge-shaped pieces at each tangential.

The reason for doing this is to reduce the amount of layers of fabric under each other.

http://i169.photobucket.com/albums/u236/TMLee/Rounded%20corners%20fabric/DSCF5741.jpg


There is some improvement.

Here you see less of the greyboard being covered by fabric folded over.

http://i169.photobucket.com/albums/u236/TMLee/Rounded%20corners%20fabric/DSCF5742.jpg


The corners are then clamped to flatten it.


The end result is a flatter corner but with smoother rounded edges.

http://i169.photobucket.com/albums/u236/TMLee/Rounded%20corners%20fabric/DSCF5744.jpg http://i169.photobucket.com/albums/u236/TMLee/Rounded%20corners%20fabric/DSCF5747.jpg


I am just thinking now how to further improve, perhaps after pinching , maybe I can snip off the piece of the fabric thats upright in the 2nd pic above.....


A few more variations needed I suppose ...

Edited by TMLee

... 671 crafted ... one at a time ... ☺️

instagram

Link to comment
Share on other sites

#58C and #58D "Red Stripes ... " being offered for sale here.


Tks for looking.


... 671 crafted ... one at a time ... ☺️

instagram

Link to comment
Share on other sites

This is Journal #61 "Dragonflies"


This is one in a series of fabrics of Japanese prints all done with a typical blue background..

Dragonflies in Japanese culture have good meanings. Scroll down to the sub-heading "Japan"

I like Japanese prints depicting dragonflies. They look quietly elegant.

At least 2 of my earlier journals have dragonfly prints. A blue one and a matching maroon one.

This is the third one.


Front with and without the band deployed.

Pictured with an FPN Bexley for scale.

http://i169.photobucket.com/albums/u236/TMLee/Journal%2061%20Dragonflies/DSCF5753.jpg http://i169.photobucket.com/albums/u236/TMLee/Journal%2061%20Dragonflies/DSCF5755.jpg


The Rear

http://i169.photobucket.com/albums/u236/TMLee/Journal%2061%20Dragonflies/DSCF5754.jpg


Full spread

http://i169.photobucket.com/albums/u236/TMLee/Journal%2061%20Dragonflies/DSCF5761.jpg


I decided to use a red ribbon pagemarker instead bcos I felt it added a nice dash of colour that complements the little hint of red in the dragonfly print.

As usual, whenever a ribbon pagemarker is incorporated, I would stitch 7 signatures instead of my usual six.

The only reason is to seat the ribbon in the exact centre of the spine to achieve symmetry.

http://i169.photobucket.com/albums/u236/TMLee/Journal%2061%20Dragonflies/DSCF5756.jpg http://i169.photobucket.com/albums/u236/TMLee/Journal%2061%20Dragonflies/DSCF5758.jpg


The blue flyleaves with the "anti drop-out" flap

http://i169.photobucket.com/albums/u236/TMLee/Journal%2061%20Dragonflies/DSCF5759.jpg http://i169.photobucket.com/albums/u236/TMLee/Journal%2061%20Dragonflies/DSCF5760.jpg


There are two new things I tried out in this journal.

First , is the different technique of folding in the rounded corners.

Compared against all my journals so far, the corners in this one are 'smoother' with less segmented cuts.

I tried to take some macro shots but you have to look closely to understand what I mean.

I guess the best way is to just feel the contours of the rounded corners with your finger to understand. You would feel almost no cuts at all.

http://i169.photobucket.com/albums/u236/TMLee/Journal%2061%20Dragonflies/DSCF5765.jpg


The second new thing I tried out , was to try to make the pocket protrude less or not at all from the edges of the covers.

My journals so far have pocket hinges that protrude by about 1mm.

So here, I decided to cut out about 1mm from the edge of the flyleaf that receives the pocket hinge.

http://i169.photobucket.com/albums/u236/TMLee/Journal%2061%20Dragonflies/DSCF5762.jpg


A close-up that shows the cut made.

The vellum hinges here do not protrude from the edge of the covers.

http://i169.photobucket.com/albums/u236/TMLee/Journal%2061%20Dragonflies/DSCF5764.jpg http://i169.photobucket.com/albums/u236/TMLee/Journal%2061%20Dragonflies/DSCF5774.jpg


The ink testpage and colophon

http://i169.photobucket.com/albums/u236/TMLee/Journal%2061%20Dragonflies/DSCF5770.jpg http://i169.photobucket.com/albums/u236/TMLee/Journal%2061%20Dragonflies/DSCF5766.jpg


7 Signatures , 112 pages total.

Paper is NATURALIS Soft White (Smooth) 120gsm.

Edited by TMLee

... 671 crafted ... one at a time ... ☺️

instagram

Link to comment
Share on other sites

Yet to be crafted Journal #62 "Capetown" offered on a commission basis here - well sort of .... :embarrassed_smile:


Tks for looking ...

Edited by TMLee

... 671 crafted ... one at a time ... ☺️

instagram

Link to comment
Share on other sites

Rounded corners in fabric - 3rd attempt.


Here i am trying a totally uncut technique.


Almost there ....

I think I just need to settle on a certain procedure, pattern.


Here is the initial tryout ...

Started at the centre of the rounded corner.

In my haste and fast drying glue, the tangentials were not creased quickly. Hence the folds were spread out over a large area. Not good.

http://i169.photobucket.com/albums/u236/TMLee/Rounded%20corners%20fabric%203rd/DSCF5793.jpg http://i169.photobucket.com/albums/u236/TMLee/Rounded%20corners%20fabric%203rd/DSCF5794.jpg


On the next tryout, the folds were arranged in a radial pattern, this time taking care to ensure they are all concentrated around the rounded corner.

It looks alot more neater but the bulk returned !

All corners were clamped to flatten them.

http://i169.photobucket.com/albums/u236/TMLee/Rounded%20corners%20fabric%203rd/DSCF5795.jpg http://i169.photobucket.com/albums/u236/TMLee/Rounded%20corners%20fabric%203rd/DSCF5796.jpg


Here are closeup shots of the smooth corners around the edge.

No traces of cut fabric.

http://i169.photobucket.com/albums/u236/TMLee/Rounded%20corners%20fabric%203rd/DSCF5798.jpg http://i169.photobucket.com/albums/u236/TMLee/Rounded%20corners%20fabric%203rd/DSCF5799.jpg


Any constructive comments welcomed. :)

Edited by TMLee

... 671 crafted ... one at a time ... ☺️

instagram

Link to comment
Share on other sites

This is Journal #63 "Tracks" Batik


This is the journal that is completed with the rounded corner fold-in technique described above.

No cuts were made to the corner fabric.


This journal has a few new features incorporated :

- the corners folded-in without cutting any slits on the fabric corners ;

- 7 signatures (instead of 6) using my favourite writing paper 135gsm (instead of 120gsm) ;

- hinge pockets that do not protrude out of the journal edges.


The fabric here is genuine Batik that is hand-dyed. Its a beautiful fabric.

Its a nice rust colour with graphics that look much like tyre tracks running all over it.

The abstract random pattern of the tracks lend a nice aesthetics to the overall composition.


Front with the Etruria Alter Ego for scale.

The two make a nice match. :)

http://i169.photobucket.com/albums/u236/TMLee/Journal%2063%20Tracks%20Batik/DSCF5839_1.jpg http://i169.photobucket.com/albums/u236/TMLee/Journal%2063%20Tracks%20Batik/DSCF5833_1.jpg


http://i169.photobucket.com/albums/u236/TMLee/Journal%2063%20Tracks%20Batik/DSCF5830_1.jpg http://i169.photobucket.com/albums/u236/TMLee/Journal%2063%20Tracks%20Batik/DSCF5831_1.jpg


I chose a nice wine red for the flyleaves to complement the deep maroon graphics of the tracks.

Here you see the adjustable "anti drop-out" flap.

http://i169.photobucket.com/albums/u236/TMLee/Journal%2063%20Tracks%20Batik/DSCF5835_1.jpg http://i169.photobucket.com/albums/u236/TMLee/Journal%2063%20Tracks%20Batik/DSCF5836_1.jpg


Full spread. Fabric cut from one piece.

http://i169.photobucket.com/albums/u236/TMLee/Journal%2063%20Tracks%20Batik/DSCF5844_1.jpg


I wanted a 2-tone stitch for this journal thinking it would add to the aesthetics.

It looks great on the spine but not so pleasant (I think) on the covers.

The next few variants will have the stitches in various permutations.

I chose a similar shade of bronze maroon ribbon to match the cord.

Here you see it planted on the 4th (middle) signature.

http://i169.photobucket.com/albums/u236/TMLee/Journal%2063%20Tracks%20Batik/DSCF5843_1.jpg http://i169.photobucket.com/albums/u236/TMLee/Journal%2063%20Tracks%20Batik/DSCF5842_1.jpg http://i169.photobucket.com/albums/u236/TMLee/Journal%2063%20Tracks%20Batik/DSCF5841_1.jpg http://i169.photobucket.com/albums/u236/TMLee/Journal%2063%20Tracks%20Batik/DSCF5840_1.jpg


I have been resisting using 135gsm paper for 7 signatures on an A6 journal.

The reason is bcos I want the journal to keep to that 1cm thick thumbrule for writing comfort. (the bookblocks in my journals with 6 signatures of 120gsm paper are quite consistent at 1cm thick.)

With 7 signatures and 135gsm paper, the bookblock here is thicker. Its about 3mm thicker than the bookblock with 6 signatures.

3mm may not be much but I guess it remains to be road-tested.


The other last new feature is the pocket hinges.

They don't protrude out of the journal anymore.

I cut away the flyleaves and pockets about 0.5mm along the edge to accomodate the tracing vellum hinges.

http://i169.photobucket.com/albums/u236/TMLee/Journal%2063%20Tracks%20Batik/DSCF5847_1.jpg http://i169.photobucket.com/albums/u236/TMLee/Journal%2063%20Tracks%20Batik/DSCF5848_1.jpg http://i169.photobucket.com/albums/u236/TMLee/Journal%2063%20Tracks%20Batik/DSCF6333_1.jpg http://i169.photobucket.com/albums/u236/TMLee/Journal%2063%20Tracks%20Batik/DSCF6334_1.jpg


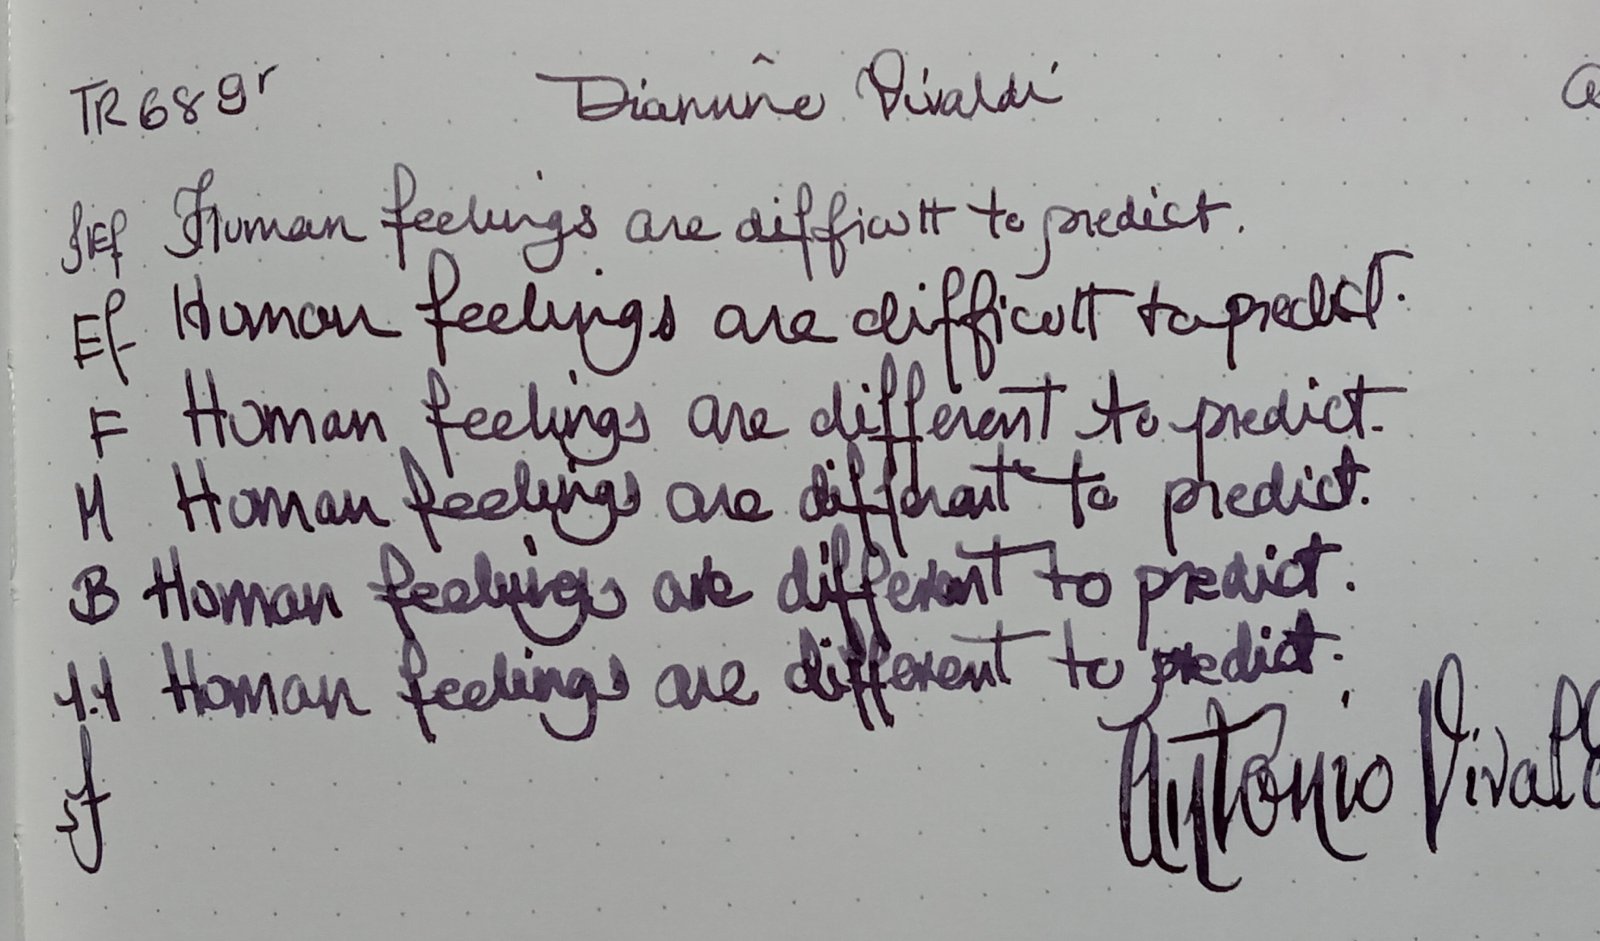
The inktestpage and Colophon

http://i169.photobucket.com/albums/u236/TMLee/Journal%2063%20Tracks%20Batik/DSCF5838_1.jpg http://i169.photobucket.com/albums/u236/TMLee/Journal%2063%20Tracks%20Batik/DSCF5845_1.jpg

Edited by TMLee

... 671 crafted ... one at a time ... ☺️

instagram

Link to comment
Share on other sites

Guest
This topic is now closed to further replies.


  • Most Contributions

    1. amberleadavis
      amberleadavis
      43844
    2. PAKMAN
      PAKMAN
      33583
    3. Ghost Plane
      Ghost Plane
      28220
    4. inkstainedruth
      inkstainedruth
      26772
    5. jar
      jar
      26105
  • Upcoming Events

  • Blog Comments

    • Shanghai Knife Dude
      I have the Sailor Naginata and some fancy blade nibs coming after 2022 by a number of new workshop from China.  With all my respect, IMHO, they are all (bleep) in doing chinese characters.  Go use a bush, or at least a bush pen. 
    • A Smug Dill
      It is the reason why I'm so keen on the idea of a personal library — of pens, nibs, inks, paper products, etc. — and spent so much money, as well as time and effort, to “build” it for myself (because I can't simply remember everything, especially as I'm getting older fast) and my wife, so that we can “know”; and, instead of just disposing of what displeased us, or even just not good enough to be “given the time of day” against competition from >500 other pens and >500 other inks for our at
    • adamselene
      Agreed.  And I think it’s good to be aware of this early on and think about at the point of buying rather than rationalizing a purchase..
    • A Smug Dill
      Alas, one cannot know “good” without some idea of “bad” against which to contrast; and, as one of my former bosses (back when I was in my twenties) used to say, “on the scale of good to bad…”, it's a spectrum, not a dichotomy. Whereas subjectively acceptable (or tolerable) and unacceptable may well be a dichotomy to someone, and finding whether the threshold or cusp between them lies takes experiencing many degrees of less-than-ideal, especially if the decision is somehow influenced by factors o
    • adamselene
      I got my first real fountain pen on my 60th birthday and many hundreds of pens later I’ve often thought of what I should’ve known in the beginning. I have many pens, the majority of which have some objectionable feature. If they are too delicate, or can’t be posted, or they are too precious to face losing , still they are users, but only in very limited environments..  I have a big disliking for pens that have the cap jump into the air and fly off. I object to Pens that dry out, or leave blobs o
  • Chatbox

    You don't have permission to chat.
    Load More
  • Files


×
×
  • Create New...