Jump to content

Hero 616 Cap Adjustment Fix Photos


Flounder

Recommended Posts

The recent spate of excellent and informative posts on the Hero 616 prompted me to buy a 3 pack of the 'jumbo' size pens from eBay seller Yespen, in black, burgandy, and bluey-green. After the much appreciated efforts of members here, I'd like to contribute with a "tweak the cap to fit properly" photo set. I've tried to make this less long winded than my usual sagas.


Of the 3 pens I bought, only the green 616 had a cap that functioned the way I expected it to when capping onto the body, the cap clutch locking positively between the metal rings on the body of the pen. The black and burgandy pens had caps that just jam onto the pen without the clutch fingers reaching the rings. After reading reviews by Nihontochicken and Dillo, I realised that quite a few of these pens must have problem caps. It's a case of excellent design and variable execution.


The really good news is that the problem is easily fixed - nothing to do with the clutch fingers in the cap, or the rings on the body of the pen. The culprit is the plastic inner cap, made to poor tolerances. On my black and burgandy pens, the lip of the inner cap needed to be honed out a little, to allow the pen to go further into the cap, allowing the clutch fingers to do their job and reach the metal rings on the pen body.

Below, my 616's, ready for tweaking. You can see the metal rings on the burgandy one...


http://i773.photobucket.com/albums/yy19/flounder2009/Hero%20616%20Cap%20Adjustment%20Fix/Hero616Adjustements001_640x480.jpg


... and the 5 clutch fingers inside the cap:


http://i773.photobucket.com/albums/yy19/flounder2009/Hero%20616%20Cap%20Adjustment%20Fix/Hero616Adjustements019_640x480.jpg


Diagnosis


I could see and feel the difference between the good green pen's cap and the bad black and burgandy's caps. Capping the green pen is a smooth action, with progressively more tension, until the clutch fingers snap snick into the recess between the metal rings of the pen body. In the two photos below, you can see that with the green pen and the burgandy side by side, the green pen extends further into the cap.


http://i773.photobucket.com/albums/yy19/flounder2009/Hero%20616%20Cap%20Adjustment%20Fix/Hero616Adjustements006_640x480.jpg


http://i773.photobucket.com/albums/yy19/flounder2009/Hero%20616%20Cap%20Adjustment%20Fix/Hero616Adjustements005_640x480.jpg


If all your Heros have caps that just jam on, you can get a feel for how they ought to behave by removing the inner cap from the outer cap, and putting the empty outer cap on the pen. You can then feel the clutch fingers snick into the metal ring area on the barrel. In this way, you can also gauge how far down the pen body the cap should travel after this fix. Here's a photo of the cap on the burgandy 616, sans inner cap, clip, and jewel.


http://i773.photobucket.com/albums/yy19/flounder2009/Hero%20616%20Cap%20Adjustment%20Fix/Hero616Adjustements014_640x480.jpg


Disassembling The Cap


Thanks to the guide provided by Yespen, and brought to my attention by acoobradovic, taking the cap apart is a doddle. Pop a flathead screwdriver up inside the cap, hold the clip in place so it doesn't rotate, and unscrew - a 5 or 6mm head seemed to be best, see photo below.


http://i773.photobucket.com/albums/yy19/flounder2009/Hero%20616%20Cap%20Adjustment%20Fix/Hero616Adjustements007_640x480.jpg


Also, most screwdriver heads seem to flair in a way that prevents them going all the way into this inner cap, and most of those change-the-bit types are too thick as well. In the next pick, only the red screwdriver reached the slot in the inner cap.


http://i773.photobucket.com/albums/yy19/flounder2009/Hero%20616%20Cap%20Adjustment%20Fix/Hero616Adjustements020_640x480.jpg


The cap in pieces. Jewel, clip, body, inner cap.


http://i773.photobucket.com/albums/yy19/flounder2009/Hero%20616%20Cap%20Adjustment%20Fix/Hero616Adjustements008_640x480.jpg


If the inner cap doesn't want to leave, poke it out the bottom with a chopstick or something.


http://i773.photobucket.com/albums/yy19/flounder2009/Hero%20616%20Cap%20Adjustment%20Fix/Hero616Adjustements013_640x480.jpg


I took a few close up shots, comparing the "bad" inner cap of the burgandy 616 - on the left - and the "good" inner cap of the bluey-green 616 (on the right).


http://i773.photobucket.com/albums/yy19/flounder2009/Hero%20616%20Cap%20Adjustment%20Fix/Hero616Adjustements015_640x480.jpg


The outer dimensions of the burgandy's inner cap seem larger.


http://i773.photobucket.com/albums/yy19/flounder2009/Hero%20616%20Cap%20Adjustment%20Fix/Hero616Adjustements016_640x480.jpg


The internal lip seems less spacious too.


http://i773.photobucket.com/albums/yy19/flounder2009/Hero%20616%20Cap%20Adjustment%20Fix/Hero616Adjustements017_640x480.jpg


Tweaking the inner cap


To hone out the inner cap's cavity lip a little, I used a mini drill and various head attachments. The burgandy's inner cap needed honing a lot more than the black pen's.


http://i773.photobucket.com/albums/yy19/flounder2009/Hero%20616%20Cap%20Adjustment%20Fix/Hero616Adjustements022_640x480.jpg


As a rough test of whether enough has been ground out, pop the inner cap into the outer cap, and slide it onto the pen to see whether the cap fingers can reach the barrel rings - no need to screw everything back together each time you check.


http://i773.photobucket.com/albums/yy19/flounder2009/Hero%20616%20Cap%20Adjustment%20Fix/Hero616Adjustements024_640x480.jpg


Cleaning out the swarf (it is soft plastic and very easy to smooth):


http://i773.photobucket.com/albums/yy19/flounder2009/Hero%20616%20Cap%20Adjustment%20Fix/Hero616Adjustements030_640x480.jpg


Screw the cap back together when you are satisfied with the cap action, not too tight what with screwing plastic into metal.


One more thing


Another wee adjustment - if the nib is not perfectly aligned with the hood, there's no need to take to hood off to straighten it. Instead, take off the barrel, hold the plastic threads in one hand and the hood in the other. You can gently persuade the hood to align with the nib by twisting slightly left or right.


http://i773.photobucket.com/albums/yy19/flounder2009/Hero%20616%20Cap%20Adjustment%20Fix/Hero616Adjustements031_640x480.jpg


It probably got misaligned in the first place because of the factory use of silicon grease rather than shellac as a hood sealant rather than shellac, allowing the hood to turn slightly when you overtighten the barrel onto the pen while holding the hood. After alignment, hold the metal rings instead while screwing on the barrel, or use shellac or whatever on the hood threads to keep it from moving.


After all that, time to enjoy the summer sun with your freshly tweaked 616's and a whiskey & soda.


http://i773.photobucket.com/albums/yy19/flounder2009/Hero%20616%20Cap%20Adjustment%20Fix/Hero616Adjustements033_640x480.jpg


Latest pen related post @ flounders-mindthots.blogspot.com : vintage Pilot Elite Pocket Pen review

Link to comment
Share on other sites

  • Replies 16
  • Created
  • Last Reply

Top Posters In This Topic

  • Flounder

    7

  • Daisy

    3

  • Seele

    1

  • Hanoi

    1

Interesting. I just got my 3 and filled the green. When I looked inside the cap, no way did it look like yours. There is no inner cap. Then upon closer inspection, the inner cap is buried deep into the outer cap and resists all my efforts to get it out. The pen holds together well without it though so I am going to leave well enough alone. I didn't check the other 2, as they might be given as gifts.


As an aside, I wish there were a way to make the hole bigger on the aluminum around the bulb thingie, where you put your finger/thumb for filling. My digits are too fat to fit easily in there.


This inexpensive little pen writes quite well though.

Hex, aka George

Link to comment
Share on other sites

Thanks Flounder, that's great info. I didn't even know there were clutch fingers in there. I'll try tonight with the one I have that won't fill.

Link to comment
Share on other sites

I didn't even know there were clutch fingers in there.


It's pretty neat eh? My parker 45 only has 4 fingers. Hex, a lot of people (myself included) pull off the metal press bar sac guard to fill up these Chinese pens. I find it easier to just squeeze the sac manually - you can see when it is full of ink that way too. I put the metal bit back on afterwards, as I like the extra weight when writing.


In the short time I've had them, they've really grown on me. Great wee bargains!

Latest pen related post @ flounders-mindthots.blogspot.com : vintage Pilot Elite Pocket Pen review

Link to comment
Share on other sites

The recent spate of excellent and informative posts on the Hero 616 prompted me to buy a 3 pack of the 'jumbo' size pens from eBay seller Yespen, in black, burgandy, and bluey-green. After the much appreciated efforts of members here, I'd like to contribute with a "tweak the cap to fit properly" photo set. I've tried to make this less long winded than my usual sagas.


Of the 3 pens I bought, only the green 616 had a cap that functioned the way I expected it to when capping onto the body, the cap clutch locking positively between the metal rings on the body of the pen. The black and burgandy pens had caps that just jam onto the pen without the clutch fingers reaching the rings. After reading reviews by Nihontochicken and Dillo, I realised that quite a few of these pens must have problem caps. It's a case of excellent design and variable execution.


The really good news is that the problem is easily fixed - nothing to do with the clutch fingers in the cap, or the rings on the body of the pen. The culprit is the plastic inner cap, made to poor tolerances. On my black and burgandy pens, the lip of the inner cap needed to be honed out a little, to allow the pen to go further into the cap, allowing the clutch fingers to do their job and reach the metal rings on the pen body.

Below, my 616's, ready for tweaking. You can see the metal rings on the burgandy one...


http://i773.photobucket.com/albums/yy19/flounder2009/Hero%20616%20Cap%20Adjustment%20Fix/Hero616Adjustements001_640x480.jpg


... and the 5 clutch fingers inside the cap:


http://i773.photobucket.com/albums/yy19/flounder2009/Hero%20616%20Cap%20Adjustment%20Fix/Hero616Adjustements019_640x480.jpg


Diagnosis


I could see and feel the difference between the good green pen's cap and the bad black and burgandy's caps. Capping the green pen is a smooth action, with progressively more tension, until the clutch fingers snap snick into the recess between the metal rings of the pen body. In the two photos below, you can see that with the green pen and the burgandy side by side, the green pen extends further into the cap.


http://i773.photobucket.com/albums/yy19/flounder2009/Hero%20616%20Cap%20Adjustment%20Fix/Hero616Adjustements006_640x480.jpg


http://i773.photobucket.com/albums/yy19/flounder2009/Hero%20616%20Cap%20Adjustment%20Fix/Hero616Adjustements005_640x480.jpg


If all your Heros have caps that just jam on, you can get a feel for how they ought to behave by removing the inner cap from the outer cap, and putting the empty outer cap on the pen. You can then feel the clutch fingers snick into the metal ring area on the barrel. In this way, you can also gauge how far down the pen body the cap should travel after this fix. Here's a photo of the cap on the burgandy 616, sans inner cap, clip, and jewel.


http://i773.photobucket.com/albums/yy19/flounder2009/Hero%20616%20Cap%20Adjustment%20Fix/Hero616Adjustements014_640x480.jpg


Disassembling The Cap


Thanks to the guide provided by Yespen, and brought to my attention by acoobradovic, taking the cap apart is a doddle. Pop a flathead screwdriver up inside the cap, hold the clip in place so it doesn't rotate, and unscrew - a 5 or 6mm head seemed to be best, see photo below.


http://i773.photobucket.com/albums/yy19/flounder2009/Hero%20616%20Cap%20Adjustment%20Fix/Hero616Adjustements007_640x480.jpg


Also, most screwdriver heads seem to flair in a way that prevents them going all the way into this inner cap, and most of those change-the-bit types are too thick as well. In the next pick, only the red screwdriver reached the slot in the inner cap.


http://i773.photobucket.com/albums/yy19/flounder2009/Hero%20616%20Cap%20Adjustment%20Fix/Hero616Adjustements020_640x480.jpg


The cap in pieces. Jewel, clip, body, inner cap.


http://i773.photobucket.com/albums/yy19/flounder2009/Hero%20616%20Cap%20Adjustment%20Fix/Hero616Adjustements008_640x480.jpg


If the inner cap doesn't want to leave, poke it out the bottom with a chopstick or something.


http://i773.photobucket.com/albums/yy19/flounder2009/Hero%20616%20Cap%20Adjustment%20Fix/Hero616Adjustements013_640x480.jpg


I took a few close up shots, comparing the "bad" inner cap of the burgandy 616 - on the left - and the "good" inner cap of the bluey-green 616 (on the right).


http://i773.photobucket.com/albums/yy19/flounder2009/Hero%20616%20Cap%20Adjustment%20Fix/Hero616Adjustements015_640x480.jpg


The outer dimensions of the burgandy's inner cap seem larger.


http://i773.photobucket.com/albums/yy19/flounder2009/Hero%20616%20Cap%20Adjustment%20Fix/Hero616Adjustements016_640x480.jpg


The internal lip seems less spacious too.


http://i773.photobucket.com/albums/yy19/flounder2009/Hero%20616%20Cap%20Adjustment%20Fix/Hero616Adjustements017_640x480.jpg


Tweaking the inner cap


To hone out the inner cap's cavity lip a little, I used a mini drill and various head attachments. The burgandy's inner cap needed honing a lot more than the black pen's.


http://i773.photobucket.com/albums/yy19/flounder2009/Hero%20616%20Cap%20Adjustment%20Fix/Hero616Adjustements022_640x480.jpg


As a rough test of whether enough has been ground out, pop the inner cap into the outer cap, and slide it onto the pen to see whether the cap fingers can reach the barrel rings - no need to screw everything back together each time you check.


http://i773.photobucket.com/albums/yy19/flounder2009/Hero%20616%20Cap%20Adjustment%20Fix/Hero616Adjustements024_640x480.jpg


Cleaning out the swarf (it is soft plastic and very easy to smooth):


http://i773.photobucket.com/albums/yy19/flounder2009/Hero%20616%20Cap%20Adjustment%20Fix/Hero616Adjustements030_640x480.jpg


Screw the cap back together when you are satisfied with the cap action, not too tight what with screwing plastic into metal.


One more thing


Another wee adjustment - if the nib is not perfectly aligned with the hood, there's no need to take to hood off to straighten it. Instead, take off the barrel, hold the plastic threads in one hand and the hood in the other. You can gently persuade the hood to align with the nib by twisting slightly left or right.


http://i773.photobucket.com/albums/yy19/flounder2009/Hero%20616%20Cap%20Adjustment%20Fix/Hero616Adjustements031_640x480.jpg


It probably got misaligned in the first place because of the factory use of silicon grease rather than shellac as a hood sealant rather than shellac, allowing the hood to turn slightly when you overtighten the barrel onto the pen while holding the hood. After alignment, hold the metal rings instead while screwing on the barrel, or use shellac or whatever on the hood threads to keep it from moving.


After all that, time to enjoy the summer sun with your freshly tweaked 616's and a whiskey & soda.


http://i773.photobucket.com/albums/yy19/flounder2009/Hero%20616%20Cap%20Adjustment%20Fix/Hero616Adjustements033_640x480.jpg


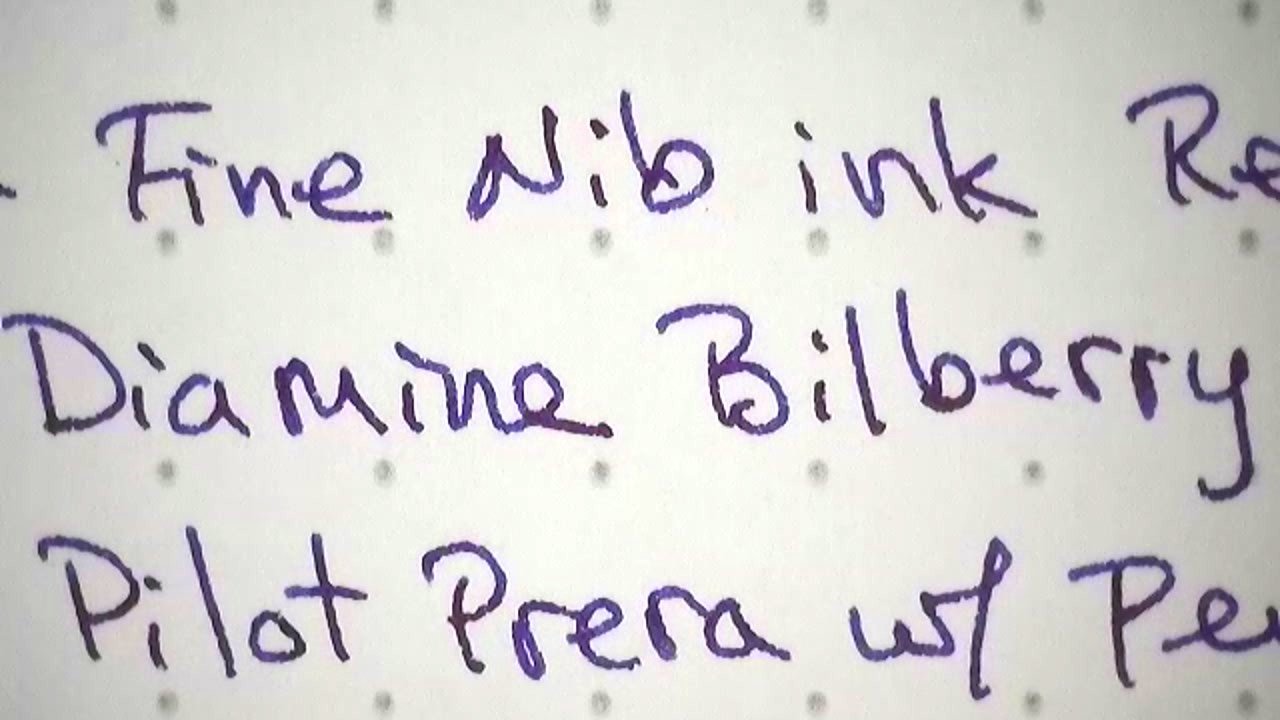
What kind of ink is it?! It looks pretty!

Enjoy writing

Link to comment
Share on other sites

Antolini, the ink is Diamine Royal Blue. It's quite a light blue, inexpensive, summery, a good all rounder. It looks like ink on the page, if that doesn't sound too stupid, rather than biro.


Also, I ought to have namechecked KrazyIvan properly, so: KrazyIvan.


Latest pen related post @ flounders-mindthots.blogspot.com : vintage Pilot Elite Pocket Pen review

Link to comment
Share on other sites

  • 1 year later...

Hey, thank you so much for posting this. I used the nib alignment tweak last night on a Hero 616 I just got, and your tip turned it from a temperamental toothpick into a lovely even-flowing writer. I know it's only a $3 pen, but your tutorial transformed a little disappointment into a big delight. Thanks!!!


P.S. Mine was stuck on so tightly that I couldn't budge it with just my fingers, so I wrapped both the section and the clear ring part with electrical tape and used pliers... very, very gently. But it did the trick, no scratches. :)


(edited to add P.S.)

Edited by Daisy

Not really a scribe, more of a Pharisee...


"The right of the people to be secure in their persons, houses, papers, and effects, against unreasonable searches and seizures, shall not be violated, and no Warrants shall issue, but upon probable cause, supported by Oath or affirmation, and particularly describing the place to be searched, and the persons or things to be seized."

-- Fourth Amendment to the U.S. Constitution

Link to comment
Share on other sites

Hmm, that's quite strange Daisy, it shouldn't really effect the smoothness of the nib. Still, gift horses and all that.


That 'twist the hood to align it with the nib' trick is something I take back, I know they're very cheap knockabout pens, but I'm quite attached to them now.


The thing is, the hood shifts about because they're only assembled with grease rather than sealant. Real Parker 51s had good tight threads, and sealant to keep the hood from turning, or latterly, good tight threads and a rubber gasket (and repairers seal these too to be safe). To achieve the same effect on a budget of pennies, the 616 jumbo relies on serations on the circumference of the hood's inner lip, to grip the clutch ring.


This is just asking for cracks to develop in the thin polystyrene, so now I say "If you're keen on these pens, align the nib by removing the hood, turning the collector till the nib and hood will line up perfectly, and then seal the hood properly, as soon as it arrives. I'll revise my blog page on this subject too.


Here's a photo, sorry about the shellac partially covering the serations. hopefully you can make out what I'm on about.


Latest pen related post @ flounders-mindthots.blogspot.com : vintage Pilot Elite Pocket Pen review

Link to comment
Share on other sites

Flounder,


I think they do not use silicone grease as sealant for the hood; it's well known that the pen should be soaked in warm water for up to an hour or so to loosen the bond, but it certainly appears that the sealant used is somewhat rubbery. When I disassemble one, I always take care in removing the sealant in the screw threads, before applying silicone grease to re-seal it again.


By the way, when I apply silicone grease, I only put it on the last half of the thread on the connector side, but never the hood side, this would lessen the likelihood of the grease being forced into the chamber in which the collector resides.

No, I am not going to list my pens here.

Link to comment
Share on other sites

Very informative. Excellent post.

ta - its actually a bit on an oldie!


I think they do not use silicone grease as sealant for the hood; it's well known that the pen should be soaked in warm water for up to an hour or so to loosen the bond, but it certainly appears that the sealant used is somewhat rubbery.


Now, that is very interesting Seele. Whatever was used on your sounds very different, and much better, than mine. All three came out of their individual blister packs with just a wipe of grease, and quite a thin wipe at that.

Latest pen related post @ flounders-mindthots.blogspot.com : vintage Pilot Elite Pocket Pen review

Link to comment
Share on other sites

Hi Flounder, it was only unsmooth because there was very little ink coming out before I did the adjustment you outlined above. Nothing wrong with the nib, just very little ink to lubricate it as it traveled the page. But in any case, I can't thank you enough: post-adjustment, this lil Hero is now my favorite writer of the bunch.


Can't wait til you update your blog page with further details! And thanks for the pic and further explanation. I ordered a few more Heros and its entirely possible I'll be using this info again... and again... and again...


Thanks a bunch!!! :)

Not really a scribe, more of a Pharisee...


"The right of the people to be secure in their persons, houses, papers, and effects, against unreasonable searches and seizures, shall not be violated, and no Warrants shall issue, but upon probable cause, supported by Oath or affirmation, and particularly describing the place to be searched, and the persons or things to be seized."

-- Fourth Amendment to the U.S. Constitution

Link to comment
Share on other sites

Hi Flounder, it was only unsmooth because there was very little ink coming out before I did the adjustment you outlined above. Nothing wrong with the nib, just very little ink to lubricate it as it traveled the page.


Ah, I get you. Maybe the shell was pressing down on the nib too much in its original position, so the ink couldn't flow properly. Glad it's cleared up.


ASAP in re: the nib alignment revision Daisy, perhaps wednesday or thursday next week. At the moment I have to get my latest nonsense posted up - again, about the 616! I can't seem to leave them alone.

Latest pen related post @ flounders-mindthots.blogspot.com : vintage Pilot Elite Pocket Pen review

Link to comment
Share on other sites

Maybe the shell was pressing down on the nib too much in its original position, so the ink couldn't flow properly.


That's exactly it. It's amazing to me what scooching the hood over less than 1/8th of an inch did to open it up.


...again, about the 616! I can't seem to leave them alone.


Heh, me neither! :)

Edited by Daisy

Not really a scribe, more of a Pharisee...


"The right of the people to be secure in their persons, houses, papers, and effects, against unreasonable searches and seizures, shall not be violated, and no Warrants shall issue, but upon probable cause, supported by Oath or affirmation, and particularly describing the place to be searched, and the persons or things to be seized."

-- Fourth Amendment to the U.S. Constitution

Link to comment
Share on other sites

  • 1 month later...
I think they do not use silicone grease as sealant for the hood; it's well known that the pen should be soaked in warm water for up to an hour or so to loosen the bond, but it certainly appears that the sealant used is somewhat rubbery.


Now, that is very interesting Seele. Whatever was used on your sounds very different, and much better, than mine. All three came out of their individual blister packs with just a wipe of grease, and quite a thin wipe at that.


An interesting update: I was going to take the hoods off my latest batch of 616 jumbos tonight for permanent sealing, and noticed to my surprise that all of them are strongly sealed out of their blister packs. Even dry heat didn't shift them. They are from the same seller I used last time, and the blister packs are all stamped 2012.


Other changes are evident in the inner caps, which are made from a different plastic to my earlier batch, bought last year.

Latest pen related post @ flounders-mindthots.blogspot.com : vintage Pilot Elite Pocket Pen review

Link to comment
Share on other sites

Create an account or sign in to comment

You need to be a member in order to leave a comment

Create an account

Sign up for a new account in our community. It's easy!

Register a new account

Sign in

Already have an account? Sign in here.

Sign In Now


  • Most Contributions

    1. amberleadavis
      amberleadavis
      43844
    2. PAKMAN
      PAKMAN
      33580
    3. Ghost Plane
      Ghost Plane
      28220
    4. inkstainedruth
      inkstainedruth
      26770
    5. jar
      jar
      26105
  • Upcoming Events

  • Blog Comments

    • Shanghai Knife Dude
      I have the Sailor Naginata and some fancy blade nibs coming after 2022 by a number of new workshop from China.  With all my respect, IMHO, they are all (bleep) in doing chinese characters.  Go use a bush, or at least a bush pen. 
    • A Smug Dill
      It is the reason why I'm so keen on the idea of a personal library — of pens, nibs, inks, paper products, etc. — and spent so much money, as well as time and effort, to “build” it for myself (because I can't simply remember everything, especially as I'm getting older fast) and my wife, so that we can “know”; and, instead of just disposing of what displeased us, or even just not good enough to be “given the time of day” against competition from >500 other pens and >500 other inks for our at
    • adamselene
      Agreed.  And I think it’s good to be aware of this early on and think about at the point of buying rather than rationalizing a purchase..
    • A Smug Dill
      Alas, one cannot know “good” without some idea of “bad” against which to contrast; and, as one of my former bosses (back when I was in my twenties) used to say, “on the scale of good to bad…”, it's a spectrum, not a dichotomy. Whereas subjectively acceptable (or tolerable) and unacceptable may well be a dichotomy to someone, and finding whether the threshold or cusp between them lies takes experiencing many degrees of less-than-ideal, especially if the decision is somehow influenced by factors o
    • adamselene
      I got my first real fountain pen on my 60th birthday and many hundreds of pens later I’ve often thought of what I should’ve known in the beginning. I have many pens, the majority of which have some objectionable feature. If they are too delicate, or can’t be posted, or they are too precious to face losing , still they are users, but only in very limited environments..  I have a big disliking for pens that have the cap jump into the air and fly off. I object to Pens that dry out, or leave blobs o
  • Chatbox

    You don't have permission to chat.
    Load More
  • Files


×
×
  • Create New...