Jump to content

M800 M1000 Piston Filler Unit: Under The Hood.


hari317

Recommended Posts

Background:

I received a pre 97 M800 old style in the mail last week. Unfortunately, the Piston shaft was damaged in that pen. After much searching I was able to buy the part from a German source, the cost of which was gracefully reimbursed by the seller. The part is still in the mail. In the meanwhile, FPNer Gambosen happened to have a broken M800 barrel which he agreed to donate to me so that I could remove the part and use it in my pen. I thought this was a good chance to document the procedure, it might be useful to someone else as well.


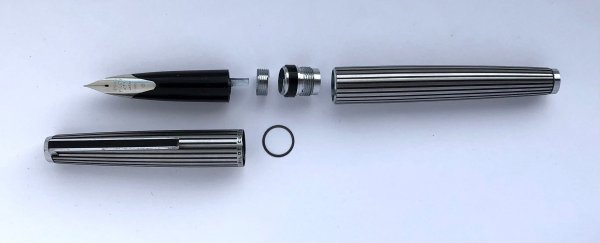
The Pelikan piston filler exploded view:


http://i307.photobucket.com/albums/nn307/hari-b/Pelikan%20Piston%20Filler/IMG_8307.jpg


The terminology is mine. I am not sure what Pelikan calls the parts.


Disassembly:

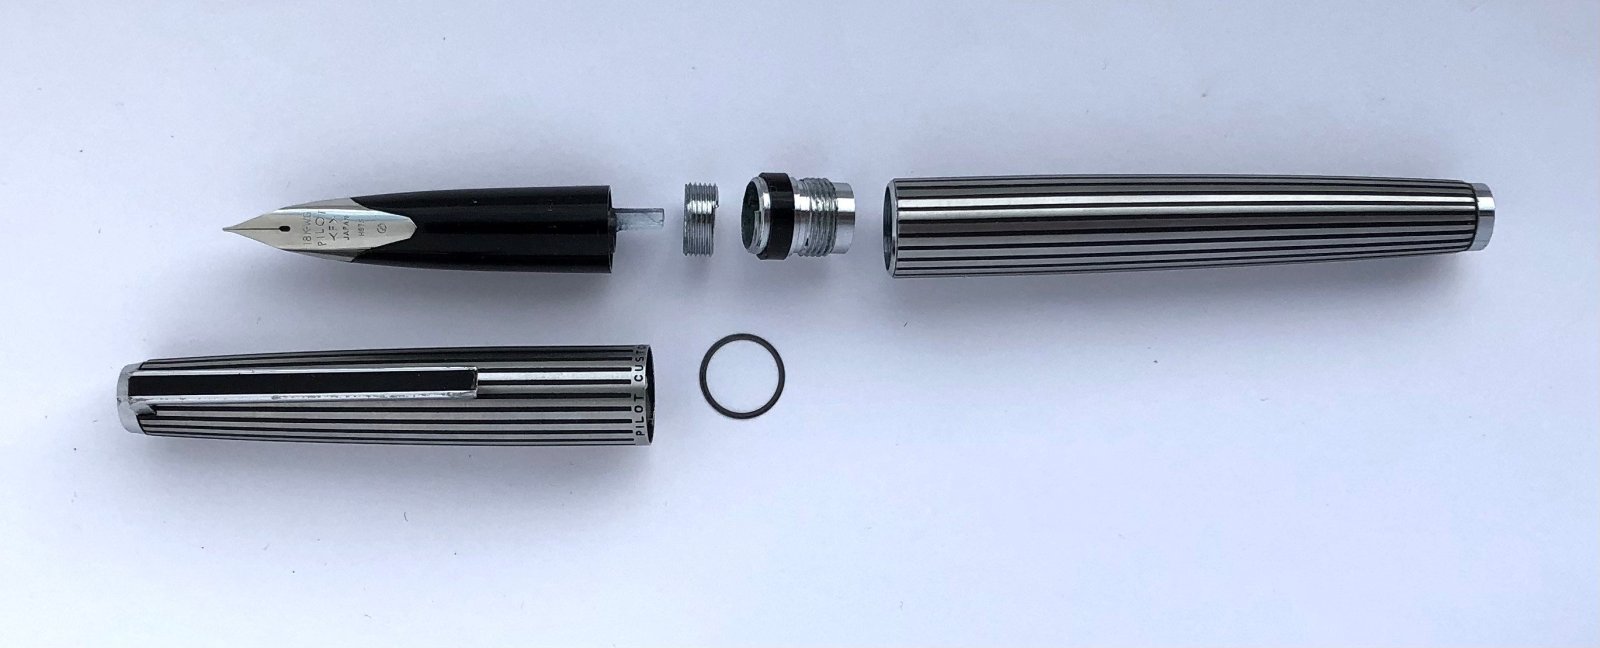
The piston filler unit on the M800 and the M1000 and a few other modern Pelikans feature a threaded-in construction. The filler is screwed into the barrel using left hand threads. The filler unit has two flat slots to engage a 7mm spanner, the spanner reduced in thickness to 0.8mm is a suitable tool.


http://i307.photobucket.com/albums/nn307/hari-b/Pelikan%20Piston%20Filler/IMG_8327.jpg


Engage the spanner to the slots, tighten the knob down on the spanner and move the spanner Clockwise(CW) to unscrew the filler unit from the barrel.


http://i307.photobucket.com/albums/nn307/hari-b/Pelikan%20Piston%20Filler/IMG_8324.jpg


Once the filler is out, unscrew the knob fully and separate it from the connector. So the parts in hand will be the piston shaft with the seal at the end, the brass connector, the hollow nut and the filler knob.


Maintenance will usually involve only cleaning the parts and applying lubricant to the piston seal.


In order to set the piston stroke in a hassle free way without trial and error, it is better to separate the anti-rotation bush from the connector. You can do the stroke adjustment even without removing this bush, but with the bush removed, anyone with even little experience should be able to set the stroke correctly in the first attempt. The bush is press fitted into the connector.


The bush removal can be done either by knocking it out or gently prying it out with a fingernail. I usually knock it out.


http://i307.photobucket.com/albums/nn307/hari-b/Pelikan%20Piston%20Filler/IMG_8314.jpg


http://i307.photobucket.com/albums/nn307/hari-b/Pelikan%20Piston%20Filler/IMG_8313.jpg


http://i307.photobucket.com/albums/nn307/hari-b/Pelikan%20Piston%20Filler/IMG_8310.jpg


http://i307.photobucket.com/albums/nn307/hari-b/Pelikan%20Piston%20Filler/IMG_8311.jpg


http://i307.photobucket.com/albums/nn307/hari-b/Pelikan%20Piston%20Filler/IMG_8312.jpg


The hollow nut has slots at the bottom which engage with the corresponding slots inside the filler knob.


http://i307.photobucket.com/albums/nn307/hari-b/Pelikan%20Piston%20Filler/IMG_8309.jpg


http://i307.photobucket.com/albums/nn307/hari-b/Pelikan%20Piston%20Filler/IMG_8308.jpg


Reassembly:


Engage the hollow nut into the filler knob and screw the knob onto the connector fully.

http://i307.photobucket.com/albums/nn307/hari-b/Pelikan%20Piston%20Filler/IMG_8315.jpg


http://i307.photobucket.com/albums/nn307/hari-b/Pelikan%20Piston%20Filler/IMG_8316.jpg


http://i307.photobucket.com/albums/nn307/hari-b/Pelikan%20Piston%20Filler/IMG_8317.jpg


http://i307.photobucket.com/albums/nn307/hari-b/Pelikan%20Piston%20Filler/IMG_8318.jpg


http://i307.photobucket.com/albums/nn307/hari-b/Pelikan%20Piston%20Filler/IMG_8319.jpg


http://i307.photobucket.com/albums/nn307/hari-b/Pelikan%20Piston%20Filler/IMG_8320.jpg


http://i307.photobucket.com/albums/nn307/hari-b/Pelikan%20Piston%20Filler/IMG_8321.jpg


http://i307.photobucket.com/albums/nn307/hari-b/Pelikan%20Piston%20Filler/IMG_8322.jpg


http://i307.photobucket.com/albums/nn307/hari-b/Pelikan%20Piston%20Filler/IMG_8323.jpg


The following pic shows what a good piston shaft should look like:

http://i307.photobucket.com/albums/nn307/hari-b/Pelikan%20Piston%20Filler/IMG_8287.jpg


The lower part is the good one given to me by Gambosen.


I hope you find this useful.


Best

Hari

Edited by hari317

In case you wish to write to me, pls use ONLY email by clicking here. I do not check PMs. Thank you.

Link to comment
Share on other sites

  • Replies 43
  • Created
  • Last Reply

Top Posters In This Topic

  • hari317

    8

  • PatientType

    2

  • Gilberto Castaneda

    2

  • dduran

    2

Top Posters In This Topic

Posted Images

Nice job on this Hari I found the pictures particularly clear and helpful. :thumbup: :thumbup:

Edited by MadAmos

Amos


The only reason for time is so that everything does not happen at once.

Albert Einstein

Link to comment
Share on other sites

Many thanks for this, Hari.

Écrire c’est tenter de savoir ce qu’on écrirait si on écrivait. – M. Duras

Link to comment
Share on other sites

You did it again Hari.

Congratulations for your skills.


Cheers,

Gilberto Castañeda


Link to comment
Share on other sites

That was very helpful. I have had a few Pelikans where the brass connector started backing out of the pen barrel. I sent them back to Pelikan for repair, but next time I'll try it myself. I've practiced on a TWSBI 540 which has a similar mechanism. The TWSBI wrench is even 7mm. Thanks for the photos and advice.

"One can not waste time worrying about small minds . . . If we were normal, we'd still be using free ball point pens." —Bo Bo Olson


"I already own more ink than a rational person can use in a lifetime." —Waski_the_Squirrel


I'm still trying to figure out how to list all my pens down here.

Link to comment
Share on other sites

Hari,


Great post. You really do a service to the pen community with some of the stuff you do. You ought to .pdf them for posterity.

Chris


Custom Bindes

Link to comment
Share on other sites

Good to see that the barrel is coming to some use after sitting in my drawer for years. Very good pictures and step by step instructions.

Surajit

....This is a line no one can see

'Tis made by an inverted Saibi Togee

Link to comment
Share on other sites

Good to see that the barrel is coming to some use after sitting in my drawer for years. Very good pictures and step by step instructions.


Thank you all for the kind comments.

In case you wish to write to me, pls use ONLY email by clicking here. I do not check PMs. Thank you.

Link to comment
Share on other sites

@hari317


Thanks for your time, very informative thread indeed.


Which parts need to be lubricated? Eg. Piston seal and shaft only?

Link to comment
Share on other sites

Which parts need to be lubricated? Eg. Piston seal and shaft only?

Just the piston seal.

In case you wish to write to me, pls use ONLY email by clicking here. I do not check PMs. Thank you.

Link to comment
Share on other sites

Hari, you're a great.


The tip about the anti-rotation bush alone is worth pinning this thread (took me half an hour to adjust the stroke on my M1000 - eventually I understand how they do it in production...). I saved your post to pdf, just in case...

Ciao - Enrico

Diplomat #1961

http://i384.photobucket.com/albums/oo288/enricofacchin/poker-3.jpg

Daddy, please no more pens - we need food, clothes, books, DENTISTRY...

Link to comment
Share on other sites

Hari, excellent documentation! I can also see that " glass is not half empty, it is half full too!"

This post as well worth to be pinned as Enricof has mentioned.

Best

A

Link to comment
Share on other sites

Hari, you're a great.


The tip about the anti-rotation bush alone is worth pinning this thread (took me half an hour to adjust the stroke on my M1000 - eventually I understand how they do it in production...). I saved your post to pdf, just in case...


Hari, excellent documentation! I can also see that " glass is not half empty, it is half full too!"

This post as well worth to be pinned as Enricof has mentioned.

Best

A


Thank you friends. I feel encouraged to do more labour on these mechanical aspects threads when I hear your positive comments. Regarding pinning, I think you should send a PM to the moderator of this forum(Bill Dodson), that is what I did to get the "pf mark" thread pinned.


Best

Hari

In case you wish to write to me, pls use ONLY email by clicking here. I do not check PMs. Thank you.

Link to comment
Share on other sites

Hi Hari!


Thanks for the tutorial, if I may add though. I noticed that there's a piece of brass still showing through. M800s are my main collection and I've double-checked all of them to see that the grip is flushed on the body.. I've attached some photos to show I mean.


My suggestion is:

1) Unscrew the piston fully

2) Insert the wrench

3) Try to close the piston until you hit the wrench

4) Tighten the wrench/piston assembly further

5) Remove the wrench and see if everything's perfect now


I use TWSBI wrenches which is fairly thin so I usually don't encounter any problems with step (3)..


This usually happens when the piston is over-extended that you can't properly screw the whole assembly to the body. Though the first part of your tutorial is great and I've learned something new with it :)

post-92635-0-22763900-1365791358.jpg

post-92635-0-41302000-1365791376.jpg

Link to comment
Share on other sites

Create an account or sign in to comment

You need to be a member in order to leave a comment

Create an account

Sign up for a new account in our community. It's easy!

Register a new account

Sign in

Already have an account? Sign in here.

Sign In Now


  • Most Contributions

    1. amberleadavis
      amberleadavis
      43844
    2. PAKMAN
      PAKMAN
      33559
    3. Ghost Plane
      Ghost Plane
      28220
    4. inkstainedruth
      inkstainedruth
      26740
    5. jar
      jar
      26101
  • Upcoming Events

  • Blog Comments

    • Shanghai Knife Dude
      I have the Sailor Naginata and some fancy blade nibs coming after 2022 by a number of new workshop from China.  With all my respect, IMHO, they are all (bleep) in doing chinese characters.  Go use a bush, or at least a bush pen. 
    • A Smug Dill
      It is the reason why I'm so keen on the idea of a personal library — of pens, nibs, inks, paper products, etc. — and spent so much money, as well as time and effort, to “build” it for myself (because I can't simply remember everything, especially as I'm getting older fast) and my wife, so that we can “know”; and, instead of just disposing of what displeased us, or even just not good enough to be “given the time of day” against competition from >500 other pens and >500 other inks for our at
    • adamselene
      Agreed.  And I think it’s good to be aware of this early on and think about at the point of buying rather than rationalizing a purchase..
    • A Smug Dill
      Alas, one cannot know “good” without some idea of “bad” against which to contrast; and, as one of my former bosses (back when I was in my twenties) used to say, “on the scale of good to bad…”, it's a spectrum, not a dichotomy. Whereas subjectively acceptable (or tolerable) and unacceptable may well be a dichotomy to someone, and finding whether the threshold or cusp between them lies takes experiencing many degrees of less-than-ideal, especially if the decision is somehow influenced by factors o
    • adamselene
      I got my first real fountain pen on my 60th birthday and many hundreds of pens later I’ve often thought of what I should’ve known in the beginning. I have many pens, the majority of which have some objectionable feature. If they are too delicate, or can’t be posted, or they are too precious to face losing , still they are users, but only in very limited environments..  I have a big disliking for pens that have the cap jump into the air and fly off. I object to Pens that dry out, or leave blobs o
  • Chatbox

    You don't have permission to chat.
    Load More
  • Files


×
×
  • Create New...